<?xml version="1.0" encoding="utf-8"?><feed xmlns="http://www.w3.org/2005/Atom" ><generator uri="https://jekyllrb.com/" version="4.4.1">Jekyll</generator><link href="https://www.modernlearner.org/rss/index.xml" rel="self" type="application/atom+xml" /><link href="https://www.modernlearner.org/" rel="alternate" type="text/html" /><updated>2026-10-12T01:03:44-04:00</updated><id>https://www.modernlearner.org/rss/index.xml</id><title type="html">Modern Learner</title><subtitle>Consulting for product analytics and game analytics for web3/cryptocurrency/blockchain game studios</subtitle><entry><title type="html">UI Frameworks for Angular: New Options to Try in 2026</title><link href="https://www.modernlearner.org/ui-frameworks-for-angular-2026/" rel="alternate" type="text/html" title="UI Frameworks for Angular: New Options to Try in 2026" /><published>2026-10-11T00:00:00-04:00</published><updated>2026-10-11T00:00:00-04:00</updated><id>https://www.modernlearner.org/ui-frameworks-for-angular-2026</id><content type="html" xml:base="https://www.modernlearner.org/ui-frameworks-for-angular-2026/"><![CDATA[<p>Angular has plenty of options for building a good-looking web app. You can start with a complete set of styled components, choose individual controls for the screens you're working on, or use UI primitives to create your own design.</p>

<p>When we published our <a href="/ui-frameworks-for-angular/">original list of UI frameworks for Angular</a>, we covered Angular Material, NG-ZORRO, PrimeNG and several other libraries. Those are still useful options. However, there are some interesting additions to explore, especially if you want more control over how your app looks.</p>

<p>Spartan and Zard UI bring the shadcn-style approach to Angular: component code that you can add to your project and customise. Taiga UI is another library we didn't cover in the original article, with a large collection of controls for forms and more complex interfaces. It has been around for several years, so think of it as an addition to our list rather than a brand-new release.</p>

<p>Here are the UI libraries we'll take a look at:</p>

<ul>
  <li><a href="https://spartan.ng/documentation/introduction">Spartan</a>: separates component behaviour from styling, with a styled layer you keep in your own codebase.</li>
  <li><a href="https://zardui.com/docs/introduction">Zard UI</a>: Angular components built with Tailwind CSS, with a CLI for adding their source to your project.</li>
  <li><a href="https://taiga-ui.dev/">Taiga UI</a>: a modular component library with a wide selection of form controls and customisation options.</li>
  <li><a href="https://material.angular.dev/">Angular Material</a>: Google's Material Design components and the Angular Component Dev Kit.</li>
  <li><a href="https://primeng.dev/">PrimeNG</a>: a broad component library with configurable themes.</li>
  <li><a href="https://ng.ant.design/docs/introduce/en">NG-ZORRO</a>: an Angular implementation of Ant Design, with plenty of components for business applications.</li>
</ul>

<p>We'll start with the three additions, then revisit the familiar options and where they fit.</p>

<h2 id="spartan-ui">Spartan UI</h2>

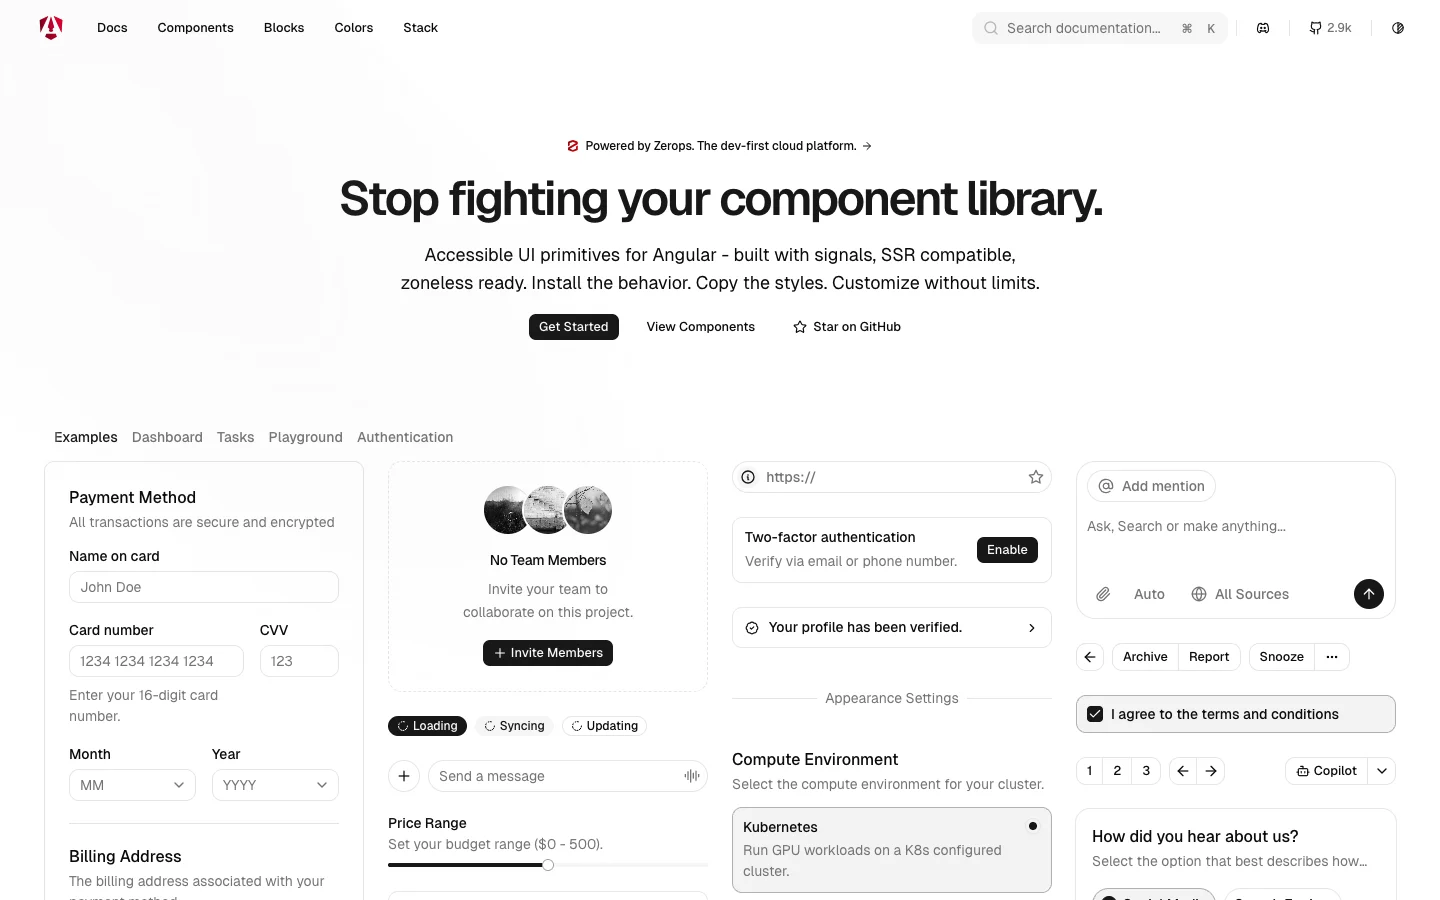
<p><a href="https://spartan.ng/documentation/introduction">Spartan</a> is worth exploring if you've seen shadcn-style interfaces and want that approach in an Angular app.</p>

<figure class="kg-card kg-image-card kg-card-hascaption">
  <img src="/assets/img/ui-frameworks-for-angular-2026/spartan-home.webp" class="kg-image" alt="Spartan homepage with examples of its Angular components" loading="lazy" width="1440" height="900" />
  <figcaption><a href="https://spartan.ng/">Spartan — Homepage</a></figcaption>
</figure>

<p>It splits its components into two parts. <strong>Brain</strong> provides the underlying behaviour, including keyboard navigation, focus management and ARIA attributes. You install it as a dependency. <strong>Helm</strong> provides the styled layer, which is copied into your project and uses Tailwind CSS.</p>

<p>This means you can change the appearance directly in the code you own. For example, if your design calls for a compact dialog with a different header layout, you can edit that layer while continuing to use the underlying primitive.</p>

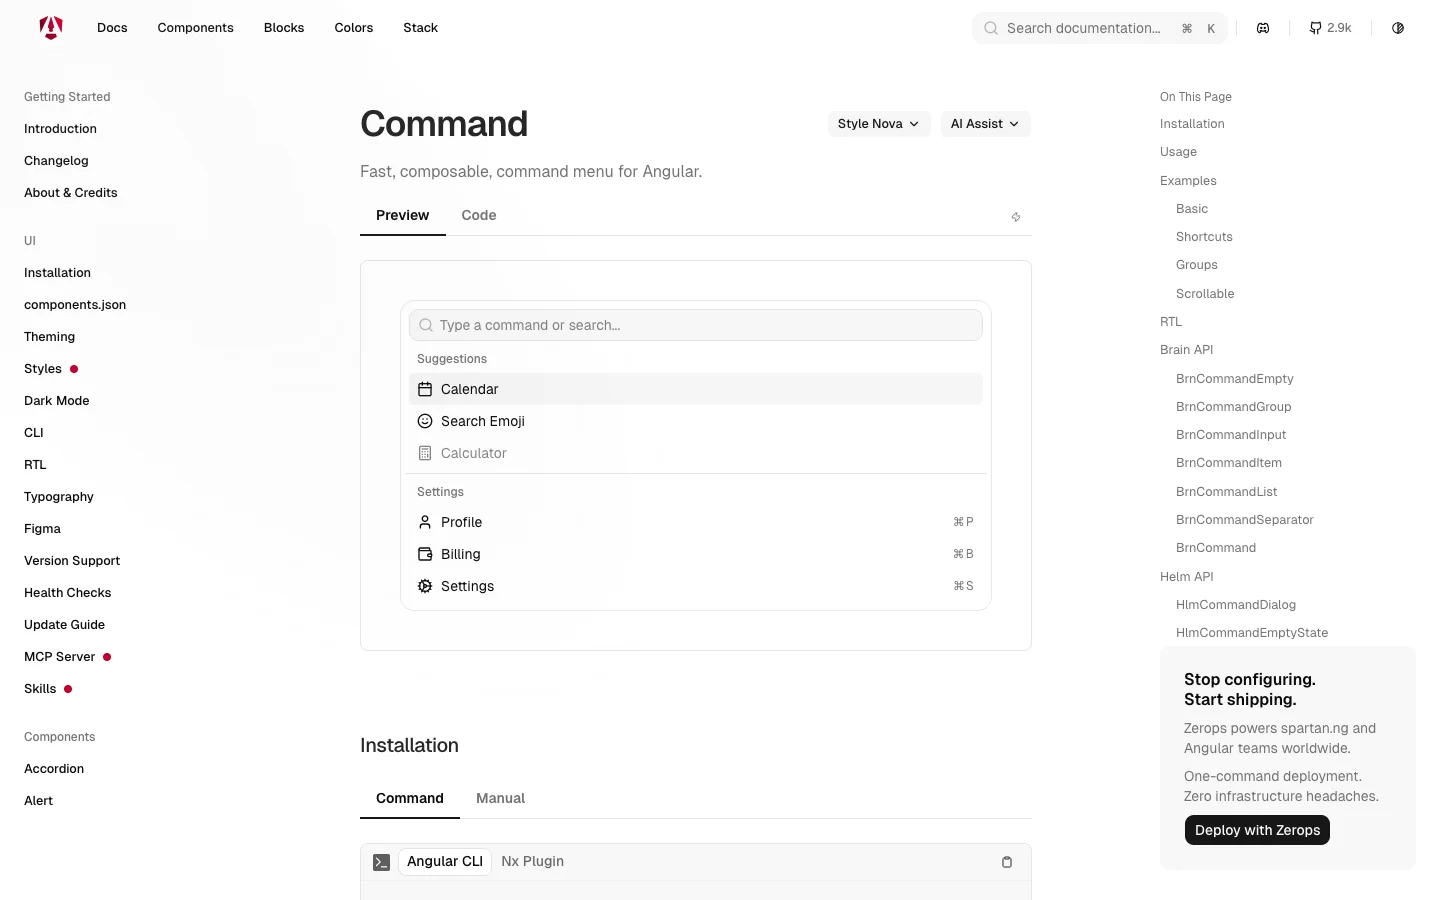
<p>One of the coolest components to explore is the <a href="https://spartan.ng/components/command">command menu</a>. It gives you a searchable list of actions, similar to the command palettes you may already use in a code editor.</p>

<figure class="kg-card kg-image-card kg-card-hascaption">
  <img src="/assets/img/ui-frameworks-for-angular-2026/spartan-command.webp" class="kg-image" alt="Spartan command menu with a search field and grouped actions" loading="lazy" width="1440" height="900" />
  <figcaption><a href="https://spartan.ng/components/command">Spartan — Command menu preview</a></figcaption>
</figure>

<p>Let's say you're building a product analytics dashboard. You could add commands for opening a saved report, switching projects or inviting a teammate. Someone who uses the app every day could find the action they need without clicking through several navigation menus.</p>

<p>You still connect those actions to your application. The component provides the interface; your code decides what happens when the user selects “Open retention report.”</p>

<p>The <a href="https://spartan.ng/components/sheet">sheet component</a> is useful too. It presents content in a panel at the edge of the screen. You could use it to show a customer's details while keeping the customer list visible underneath, or to let someone adjust filters without leaving a report.</p>

<p>Spartan is especially interesting when you already have a design in mind. You get a starting point for the controls and can shape their appearance around the product.</p>

<p>There is some maintenance involved in keeping your own component code. When the project improves its styled components, you'll need to decide which changes to bring into your version. Spartan's <a href="https://spartan.ng/documentation/update-guide">update guide</a> is a useful place to start. Keep your customisations focused so that reviewing those changes stays manageable.</p>

<h2 id="zard-ui">Zard UI</h2>

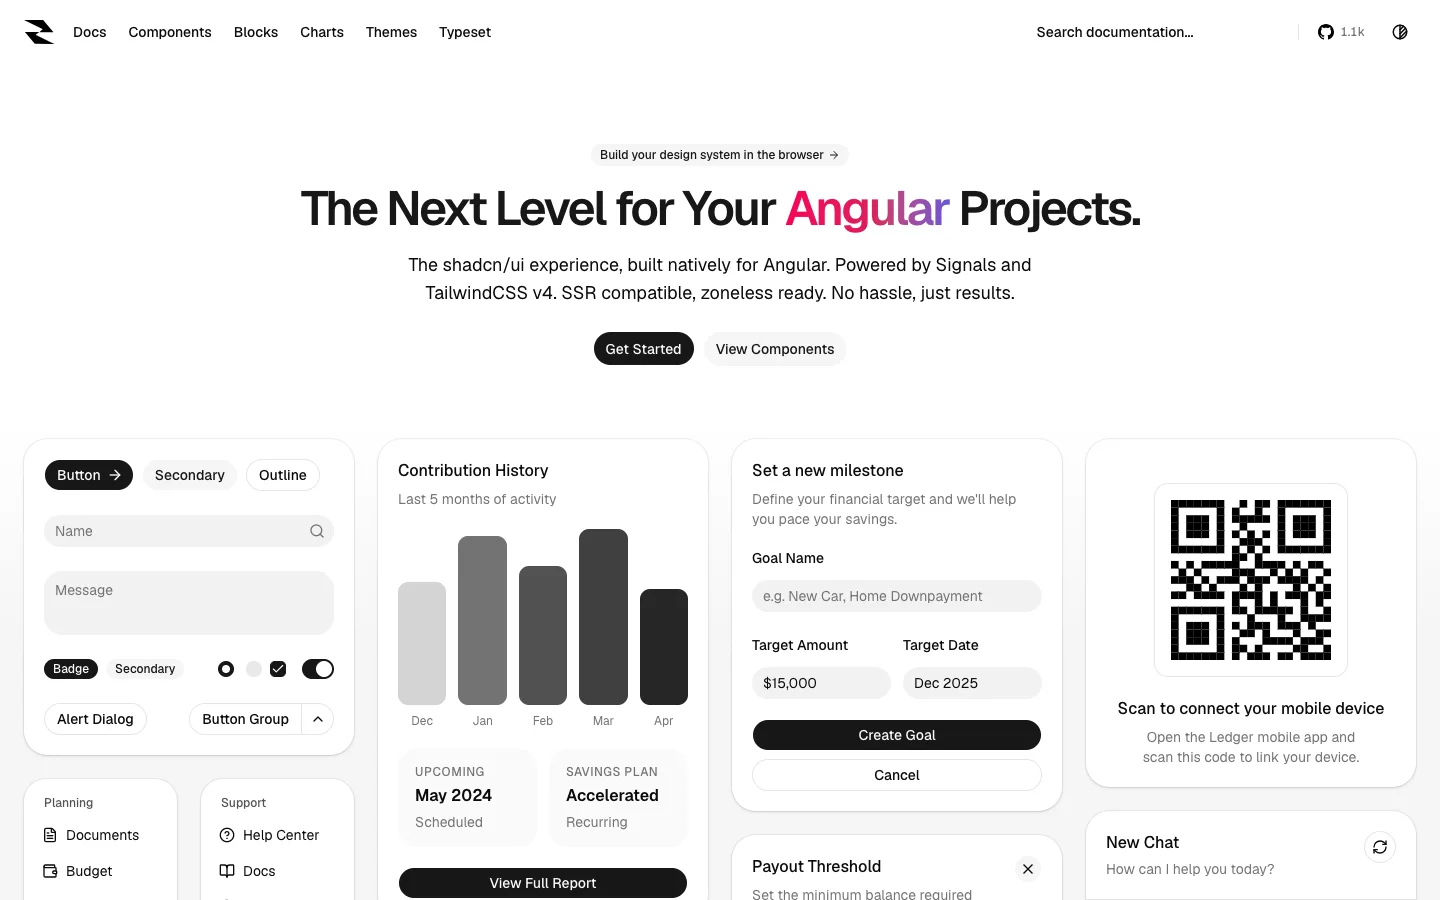
<p><a href="https://zardui.com/docs/introduction">Zard UI</a> is another option for bringing a shadcn-inspired design to Angular. It uses Tailwind CSS and modern Angular features such as standalone components and signals.</p>

<figure class="kg-card kg-image-card kg-card-hascaption">
  <img src="/assets/img/ui-frameworks-for-angular-2026/zard-home.webp" class="kg-image" alt="Zard UI homepage with Tailwind-styled Angular component examples" loading="lazy" width="1440" height="900" />
  <figcaption><a href="https://zardui.com/">Zard UI — Homepage</a></figcaption>
</figure>

<p>The <a href="https://zardui.com/docs/cli">CLI</a> helps you initialise the project and add the components you want. Their source lives in your application, where you can inspect and modify it.</p>

<p>That workflow is handy when the default component is nearly right. Perhaps your product needs a particular button variant, a different spacing convention or an extra piece of information inside a card. You can make that change in the shared component and use it across your screens.</p>

<p>The <a href="https://zardui.com/docs/components">component collection</a> includes dialogs, comboboxes, calendars, sidebars, sheets, tables and loading placeholders. You can use those pieces to assemble the navigation and forms for a customer portal or an internal tool.</p>

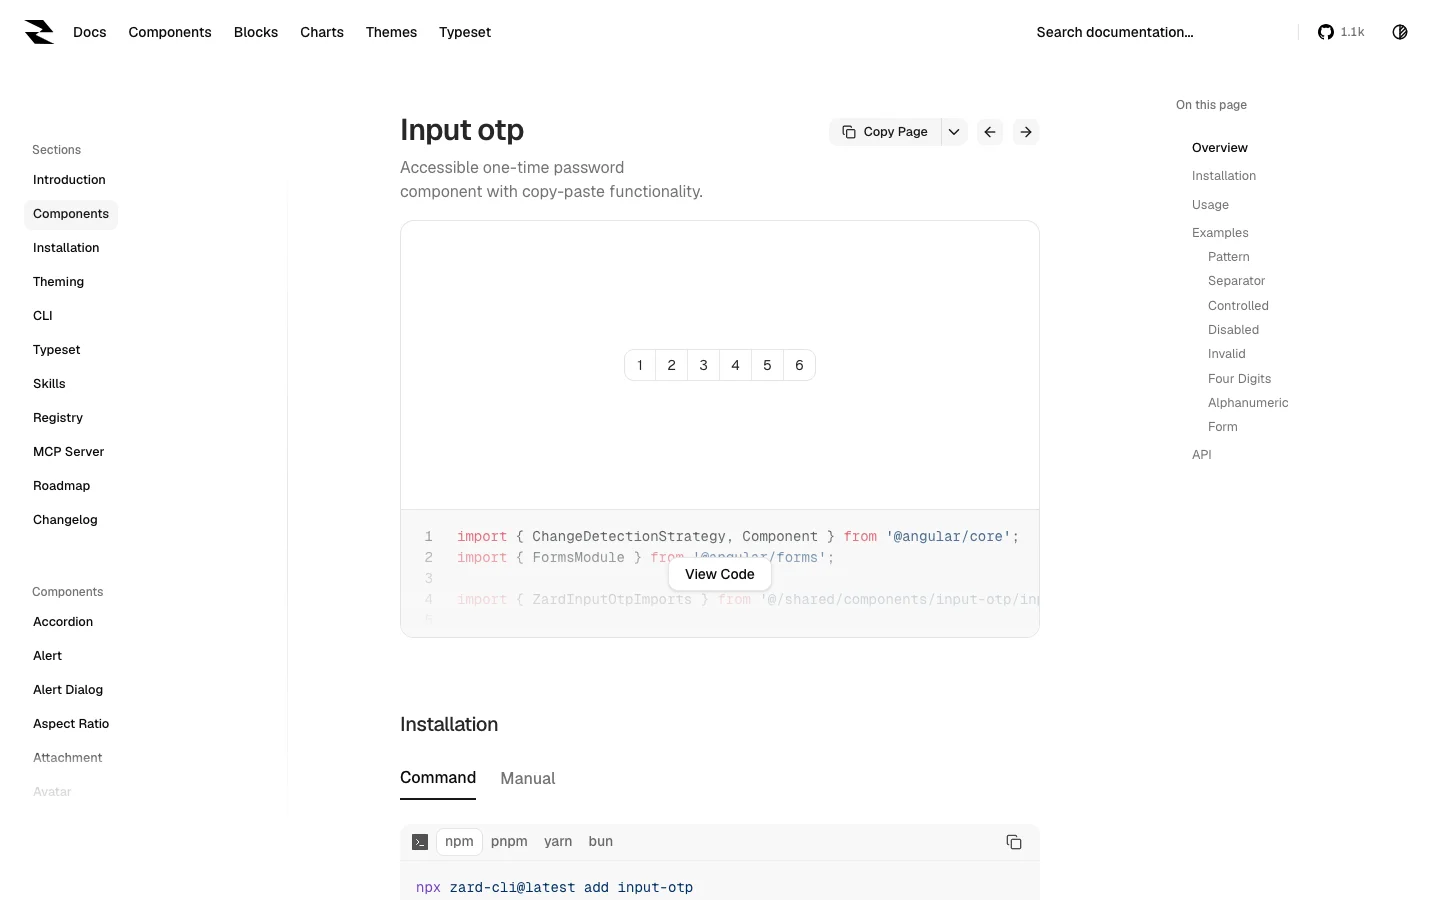
<p>The <a href="https://zardui.com/docs/components/input-otp">Input OTP component</a> is a good example of a small control that can save some fiddly UI work. It provides an interface for entering a verification code. That could fit into an email verification screen or a two-factor authentication flow.</p>

<figure class="kg-card kg-image-card kg-card-hascaption">
  <img src="/assets/img/ui-frameworks-for-angular-2026/zard-input-otp.webp" class="kg-image" alt="Zard UI Input OTP preview with six verification-code slots" loading="lazy" width="1440" height="900" />
  <figcaption><a href="https://zardui.com/docs/components/input-otp">Zard UI — Input OTP preview</a></figcaption>
</figure>

<p>Your authentication service still generates and checks the code. The UI component handles the entry part of the experience. When trying it out, include the less pleasant cases too: an incorrect code, an expired code and someone pasting a code from their email.</p>

<p>Zard also has a <a href="https://zardui.com/docs/components/command">command component</a>, so it's worth comparing with Spartan if a searchable action menu is part of your design. Build the same small menu in both and see which API and component structure you prefer.</p>

<p>For example, try a menu that searches a few saved reports, groups account actions separately and shows a useful empty state. That gives you something concrete to evaluate beyond the appearance of the default demo.</p>

<p>Zard UI makes sense for a team that enjoys working directly with component source and Tailwind styles. As with any code you bring into your project, plan to review upstream improvements alongside your own changes.</p>

<h2 id="taiga-ui">Taiga UI</h2>

<p><a href="https://taiga-ui.dev/">Taiga UI</a> takes a different approach. It is a component library you install and configure, with a broad collection of controls, directives and supporting tools.</p>

<figure class="kg-card kg-image-card kg-card-hascaption">
  <img src="/assets/img/ui-frameworks-for-angular-2026/taiga-home.webp" class="kg-image" alt="Taiga UI homepage introducing its open-source Angular components" loading="lazy" width="1440" height="900" />
  <figcaption><a href="https://taiga-ui.dev/">Taiga UI — Homepage</a></figcaption>
</figure>

<p>The project is <a href="https://github.com/taiga-family/taiga-ui">modular and designed for tree shaking</a>, so you can import the parts you use. It also supports customisation through CSS custom properties and includes dark-theme support.</p>

<p>The range of form controls is a good reason to explore it. Once an application grows beyond a few text fields, you start needing date ranges, multiple selections, formatted values and controls that work well together.</p>

<p>The <a href="https://taiga-ui.dev/components/input-chip/">InputChip component</a> lets you represent multiple items in a field. You could use it for tags on a support ticket, a list of recipients or a set of selected player segments.</p>

<p>For example, a game analytics tool might let you filter a report to players on Android and iOS. Showing those choices as removable chips makes it easy to see which filters are active and remove one without resetting the whole form.</p>

<p>Taiga's examples include different item presentations and customisation options. That is useful when a plain string isn't enough and you want to display more context for each selection.</p>

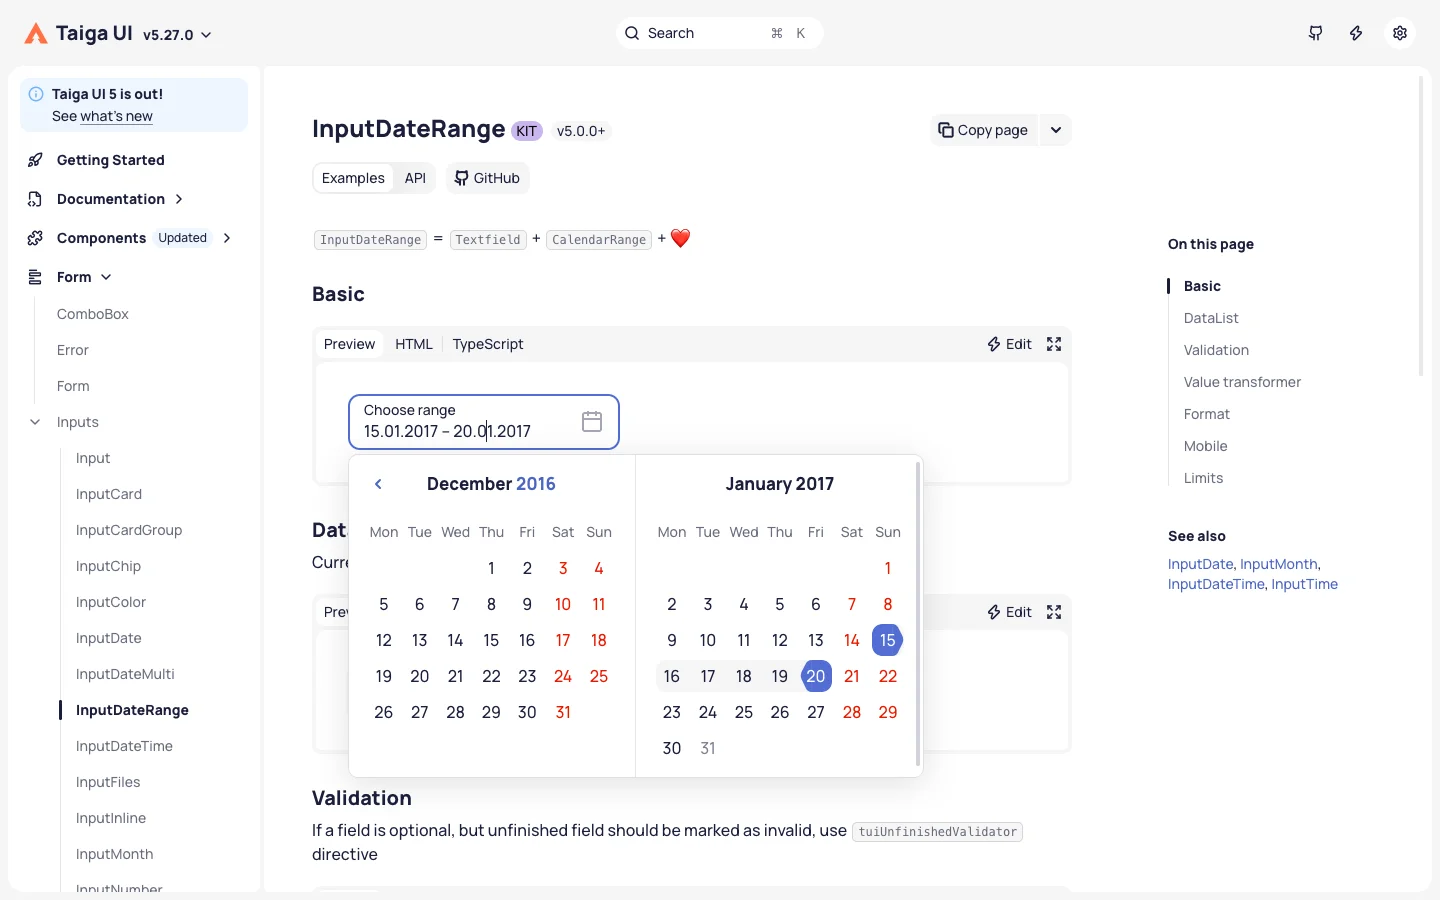
<p>The <a href="https://taiga-ui.dev/components/input-date-range/">InputDateRange component</a> is another practical one. A reporting screen usually needs a start and end date, and putting those together gives users a clear way to choose the period they want to inspect.</p>

<figure class="kg-card kg-image-card kg-card-hascaption">
  <img src="/assets/img/ui-frameworks-for-angular-2026/taiga-input-date-range.webp" class="kg-image" alt="Taiga UI InputDateRange with two calendar months and a selected date range" loading="lazy" width="1440" height="900" />
  <figcaption><a href="https://taiga-ui.dev/components/input-date-range">Taiga UI — InputDateRange with calendars open</a></figcaption>
</figure>

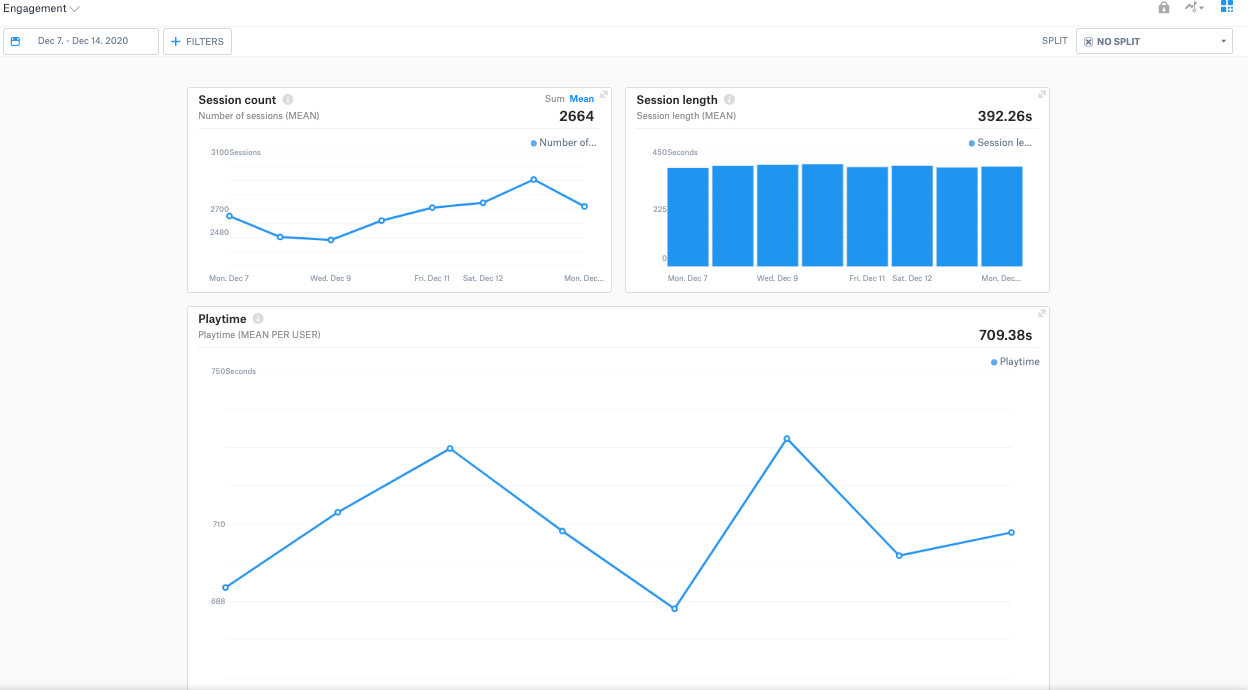
<p>You could use it above a <a href="/dau-mau-ratio/">DAU and MAU dashboard</a>, alongside filters for platform or country. Your application then uses those selections to request the relevant data and update the report.</p>

<p>When evaluating it, check how the values from the control map to your API. A date selected by a user needs a clear interpretation in the reporting system, particularly when the report includes users in different time zones.</p>

<p>Taiga UI is worth a closer look if your app has lots of forms, filters and selection controls. Try several related controls together on one screen. That will tell you much more than trying a button or datepicker on its own.</p>

<h2 id="angular-material-ui">Angular Material UI</h2>

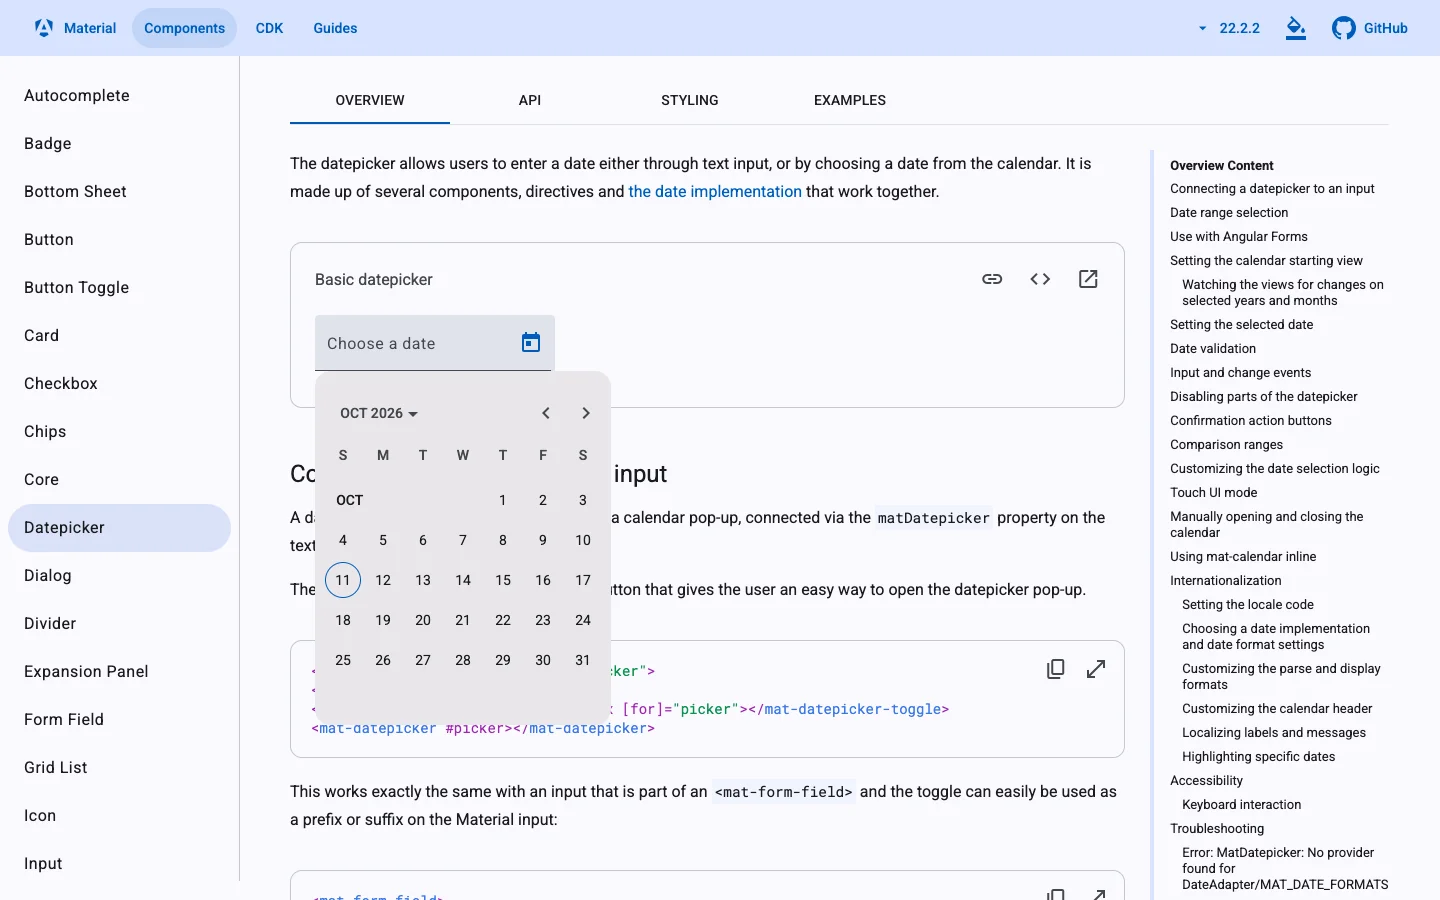
<p><a href="https://material.angular.dev/">Angular Material</a> remains a useful starting point for apps that suit Google's Material Design. It covers familiar controls such as form fields, buttons, menus, dialogs and tables.</p>

<figure class="kg-card kg-image-card kg-card-hascaption">
  <img src="/assets/img/ui-frameworks-for-angular-2026/angular-material-home.webp" class="kg-image" alt="Angular Material homepage introducing Material Design components for Angular" loading="lazy" width="1440" height="900" />
  <figcaption><a href="https://material.angular.dev/">Angular Material — Homepage</a></figcaption>
</figure>

<p>For an account settings area, you can use these components to build profile forms, notification preferences and confirmation dialogs with a consistent appearance.</p>

<figure class="kg-card kg-image-card kg-card-hascaption">
  <img src="/assets/img/ui-frameworks-for-angular-2026/angular-material-datepicker.webp" class="kg-image" alt="Angular Material basic datepicker with its calendar open" loading="lazy" width="1440" height="900" />
  <figcaption><a href="https://material.angular.dev/components/datepicker/overview">Angular Material — Basic datepicker with calendar open</a></figcaption>
</figure>

<p>The <a href="https://material.angular.dev/cdk/categories">Angular CDK</a>, or Component Dev Kit, is also worth knowing about. It provides building blocks for UI behaviour, including overlays, drag and drop, scrolling and accessibility utilities. You can use it when you're building a custom component and need help with those interactions.</p>

<p>Material belongs on the shortlist when its design suits the application and the team wants a shared set of conventions. If you're planning extensive visual changes, prototype those changes on a form and a dialog before applying the library throughout the app.</p>

<h2 id="primeng">PrimeNG</h2>

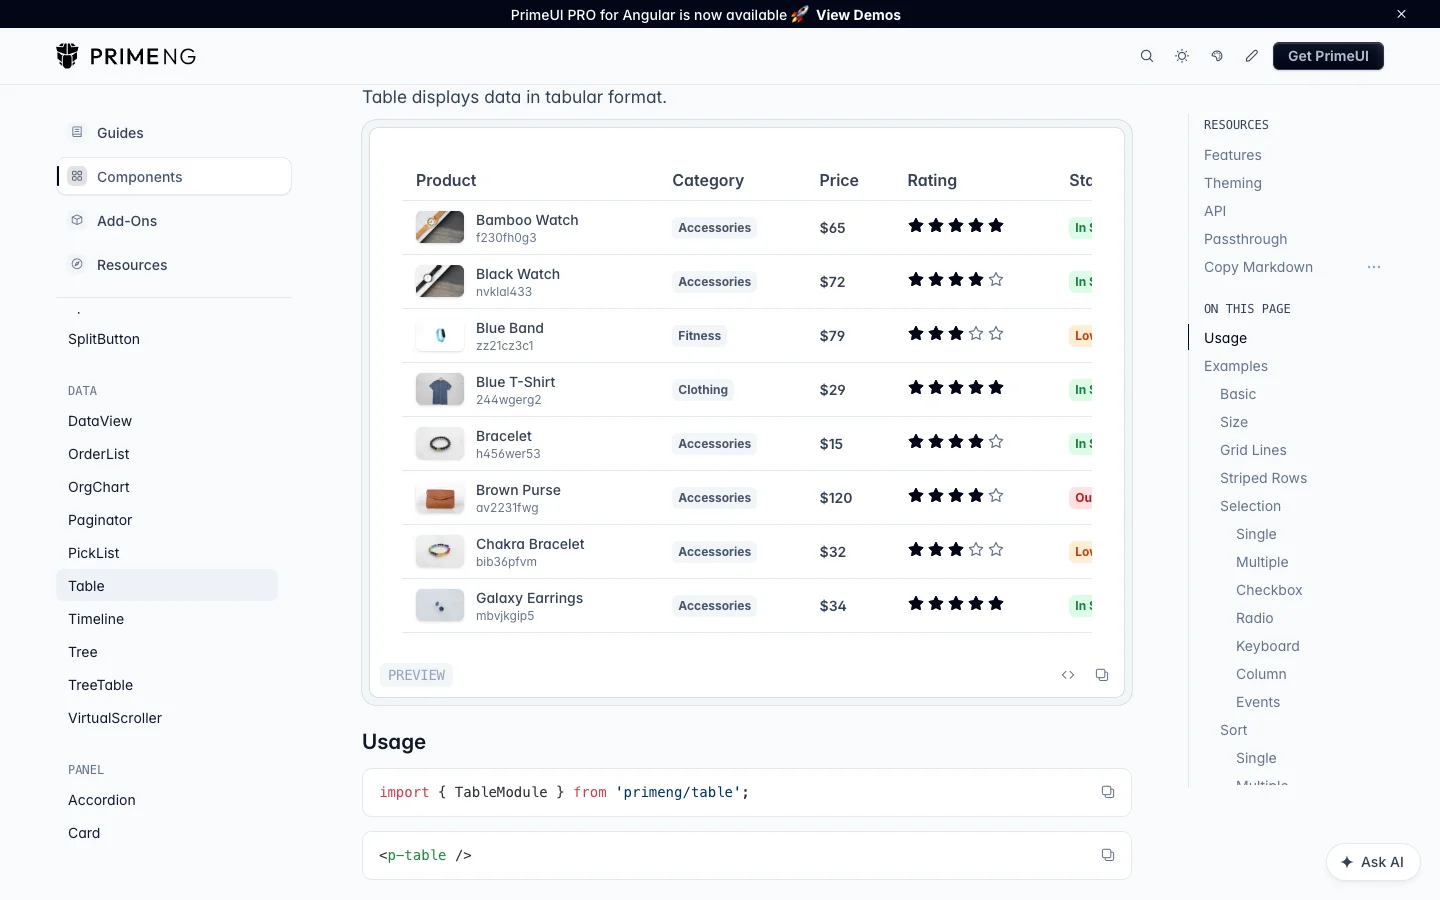
<p><a href="https://primeng.dev/">PrimeNG</a> is still worth exploring when you want a wide selection of components from one library. It covers forms, data display, menus and overlays, with a theming system for adjusting the appearance.</p>

<p>Its <a href="https://primeng.dev/theming/styled">styled mode</a> uses design tokens. These let you define shared choices such as colours and component styling through a theme. Presets include Aura, Material, Lara and Nora.</p>

<p>For example, if you're building a customer portal, you can establish the brand colours and form appearance centrally before adding more pages. That is easier to keep consistent than styling every screen independently.</p>

<figure class="kg-card kg-image-card kg-card-hascaption">
  <img src="/assets/img/ui-frameworks-for-angular-2026/primeng-table.webp" class="kg-image" alt="PrimeNG product table showing images, categories, prices and ratings" loading="lazy" width="1440" height="900" />
  <figcaption><a href="https://primeng.dev/table">PrimeNG — Product table preview</a></figcaption>
</figure>

<p>One current detail to check is charting. The <a href="https://primeng.dev/chart">chart documentation</a> announces that its Chart.js-based components will be removed in a future release in favour of PrimeUI PRO Charts. If charts are central to your application, review that direction before choosing your implementation.</p>

<h2 id="ng-zorro">NG-ZORRO</h2>

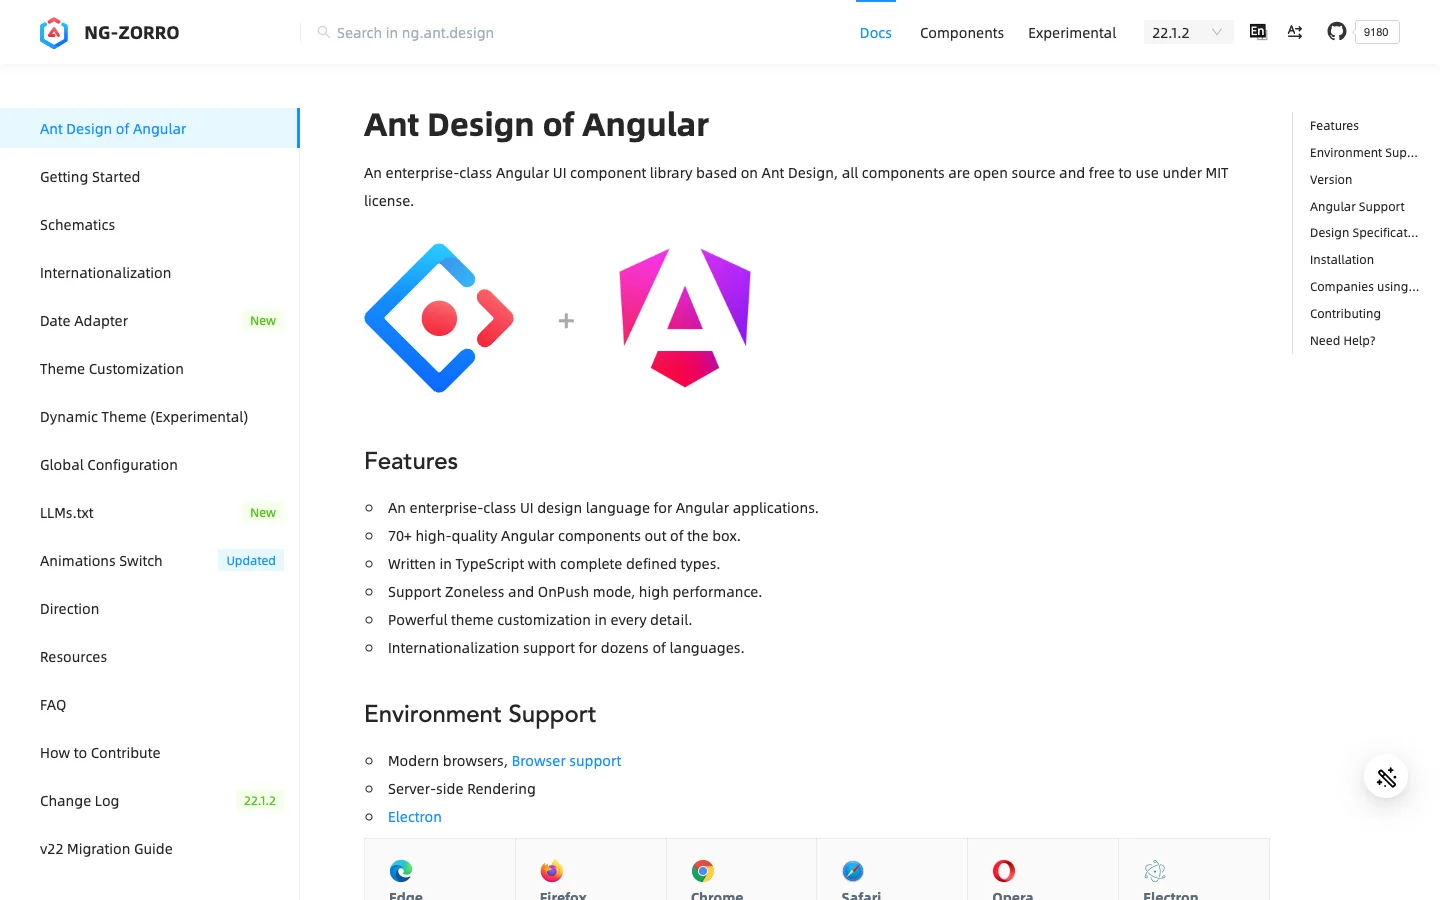
<p><a href="https://ng.ant.design/docs/introduce/en">NG-ZORRO</a> brings Ant Design to Angular and makes its components available under the MIT licence. It is a useful option for admin interfaces and other applications with a lot of information to organise.</p>

<figure class="kg-card kg-image-card kg-card-hascaption">
  <img src="/assets/img/ui-frameworks-for-angular-2026/ng-zorro-home.webp" class="kg-image" alt="NG-ZORRO introduction page describing Ant Design components for Angular" loading="lazy" width="1440" height="900" />
  <figcaption><a href="https://ng.ant.design/docs/introduce/en">NG-ZORRO — Introduction page</a></figcaption>
</figure>

<p>Its <a href="https://ng.ant.design/components/overview/en">component catalogue</a> includes tables, forms, drawers, trees and timelines.</p>

<p>A drawer could show the details of a selected order while the order list stays in the background. A timeline could display the steps taken to resolve a support request. These are useful patterns when users need context from several parts of a record.</p>

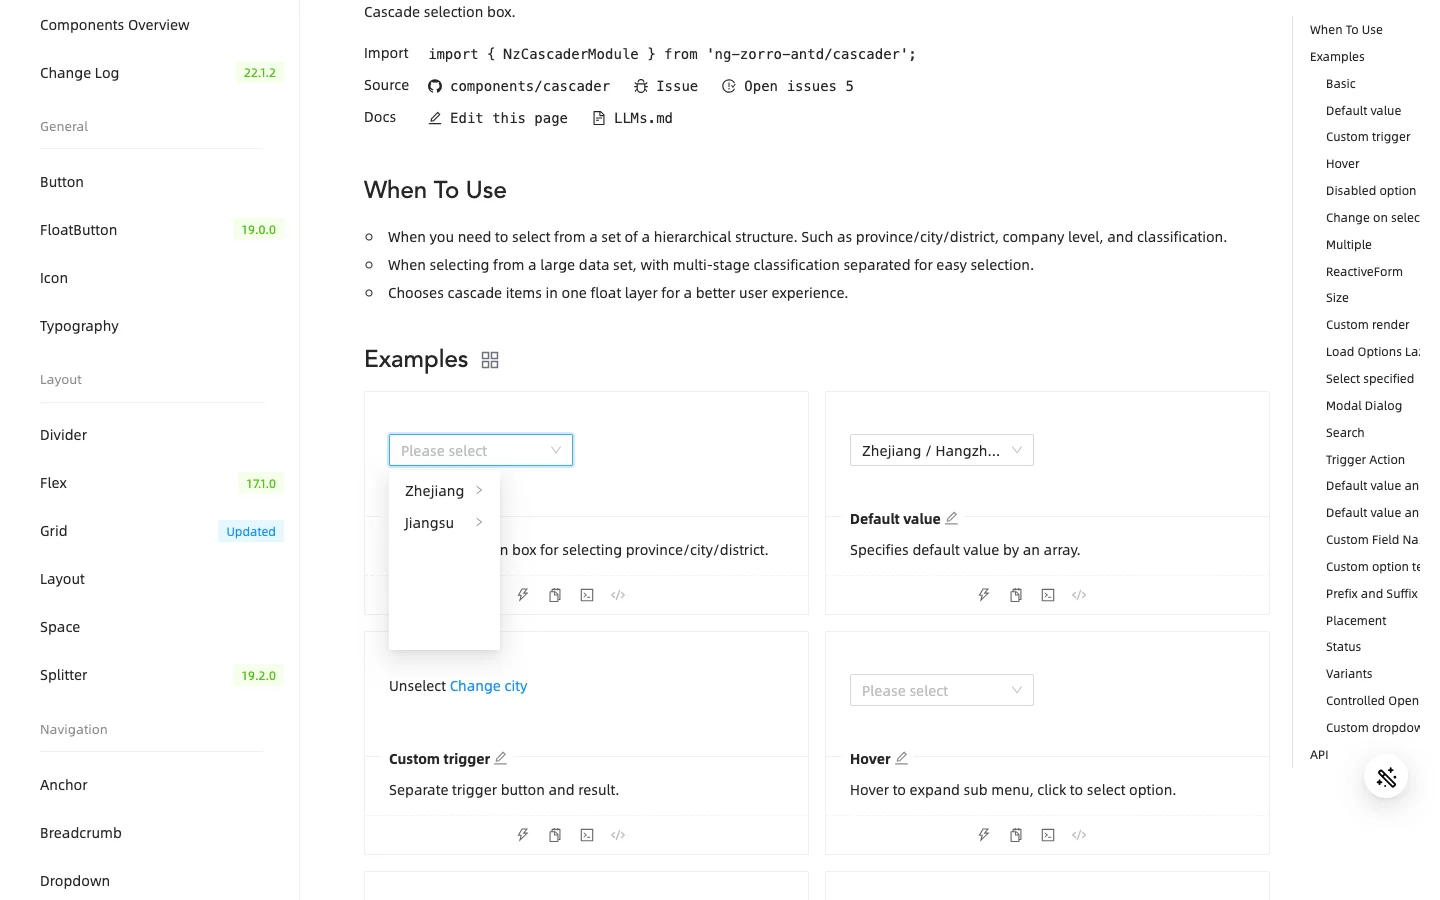
<p>The cascader is another interesting control. It lets someone select an item through a hierarchy, such as a department, category and subcategory.</p>

<figure class="kg-card kg-image-card kg-card-hascaption">
  <img src="/assets/img/ui-frameworks-for-angular-2026/ng-zorro-cascader.webp" class="kg-image" alt="NG-ZORRO cascader preview with its province selection menu open" loading="lazy" width="1440" height="900" />
  <figcaption><a href="https://ng.ant.design/components/cascader/en">NG-ZORRO — Cascader preview</a></figcaption>
</figure>

<p>NG-ZORRO is a good one to explore when Ant Design already matches the direction of your product. Start with its more specialised controls and see how well they fit the workflows you're building.</p>

<h2 id="what-about-grids-charts-and-scheduling">What About Grids, Charts and Scheduling?</h2>

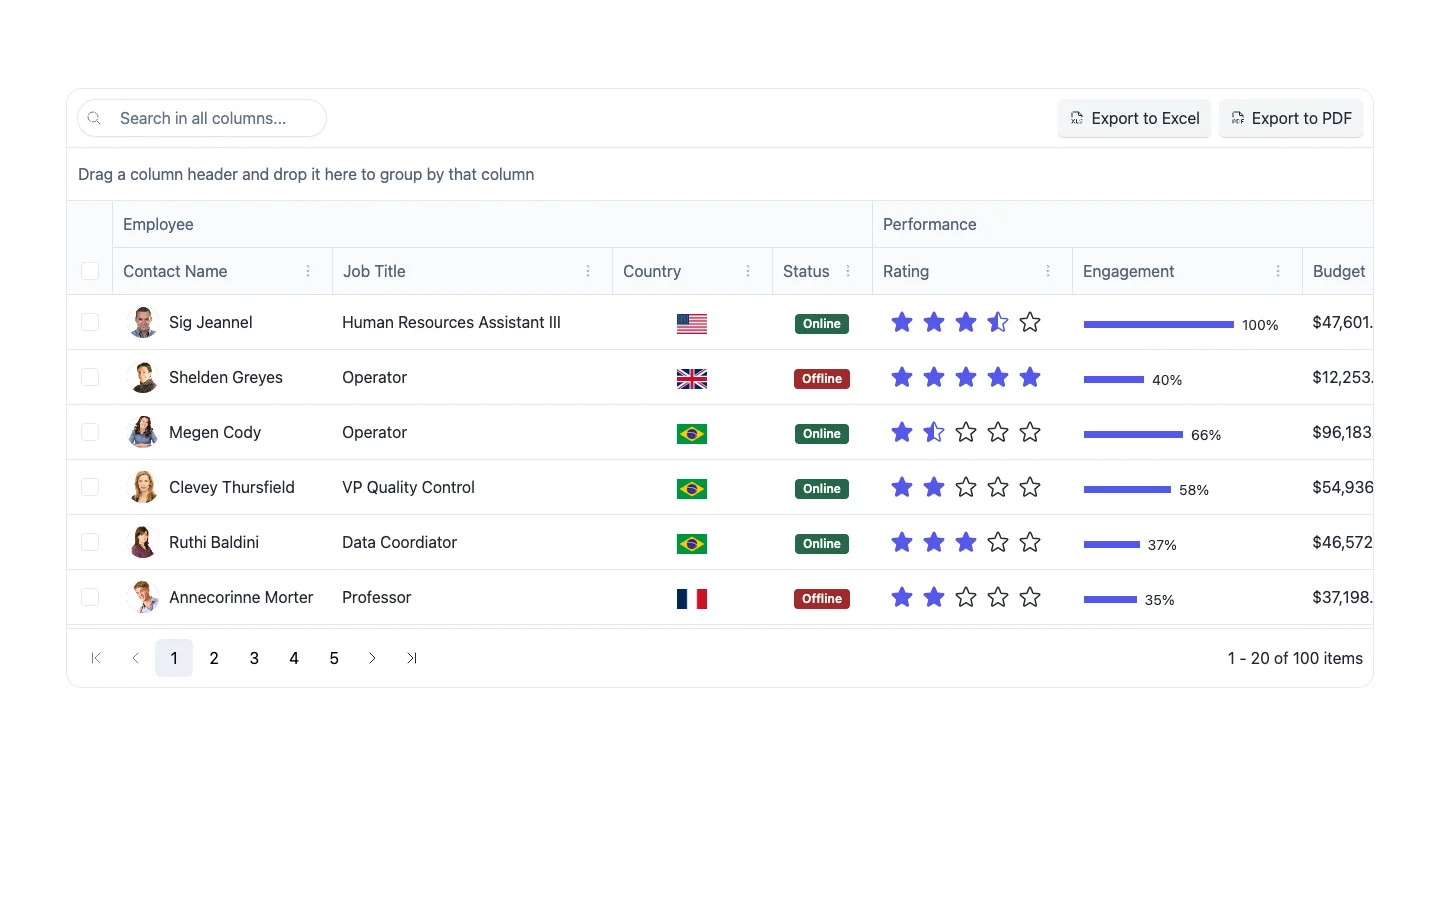
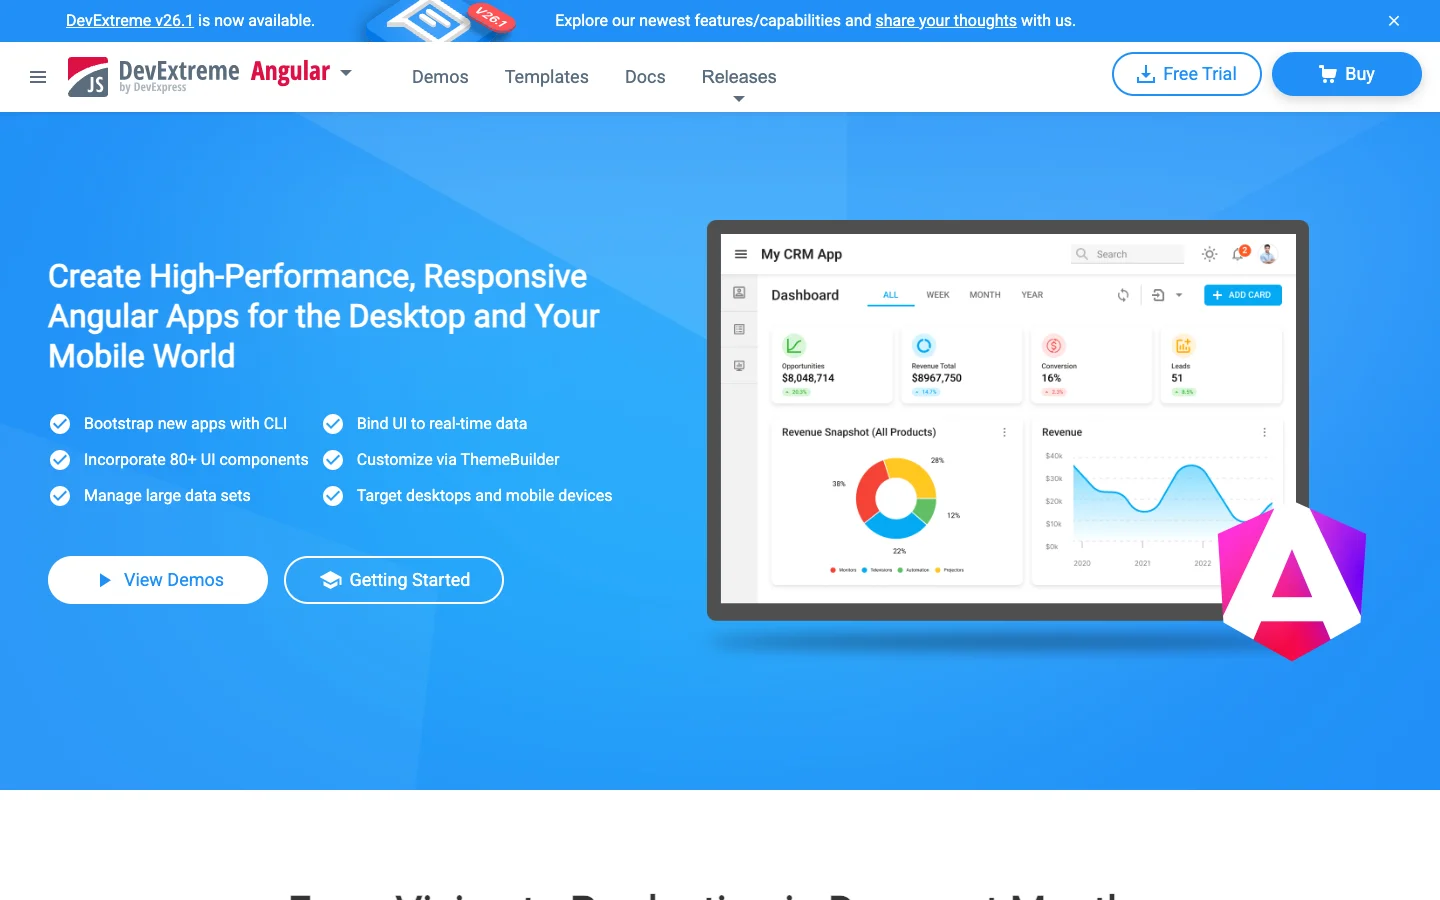
<p>Some applications need a more specialised component suite. If your main screen revolves around a complex data grid, appointment scheduling or financial charts, the commercial libraries from our original article are still worth evaluating.</p>

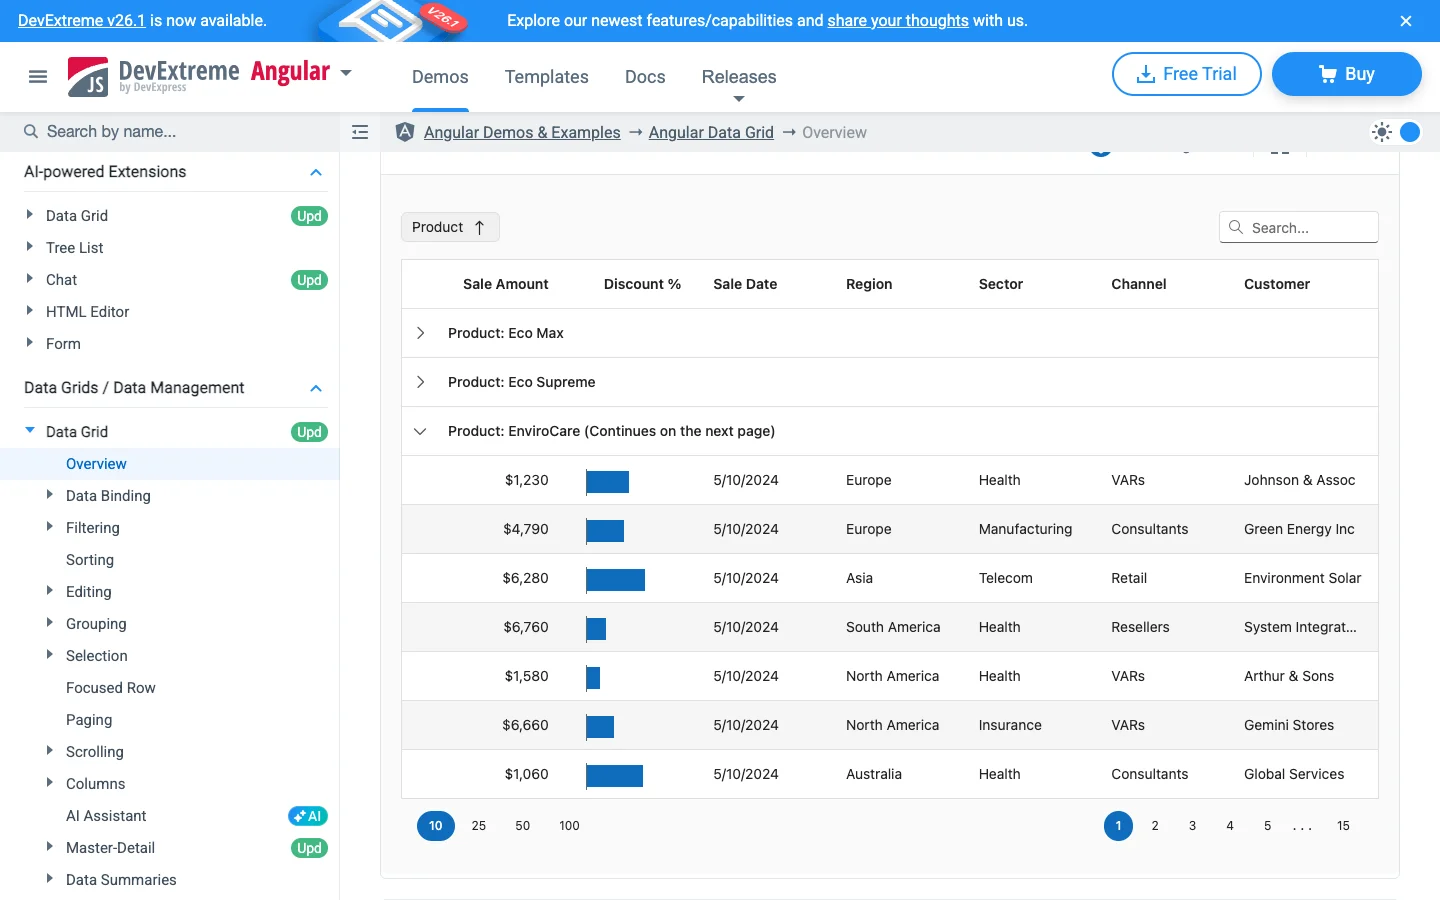
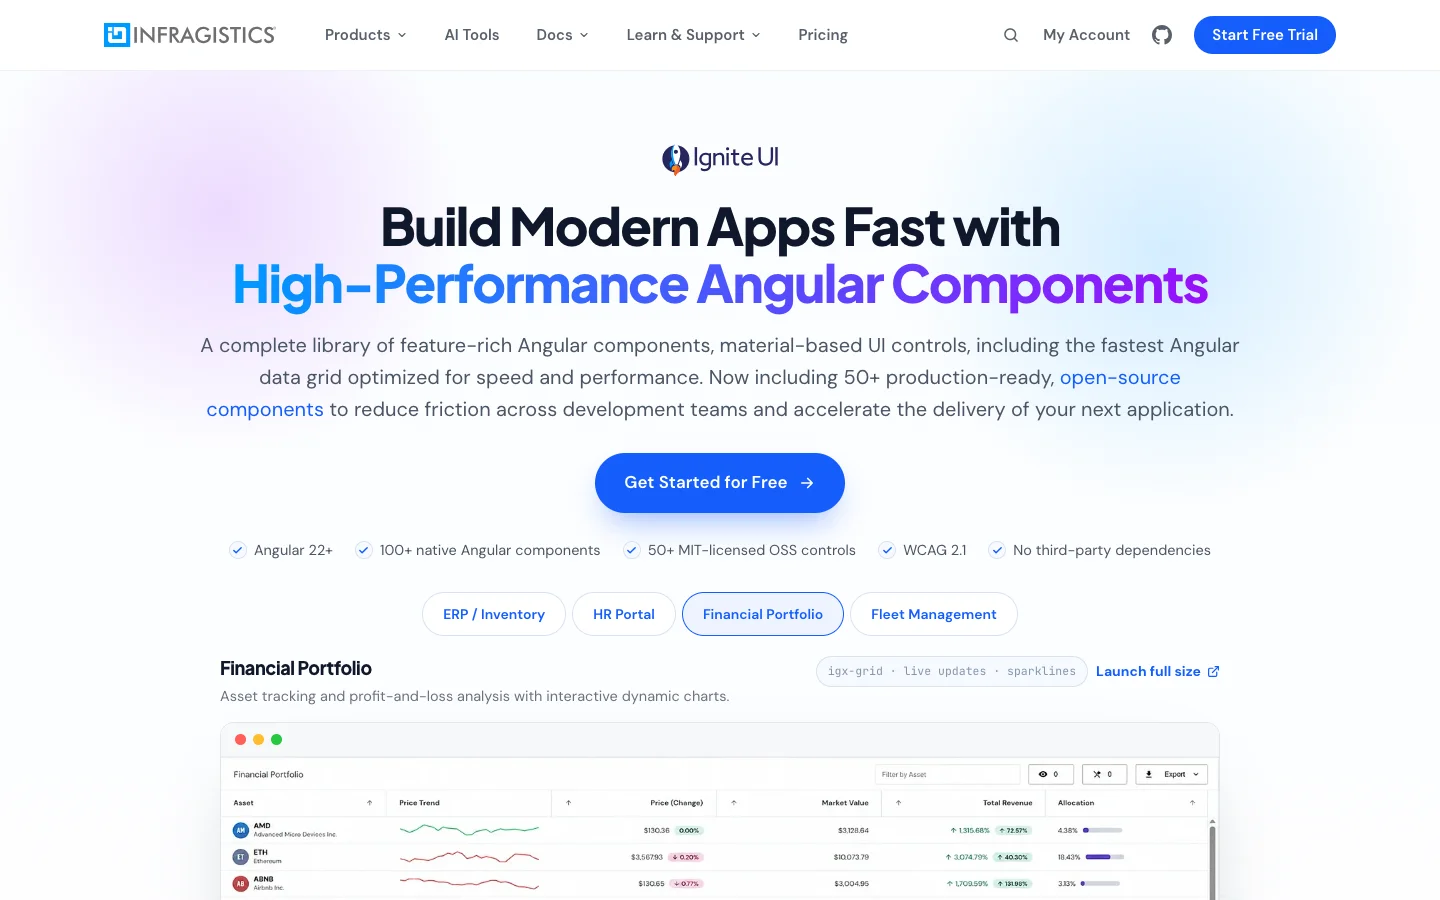
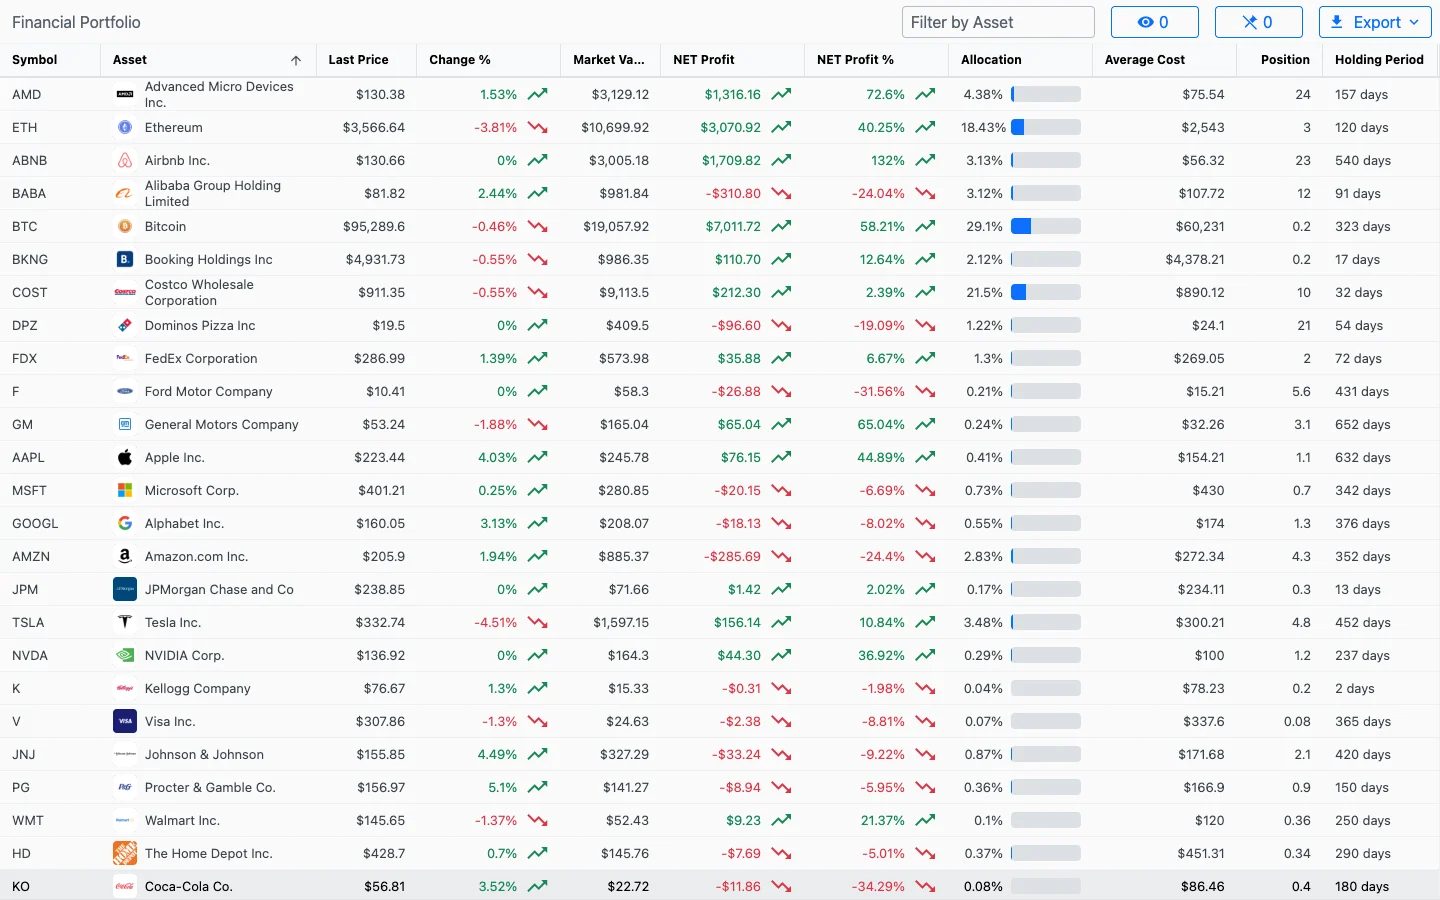
<p><a href="https://www.telerik.com/kendo-angular-ui">Kendo UI for Angular</a>, <a href="https://js.devexpress.com/Angular/">DevExtreme</a> and <a href="https://www.infragistics.com/products/ignite-ui-angular">Ignite UI for Angular</a> offer controls in this area. Check which features are included in the particular package and licence you're considering.</p>

<h3 id="kendo-ui-for-angular">Kendo UI for Angular</h3>

<figure class="kg-card kg-image-card kg-card-hascaption">
  <img src="/assets/img/ui-frameworks-for-angular-2026/kendo-grid.webp" class="kg-image" alt="Kendo UI employee data grid with search, export controls and performance columns" loading="lazy" width="1440" height="900" />
  <figcaption><a href="https://demos.telerik.com/kendo-angular-ui/demos/grid/filter-all-columns?theme=meridian-main">Kendo UI for Angular — Employee data grid preview</a></figcaption>
</figure>

<h3 id="devextreme">DevExtreme</h3>

<figure class="kg-card kg-image-card kg-card-hascaption">
  <img src="/assets/img/ui-frameworks-for-angular-2026/devextreme-home.webp" class="kg-image" alt="DevExtreme Angular product homepage with a dashboard interface example" loading="lazy" width="1440" height="900" />
  <figcaption><a href="https://js.devexpress.com/Angular/">DevExtreme — Product homepage</a></figcaption>
</figure>

<figure class="kg-card kg-image-card kg-card-hascaption">
  <img src="/assets/img/ui-frameworks-for-angular-2026/devextreme-grid.webp" class="kg-image" alt="DevExtreme grouped data grid displaying products and sales records" loading="lazy" width="1440" height="900" />
  <figcaption><a href="https://js.devexpress.com/Angular/Demos/WidgetsGallery/Demo/DataGrid/Overview/FluentBlueLight/">DevExtreme — Grouped data grid preview</a></figcaption>
</figure>

<h3 id="ignite-ui-for-angular">Ignite UI for Angular</h3>

<figure class="kg-card kg-image-card kg-card-hascaption">
  <img src="/assets/img/ui-frameworks-for-angular-2026/ignite-home.webp" class="kg-image" alt="Ignite UI for Angular product homepage with its financial portfolio example" loading="lazy" width="1440" height="900" />
  <figcaption><a href="https://www.infragistics.com/products/ignite-ui-angular">Ignite UI for Angular — Product homepage</a></figcaption>
</figure>

<figure class="kg-card kg-image-card kg-card-hascaption">
  <img src="/assets/img/ui-frameworks-for-angular-2026/ignite-finance-grid.webp" class="kg-image" alt="Ignite UI financial portfolio grid showing assets, prices, profit and allocation bars" loading="lazy" width="1440" height="900" />
  <figcaption><a href="https://www.infragistics.com/angular-grid-examples/finance">Ignite UI for Angular — Financial portfolio grid preview</a></figcaption>
</figure>

<p>A useful evaluation is to build the busiest screen in your application. Include the filtering, editing and export behaviour users actually need. A simple table demo won't tell you whether a library can handle the workflow your finance or operations team has in mind.</p>

<h2 id="which-angular-ui-library-should-you-try">Which Angular UI Library Should You Try?</h2>

<p>If you want to customise component source and work with Tailwind CSS, start by comparing Spartan and Zard UI. If you're looking for a broad selection of configurable form controls, take a closer look at Taiga UI. Material, PrimeNG and NG-ZORRO remain useful alternatives when their components and design conventions suit the application.</p>

<p>Pick one real screen for the comparison. An analytics report is a good example: it might need a date range, a few filters, a results table and a dialog for saving the report.</p>

<p>Include loading states, validation messages and empty results. Try the screen on a smaller display and use it with the keyboard. If your app uses server-side rendering or zoneless change detection, check compatibility with the specific library version you plan to install.</p>

<p>You'll also want to decide how much UI code your team wants to maintain. Editing a component directly gives you flexibility, while configuring an installed library can make shared updates more straightforward.</p>

<p>The demos are a great place to discover interesting components. Putting a few of them together around a task your users need to complete is how you find the right fit for your Angular app.</p>

<h2 id="angular-ui-component-comparison">Angular UI component comparison</h2>

<p>Here is a grouped reference for the nine frameworks covered above. A dash means there is no separate matching catalogue entry in this comparison, not that the framework cannot build that interface. For example, a combobox can cover an autocomplete workflow, and an input component can support textareas.</p>

<p>Check the package and licence for the commercial suites; Ignite UI has both open-source and premium components. PrimeNG's Chart is included below, but its documentation announces its retirement, as noted above.</p>

<h3 id="components-layoutcontainersandoverlays">Layout, containers and overlays</h3>

<table class="component-matrix" tabindex="0" aria-labelledby="components-layoutcontainersandoverlays">
<thead>
<tr><th scope="col">Component</th><th scope="col"><a href="https://spartan.ng/documentation/introduction">Spartan</a></th><th scope="col"><a href="https://zardui.com/docs/components">Zard UI</a></th><th scope="col"><a href="https://taiga-ui.dev/">Taiga UI</a></th><th scope="col"><a href="https://material.angular.dev/components/categories">Angular Material</a></th><th scope="col"><a href="https://primeng.dev/components">PrimeNG</a></th><th scope="col"><a href="https://ng.ant.design/components/overview/en">NG-ZORRO</a></th><th scope="col"><a href="https://www.telerik.com/kendo-angular-ui/components/">Kendo UI for Angular</a></th><th scope="col"><a href="https://js.devexpress.com/Angular/Documentation/ApiReference/UI_Components/">DevExtreme Angular</a></th><th scope="col"><a href="https://www.infragistics.com/products/ignite-ui-angular/angular/components/general/open-source-vs-premium">Ignite UI for Angular</a></th></tr>
</thead>
<tbody>
<tr><th scope="row">Accordion</th><td><a href="https://spartan.ng/components/accordion">Accordion</a></td><td><a href="https://zardui.com/docs/components/accordion">Accordion</a></td><td><a href="https://taiga-ui.dev/components/accordion/">Accordion</a></td><td><a href="https://material.angular.dev/components/expansion">Expansion Panel</a><br /><a href="https://material.angular.dev/cdk/accordion">CDK Accordion (primitive)</a></td><td><a href="https://primeng.dev/accordion">Accordion</a></td><td>&mdash;</td><td><a href="https://www.telerik.com/kendo-angular-ui/components/layout/expansionpanel">ExpansionPanel</a></td><td><a href="https://js.devexpress.com/Angular/Documentation/ApiReference/UI_Components/dxAccordion/">Accordion</a></td><td><a href="https://www.infragistics.com/products/ignite-ui-angular/angular/components/layouts/accordion">Accordion</a><br /><a href="https://www.infragistics.com/products/ignite-ui-angular/angular/components/expansion-panel">Expansion Panel</a></td></tr>
<tr><th scope="row">Action sheet</th><td>&mdash;</td><td>&mdash;</td><td>&mdash;</td><td>&mdash;</td><td>&mdash;</td><td>&mdash;</td><td><a href="https://www.telerik.com/kendo-angular-ui/components/navigation/actionsheet">ActionSheet</a></td><td><a href="https://js.devexpress.com/Angular/Documentation/ApiReference/UI_Components/dxActionSheet/">ActionSheet</a></td><td>&mdash;</td></tr>
<tr><th scope="row">Aspect ratio</th><td><a href="https://spartan.ng/components/aspect-ratio">Aspect Ratio</a></td><td><a href="https://zardui.com/docs/components/aspect-ratio">Aspect Ratio</a></td><td>&mdash;</td><td>&mdash;</td><td>&mdash;</td><td>&mdash;</td><td>&mdash;</td><td>&mdash;</td><td>&mdash;</td></tr>
<tr><th scope="row">Card</th><td><a href="https://spartan.ng/components/card">Card</a></td><td><a href="https://zardui.com/docs/components/card">Card</a></td><td><a href="https://taiga-ui.dev/layout/card-collapsed/">Card Collapsed</a><br /><a href="https://taiga-ui.dev/layout/card-large/">Card Large</a><br /><a href="https://taiga-ui.dev/layout/card-medium/">Card Medium</a></td><td><a href="https://material.angular.dev/components/card">Card</a></td><td><a href="https://primeng.dev/card">Card</a></td><td><a href="https://ng.ant.design/components/card/en">Card</a></td><td><a href="https://www.telerik.com/kendo-angular-ui/components/layout/card">Card</a></td><td>&mdash;</td><td><a href="https://www.infragistics.com/products/ignite-ui-angular/angular/components/card">Card</a></td></tr>
<tr><th scope="row">Collapsible region</th><td><a href="https://spartan.ng/components/collapsible">Collapsible</a></td><td><a href="https://zardui.com/docs/components/collapsible">Collapsible</a></td><td><a href="https://taiga-ui.dev/components/expand/">Expand</a></td><td>&mdash;</td><td>&mdash;</td><td><a href="https://ng.ant.design/components/collapse/en">Collapse</a></td><td><a href="https://www.telerik.com/kendo-angular-ui/components/layout/panelbar">PanelBar</a></td><td>&mdash;</td><td>&mdash;</td></tr>
<tr><th scope="row">Confirmation dialog</th><td><a href="https://spartan.ng/components/alert-dialog">Alert Dialog</a></td><td><a href="https://zardui.com/docs/components/alert-dialog">Alert Dialog</a></td><td><a href="https://taiga-ui.dev/components/confirm/">Confirm</a></td><td>&mdash;</td><td><a href="https://primeng.dev/confirmdialog">ConfirmDialog</a></td><td>&mdash;</td><td>&mdash;</td><td>&mdash;</td><td>&mdash;</td></tr>
<tr><th scope="row">Confirmation popover</th><td>&mdash;</td><td>&mdash;</td><td>&mdash;</td><td>&mdash;</td><td><a href="https://primeng.dev/confirmpopup">ConfirmPopup</a></td><td><a href="https://ng.ant.design/components/popconfirm/en">Popconfirm</a></td><td>&mdash;</td><td>&mdash;</td><td>&mdash;</td></tr>
<tr><th scope="row">Dialog</th><td><a href="https://spartan.ng/components/dialog">Dialog</a></td><td><a href="https://zardui.com/docs/components/dialog">Dialog</a></td><td><a href="https://taiga-ui.dev/components/dialog/">Dialog</a></td><td><a href="https://material.angular.dev/components/dialog">Dialog</a><br /><a href="https://material.angular.dev/cdk/dialog">CDK Dialog (primitive)</a></td><td><a href="https://primeng.dev/dialog">Dialog</a><br /><a href="https://primeng.dev/dynamicdialog">DynamicDialog</a></td><td><a href="https://ng.ant.design/components/modal/en">Modal</a></td><td><a href="https://www.telerik.com/kendo-angular-ui/components/dialogs/dialog">Dialog</a><br /><a href="https://www.telerik.com/kendo-angular-ui/components/dialogs/window">Window</a><br /><a href="https://www.telerik.com/kendo-angular-ui/components/popup">Popup</a></td><td><a href="https://js.devexpress.com/Angular/Documentation/ApiReference/UI_Components/dxPopup/">Popup</a></td><td><a href="https://www.infragistics.com/products/ignite-ui-angular/angular/components/dialog">Dialog</a></td></tr>
<tr><th scope="row">Divider</th><td><a href="https://spartan.ng/components/separator">Separator</a></td><td><a href="https://zardui.com/docs/components/separator">Separator</a></td><td>&mdash;</td><td><a href="https://material.angular.dev/components/divider">Divider</a></td><td><a href="https://primeng.dev/divider">Divider</a></td><td><a href="https://ng.ant.design/components/divider/en">Divider</a></td><td>&mdash;</td><td>&mdash;</td><td><a href="https://www.infragistics.com/products/ignite-ui-angular/angular/components/divider">Divider (directive)</a></td></tr>
<tr><th scope="row">Dock manager</th><td>&mdash;</td><td>&mdash;</td><td>&mdash;</td><td>&mdash;</td><td>&mdash;</td><td>&mdash;</td><td>&mdash;</td><td>&mdash;</td><td><a href="https://www.infragistics.com/products/ignite-ui-angular/angular/components/dock-manager">Dock Manager</a></td></tr>
<tr><th scope="row">Drawer</th><td><a href="https://spartan.ng/components/drawer">Drawer</a></td><td><a href="https://zardui.com/docs/components/drawer">Drawer</a></td><td><a href="https://taiga-ui.dev/components/drawer/">Drawer</a></td><td><a href="https://material.angular.dev/components/sidenav">Sidenav</a></td><td><a href="https://primeng.dev/drawer">Drawer</a></td><td><a href="https://ng.ant.design/components/drawer/en">Drawer</a></td><td><a href="https://www.telerik.com/kendo-angular-ui/components/layout/drawer">Drawer</a></td><td><a href="https://js.devexpress.com/Angular/Documentation/ApiReference/UI_Components/dxDrawer/">Drawer</a></td><td><a href="https://www.infragistics.com/products/ignite-ui-angular/angular/components/navdrawer">Navigation Drawer</a></td></tr>
<tr><th scope="row">Elastic container</th><td>&mdash;</td><td>&mdash;</td><td><a href="https://taiga-ui.dev/components/elastic-container/">Elastic Container</a></td><td>&mdash;</td><td>&mdash;</td><td>&mdash;</td><td>&mdash;</td><td>&mdash;</td><td>&mdash;</td></tr>
<tr><th scope="row">Fieldset</th><td>&mdash;</td><td>&mdash;</td><td>&mdash;</td><td>&mdash;</td><td><a href="https://primeng.dev/fieldset">Fieldset</a></td><td>&mdash;</td><td>&mdash;</td><td>&mdash;</td><td>&mdash;</td></tr>
<tr><th scope="row">Flex / stack layout</th><td>&mdash;</td><td>&mdash;</td><td>&mdash;</td><td>&mdash;</td><td>&mdash;</td><td><a href="https://ng.ant.design/components/flex/en">Flex</a></td><td><a href="https://www.telerik.com/kendo-angular-ui/components/layout/stacklayout">StackLayout</a></td><td>&mdash;</td><td>&mdash;</td></tr>
<tr><th scope="row">Floating container</th><td>&mdash;</td><td>&mdash;</td><td><a href="https://taiga-ui.dev/components/floating-container/">Floating Container</a></td><td>&mdash;</td><td>&mdash;</td><td>&mdash;</td><td>&mdash;</td><td>&mdash;</td><td>&mdash;</td></tr>
<tr><th scope="row">Form layout</th><td>&mdash;</td><td>&mdash;</td><td><a href="https://taiga-ui.dev/layout/form/">Form</a></td><td>&mdash;</td><td>&mdash;</td><td><a href="https://ng.ant.design/components/form/en">Form</a></td><td><a href="https://www.telerik.com/kendo-angular-ui/components/inputs/form">Form</a></td><td><a href="https://js.devexpress.com/Angular/Documentation/ApiReference/UI_Components/dxForm/">Form</a></td><td>&mdash;</td></tr>
<tr><th scope="row">Grid layout</th><td>&mdash;</td><td>&mdash;</td><td>&mdash;</td><td><a href="https://material.angular.dev/components/grid-list">Grid List</a></td><td>&mdash;</td><td><a href="https://ng.ant.design/components/grid/en">Grid</a></td><td><a href="https://www.telerik.com/kendo-angular-ui/components/layout/gridlayout">GridLayout</a></td><td>&mdash;</td><td>&mdash;</td></tr>
<tr><th scope="row">Hover card</th><td><a href="https://spartan.ng/components/hover-card">Hover Card</a></td><td><a href="https://zardui.com/docs/components/hover-card">Hover Card</a></td><td><a href="https://taiga-ui.dev/directives/dropdown-hover/">Dropdown Hover (directive)</a></td><td>&mdash;</td><td>&mdash;</td><td>&mdash;</td><td>&mdash;</td><td>&mdash;</td><td>&mdash;</td></tr>
<tr><th scope="row">Layout</th><td>&mdash;</td><td>&mdash;</td><td>&mdash;</td><td>&mdash;</td><td>&mdash;</td><td><a href="https://ng.ant.design/components/layout/en">Layout</a></td><td>&mdash;</td><td><a href="https://js.devexpress.com/Angular/Documentation/ApiReference/UI_Components/dxBox/">Box</a><br /><a href="https://js.devexpress.com/Angular/Documentation/ApiReference/UI_Components/dxResponsiveBox/">ResponsiveBox</a></td><td><a href="https://www.infragistics.com/products/ignite-ui-angular/angular/components/layout">Layout (Layout Manager) (directive)</a></td></tr>
<tr><th scope="row">Layout header</th><td>&mdash;</td><td>&mdash;</td><td><a href="https://taiga-ui.dev/layout/header/">Header</a></td><td>&mdash;</td><td>&mdash;</td><td><a href="https://ng.ant.design/components/page-header/en">PageHeader</a></td><td>&mdash;</td><td>&mdash;</td><td>&mdash;</td></tr>
<tr><th scope="row">Multiple views</th><td>&mdash;</td><td>&mdash;</td><td>&mdash;</td><td>&mdash;</td><td>&mdash;</td><td>&mdash;</td><td>&mdash;</td><td><a href="https://js.devexpress.com/Angular/Documentation/ApiReference/UI_Components/dxMultiView/">MultiView</a></td><td>&mdash;</td></tr>
<tr><th scope="row">Panel</th><td>&mdash;</td><td>&mdash;</td><td>&mdash;</td><td>&mdash;</td><td><a href="https://primeng.dev/panel">Panel</a></td><td>&mdash;</td><td>&mdash;</td><td>&mdash;</td><td>&mdash;</td></tr>
<tr><th scope="row">Popover</th><td><a href="https://spartan.ng/components/popover">Popover</a></td><td><a href="https://zardui.com/docs/components/popover">Popover</a></td><td><a href="https://taiga-ui.dev/directives/dropdown/">Dropdown (directive)</a></td><td>&mdash;</td><td><a href="https://primeng.dev/popover">Popover</a></td><td><a href="https://ng.ant.design/components/popover/en">Popover</a></td><td><a href="https://www.telerik.com/kendo-angular-ui/components/tooltips/popover">Popover</a></td><td><a href="https://js.devexpress.com/Angular/Documentation/ApiReference/UI_Components/dxPopover/">Popover</a></td><td>&mdash;</td></tr>
<tr><th scope="row">Resizable panels</th><td><a href="https://spartan.ng/components/resizable">Resizable</a></td><td><a href="https://zardui.com/docs/components/resizable">Resizable</a></td><td>&mdash;</td><td>&mdash;</td><td><a href="https://primeng.dev/splitter">Splitter</a></td><td><a href="https://ng.ant.design/components/splitter/en">Splitter</a></td><td><a href="https://www.telerik.com/kendo-angular-ui/components/layout/splitter">Splitter</a></td><td><a href="https://js.devexpress.com/Angular/Documentation/ApiReference/UI_Components/dxSplitter/">Splitter</a></td><td><a href="https://www.infragistics.com/products/ignite-ui-angular/angular/components/splitter">Splitter</a></td></tr>
<tr><th scope="row">Scroll area</th><td><a href="https://spartan.ng/components/scroll-area">Scroll Area</a></td><td>&mdash;</td><td><a href="https://taiga-ui.dev/components/scrollbar/">Scrollbar</a></td><td>&mdash;</td><td><a href="https://primeng.dev/scrollarea">ScrollArea</a></td><td>&mdash;</td><td>&mdash;</td><td><a href="https://js.devexpress.com/Angular/Documentation/ApiReference/UI_Components/dxScrollView/">ScrollView</a></td><td>&mdash;</td></tr>
<tr><th scope="row">Sheet / bottom sheet</th><td><a href="https://spartan.ng/components/sheet">Sheet</a></td><td><a href="https://zardui.com/docs/components/sheet">Sheet</a></td><td><a href="https://taiga-ui.dev/components/bottom-sheet/">Bottom Sheet</a><br /><a href="https://taiga-ui.dev/components/sheet-dialog/">Sheet Dialog</a></td><td><a href="https://material.angular.dev/components/bottom-sheet">Bottom Sheet</a></td><td>&mdash;</td><td>&mdash;</td><td>&mdash;</td><td>&mdash;</td><td>&mdash;</td></tr>
<tr><th scope="row">Shrink-wrap container</th><td>&mdash;</td><td>&mdash;</td><td><a href="https://taiga-ui.dev/components/shrink-wrap/">Shrink Wrap</a></td><td>&mdash;</td><td>&mdash;</td><td>&mdash;</td><td>&mdash;</td><td>&mdash;</td><td>&mdash;</td></tr>
<tr><th scope="row">Sidebar</th><td><a href="https://spartan.ng/components/sidebar">Sidebar</a></td><td><a href="https://zardui.com/docs/components/sidebar">Sidebar</a></td><td>&mdash;</td><td>&mdash;</td><td><a href="https://primeng.dev/sidebar">Sidebar</a></td><td>&mdash;</td><td>&mdash;</td><td>&mdash;</td><td>&mdash;</td></tr>
<tr><th scope="row">Slide transition</th><td>&mdash;</td><td>&mdash;</td><td><a href="https://taiga-ui.dev/components/slides/">Slides</a></td><td>&mdash;</td><td>&mdash;</td><td>&mdash;</td><td>&mdash;</td><td>&mdash;</td><td>&mdash;</td></tr>
<tr><th scope="row">Spacing</th><td>&mdash;</td><td>&mdash;</td><td>&mdash;</td><td>&mdash;</td><td>&mdash;</td><td><a href="https://ng.ant.design/components/space/en">Space</a></td><td>&mdash;</td><td>&mdash;</td><td>&mdash;</td></tr>
<tr><th scope="row">Sticky / affix</th><td>&mdash;</td><td>&mdash;</td><td>&mdash;</td><td>&mdash;</td><td>&mdash;</td><td><a href="https://ng.ant.design/components/affix/en">Affix</a></td><td>&mdash;</td><td>&mdash;</td><td>&mdash;</td></tr>
<tr><th scope="row">Surface</th><td>&mdash;</td><td>&mdash;</td><td><a href="https://taiga-ui.dev/components/surface/">Surface</a></td><td>&mdash;</td><td>&mdash;</td><td>&mdash;</td><td>&mdash;</td><td>&mdash;</td><td>&mdash;</td></tr>
<tr><th scope="row">Swipe actions</th><td>&mdash;</td><td>&mdash;</td><td><a href="https://taiga-ui.dev/components/swipe-actions/">Swipe Actions</a></td><td>&mdash;</td><td>&mdash;</td><td>&mdash;</td><td>&mdash;</td><td>&mdash;</td><td>&mdash;</td></tr>
<tr><th scope="row">Tiles</th><td>&mdash;</td><td>&mdash;</td><td><a href="https://taiga-ui.dev/components/tiles/">Tiles</a></td><td>&mdash;</td><td>&mdash;</td><td>&mdash;</td><td><a href="https://www.telerik.com/kendo-angular-ui/components/layout/tilelayout">TileLayout</a></td><td><a href="https://js.devexpress.com/Angular/Documentation/ApiReference/UI_Components/dxTileView/">TileView</a></td><td><a href="https://www.infragistics.com/products/ignite-ui-angular/angular/components/tile-manager">Tile Manager</a><br /><a href="https://www.infragistics.com/products/ignite-ui-angular/angular/components/dashboard-tile">Dashboard Tile</a></td></tr>
<tr><th scope="row">Tooltip</th><td><a href="https://spartan.ng/components/tooltip">Tooltip</a></td><td><a href="https://zardui.com/docs/components/tooltip">Tooltip</a></td><td><a href="https://taiga-ui.dev/components/tooltip/">Tooltip</a><br /><a href="https://taiga-ui.dev/directives/hint/">Hint (directive)</a></td><td><a href="https://material.angular.dev/components/tooltip">Tooltip</a></td><td><a href="https://primeng.dev/tooltip">Tooltip</a></td><td><a href="https://ng.ant.design/components/tooltip/en">Tooltip</a></td><td><a href="https://www.telerik.com/kendo-angular-ui/components/tooltips/tooltip">Tooltip</a></td><td><a href="https://js.devexpress.com/Angular/Documentation/ApiReference/UI_Components/dxTooltip/">Tooltip</a></td><td><a href="https://www.infragistics.com/products/ignite-ui-angular/angular/components/tooltip">Tooltip (directive)</a></td></tr>
</tbody>
</table>

<h3 id="components-feedbackandloading">Feedback and loading</h3>

<table class="component-matrix" tabindex="0" aria-labelledby="components-feedbackandloading">
<thead>
<tr><th scope="col">Component</th><th scope="col"><a href="https://spartan.ng/documentation/introduction">Spartan</a></th><th scope="col"><a href="https://zardui.com/docs/components">Zard UI</a></th><th scope="col"><a href="https://taiga-ui.dev/">Taiga UI</a></th><th scope="col"><a href="https://material.angular.dev/components/categories">Angular Material</a></th><th scope="col"><a href="https://primeng.dev/components">PrimeNG</a></th><th scope="col"><a href="https://ng.ant.design/components/overview/en">NG-ZORRO</a></th><th scope="col"><a href="https://www.telerik.com/kendo-angular-ui/components/">Kendo UI for Angular</a></th><th scope="col"><a href="https://js.devexpress.com/Angular/Documentation/ApiReference/UI_Components/">DevExtreme Angular</a></th><th scope="col"><a href="https://www.infragistics.com/products/ignite-ui-angular/angular/components/general/open-source-vs-premium">Ignite UI for Angular</a></th></tr>
</thead>
<tbody>
<tr><th scope="row">Alert / notification</th><td><a href="https://spartan.ng/components/alert">Alert</a><br /><a href="https://spartan.ng/components/message">Message</a></td><td><a href="https://zardui.com/docs/components/alert">Alert</a><br /><a href="https://zardui.com/docs/components/message">Message</a></td><td><a href="https://taiga-ui.dev/components/message/">Message</a><br /><a href="https://taiga-ui.dev/components/notification/">Notification</a></td><td>&mdash;</td><td><a href="https://primeng.dev/message">Message</a></td><td><a href="https://ng.ant.design/components/alert/en">Alert</a><br /><a href="https://ng.ant.design/components/message/en">Message</a><br /><a href="https://ng.ant.design/components/notification/en">Notification</a></td><td><a href="https://www.telerik.com/kendo-angular-ui/components/notification">Notification</a></td><td>&mdash;</td><td><a href="https://www.infragistics.com/products/ignite-ui-angular/angular/components/banner">Banner</a></td></tr>
<tr><th scope="row">Blocking notification</th><td>&mdash;</td><td>&mdash;</td><td><a href="https://taiga-ui.dev/components/notification-middle/">Notification Middle</a></td><td>&mdash;</td><td>&mdash;</td><td>&mdash;</td><td>&mdash;</td><td>&mdash;</td><td>&mdash;</td></tr>
<tr><th scope="row">Blocking UI</th><td>&mdash;</td><td>&mdash;</td><td>&mdash;</td><td>&mdash;</td><td><a href="https://primeng.dev/blockui">BlockUI</a></td><td>&mdash;</td><td>&mdash;</td><td>&mdash;</td><td>&mdash;</td></tr>
<tr><th scope="row">Clipboard copy</th><td>&mdash;</td><td>&mdash;</td><td><a href="https://taiga-ui.dev/components/copy/">Copy</a></td><td>&mdash;</td><td>&mdash;</td><td>&mdash;</td><td>&mdash;</td><td>&mdash;</td><td>&mdash;</td></tr>
<tr><th scope="row">Empty state</th><td><a href="https://spartan.ng/components/empty">Empty</a></td><td><a href="https://zardui.com/docs/components/empty">Empty</a></td><td>&mdash;</td><td>&mdash;</td><td>&mdash;</td><td><a href="https://ng.ant.design/components/empty/en">Empty</a></td><td>&mdash;</td><td>&mdash;</td><td>&mdash;</td></tr>
<tr><th scope="row">Inline editing</th><td>&mdash;</td><td>&mdash;</td><td>&mdash;</td><td>&mdash;</td><td><a href="https://primeng.dev/inplace">Inplace</a></td><td>&mdash;</td><td>&mdash;</td><td>&mdash;</td><td>&mdash;</td></tr>
<tr><th scope="row">Loading shimmer</th><td>&mdash;</td><td>&mdash;</td><td><a href="https://taiga-ui.dev/directives/shimmer/">Shimmer (directive)</a></td><td>&mdash;</td><td>&mdash;</td><td>&mdash;</td><td>&mdash;</td><td>&mdash;</td><td>&mdash;</td></tr>
<tr><th scope="row">Loading spinner</th><td><a href="https://spartan.ng/components/spinner">Spinner</a></td><td><a href="https://zardui.com/docs/components/spinner">Spinner</a></td><td><a href="https://taiga-ui.dev/components/loader/">Loader</a></td><td>&mdash;</td><td>&mdash;</td><td><a href="https://ng.ant.design/components/spin/en">Spin</a></td><td><a href="https://www.telerik.com/kendo-angular-ui/components/indicators/loader">Loader</a></td><td><a href="https://js.devexpress.com/Angular/Documentation/ApiReference/UI_Components/dxLoadIndicator/">LoadIndicator</a><br /><a href="https://js.devexpress.com/Angular/Documentation/ApiReference/UI_Components/dxLoadPanel/">LoadPanel</a></td><td>&mdash;</td></tr>
<tr><th scope="row">Meter</th><td>&mdash;</td><td>&mdash;</td><td><a href="https://taiga-ui.dev/components/meter/">Meter</a></td><td>&mdash;</td><td><a href="https://primeng.dev/metergroup">MeterGroup</a></td><td>&mdash;</td><td>&mdash;</td><td>&mdash;</td><td>&mdash;</td></tr>
<tr><th scope="row">Progress indicator</th><td><a href="https://spartan.ng/components/progress">Progress</a></td><td><a href="https://zardui.com/docs/components/progress">Progress</a></td><td><a href="https://taiga-ui.dev/components/progress-bar/">Progress Bar</a><br /><a href="https://taiga-ui.dev/components/progress-circle/">Progress Circle</a><br /><a href="https://taiga-ui.dev/components/progress-segmented/">Progress Segmented</a></td><td><a href="https://material.angular.dev/components/progress-bar">Progress Bar</a><br /><a href="https://material.angular.dev/components/progress-spinner">Progress Spinner</a></td><td><a href="https://primeng.dev/progressbar">ProgressBar</a><br /><a href="https://primeng.dev/progressspinner">ProgressSpinner</a></td><td><a href="https://ng.ant.design/components/progress/en">Progress</a></td><td><a href="https://www.telerik.com/kendo-angular-ui/components/progressbars/progressbar">ProgressBar</a><br /><a href="https://www.telerik.com/kendo-angular-ui/components/progressbars/chunkprogressbar">ChunkProgressBar</a><br /><a href="https://www.telerik.com/kendo-angular-ui/components/progressbars/circularprogressbar">CircularProgressBar</a></td><td><a href="https://js.devexpress.com/Angular/Documentation/ApiReference/UI_Components/dxProgressBar/">ProgressBar</a></td><td><a href="https://www.infragistics.com/products/ignite-ui-angular/angular/components/circular-progress">Circular Progress</a><br /><a href="https://www.infragistics.com/products/ignite-ui-angular/angular/components/linear-progress">Linear Progress</a></td></tr>
<tr><th scope="row">Pull to refresh</th><td>&mdash;</td><td>&mdash;</td><td><a href="https://taiga-ui.dev/components/pull-to-refresh/">Pull To Refresh</a></td><td>&mdash;</td><td>&mdash;</td><td>&mdash;</td><td>&mdash;</td><td>&mdash;</td><td>&mdash;</td></tr>
<tr><th scope="row">Pulse indicator</th><td>&mdash;</td><td>&mdash;</td><td><a href="https://taiga-ui.dev/components/pulse/">Pulse</a></td><td>&mdash;</td><td>&mdash;</td><td>&mdash;</td><td>&mdash;</td><td>&mdash;</td><td>&mdash;</td></tr>
<tr><th scope="row">Push notification</th><td>&mdash;</td><td>&mdash;</td><td><a href="https://taiga-ui.dev/components/push/">Push</a></td><td>&mdash;</td><td>&mdash;</td><td>&mdash;</td><td>&mdash;</td><td>&mdash;</td><td>&mdash;</td></tr>
<tr><th scope="row">Result state</th><td>&mdash;</td><td>&mdash;</td><td>&mdash;</td><td>&mdash;</td><td>&mdash;</td><td><a href="https://ng.ant.design/components/result/en">Result</a></td><td>&mdash;</td><td>&mdash;</td><td>&mdash;</td></tr>
<tr><th scope="row">Ripple effect</th><td>&mdash;</td><td>&mdash;</td><td>&mdash;</td><td><a href="https://material.angular.dev/components/ripple">Ripples (directive)</a></td><td>&mdash;</td><td>&mdash;</td><td><a href="https://www.telerik.com/kendo-angular-ui/components/ripple">Ripple</a></td><td>&mdash;</td><td><a href="https://www.infragistics.com/products/ignite-ui-angular/angular/components/ripple">Ripple (directive)</a></td></tr>
<tr><th scope="row">Scroll-to-top control</th><td>&mdash;</td><td>&mdash;</td><td>&mdash;</td><td>&mdash;</td><td><a href="https://primeng.dev/scrolltop">ScrollTop</a></td><td>&mdash;</td><td>&mdash;</td><td>&mdash;</td><td>&mdash;</td></tr>
<tr><th scope="row">Skeleton placeholder</th><td><a href="https://spartan.ng/components/skeleton">Skeleton</a></td><td><a href="https://zardui.com/docs/components/skeleton">Skeleton</a></td><td><a href="https://taiga-ui.dev/directives/skeleton/">Skeleton (directive)</a></td><td>&mdash;</td><td><a href="https://primeng.dev/skeleton">Skeleton</a></td><td><a href="https://ng.ant.design/components/skeleton/en">Skeleton</a></td><td><a href="https://www.telerik.com/kendo-angular-ui/components/indicators/skeleton">Skeleton</a></td><td>&mdash;</td><td>&mdash;</td></tr>
<tr><th scope="row">Status</th><td>&mdash;</td><td>&mdash;</td><td><a href="https://taiga-ui.dev/components/status/">Status</a></td><td>&mdash;</td><td>&mdash;</td><td>&mdash;</td><td>&mdash;</td><td>&mdash;</td><td>&mdash;</td></tr>
<tr><th scope="row">Toast</th><td><a href="https://spartan.ng/components/sonner">Sonner (Toast)</a></td><td><a href="https://zardui.com/docs/components/sonner">Sonner</a></td><td><a href="https://taiga-ui.dev/components/toast/">Toast</a></td><td><a href="https://material.angular.dev/components/snack-bar">Snackbar</a></td><td><a href="https://primeng.dev/toast">Toast</a></td><td>&mdash;</td><td>&mdash;</td><td><a href="https://js.devexpress.com/Angular/Documentation/ApiReference/UI_Components/dxToast/">Toast</a></td><td><a href="https://www.infragistics.com/products/ignite-ui-angular/angular/components/snackbar">Snackbar</a><br /><a href="https://www.infragistics.com/products/ignite-ui-angular/angular/components/toast">Toast</a></td></tr>
<tr><th scope="row">Validation error</th><td>&mdash;</td><td>&mdash;</td><td><a href="https://taiga-ui.dev/components/error/">Error</a></td><td>&mdash;</td><td>&mdash;</td><td>&mdash;</td><td>&mdash;</td><td>&mdash;</td><td>&mdash;</td></tr>
</tbody>
</table>

<h3 id="components-filesmediaandspecialisedcontrols">Files, media and specialised controls</h3>

<table class="component-matrix" tabindex="0" aria-labelledby="components-filesmediaandspecialisedcontrols">
<thead>
<tr><th scope="col">Component</th><th scope="col"><a href="https://spartan.ng/documentation/introduction">Spartan</a></th><th scope="col"><a href="https://zardui.com/docs/components">Zard UI</a></th><th scope="col"><a href="https://taiga-ui.dev/">Taiga UI</a></th><th scope="col"><a href="https://material.angular.dev/components/categories">Angular Material</a></th><th scope="col"><a href="https://primeng.dev/components">PrimeNG</a></th><th scope="col"><a href="https://ng.ant.design/components/overview/en">NG-ZORRO</a></th><th scope="col"><a href="https://www.telerik.com/kendo-angular-ui/components/">Kendo UI for Angular</a></th><th scope="col"><a href="https://js.devexpress.com/Angular/Documentation/ApiReference/UI_Components/">DevExtreme Angular</a></th><th scope="col"><a href="https://www.infragistics.com/products/ignite-ui-angular/angular/components/general/open-source-vs-premium">Ignite UI for Angular</a></th></tr>
</thead>
<tbody>
<tr><th scope="row">AI prompt</th><td>&mdash;</td><td>&mdash;</td><td>&mdash;</td><td>&mdash;</td><td>&mdash;</td><td>&mdash;</td><td><a href="https://www.telerik.com/kendo-angular-ui/components/conversational-ui/aiprompt">AIPrompt</a><br /><a href="https://www.telerik.com/kendo-angular-ui/components/conversational-ui/inline-aiprompt">InlineAIPrompt</a><br /><a href="https://www.telerik.com/kendo-angular-ui/components/conversational-ui/promptbox">PromptBox</a></td><td>&mdash;</td><td>&mdash;</td></tr>
<tr><th scope="row">Attachment</th><td><a href="https://spartan.ng/components/attachment">Attachment</a></td><td><a href="https://zardui.com/docs/components/attachment">Attachment</a></td><td><a href="https://taiga-ui.dev/components/file/">File</a></td><td>&mdash;</td><td>&mdash;</td><td>&mdash;</td><td>&mdash;</td><td>&mdash;</td><td>&mdash;</td></tr>
<tr><th scope="row">Barcode</th><td>&mdash;</td><td>&mdash;</td><td>&mdash;</td><td>&mdash;</td><td>&mdash;</td><td>&mdash;</td><td><a href="https://www.telerik.com/kendo-angular-ui/components/barcodes/barcode">Barcode</a></td><td>&mdash;</td><td>&mdash;</td></tr>
<tr><th scope="row">Chat</th><td>&mdash;</td><td>&mdash;</td><td>&mdash;</td><td>&mdash;</td><td>&mdash;</td><td>&mdash;</td><td><a href="https://www.telerik.com/kendo-angular-ui/components/conversational-ui/chat">Chat</a></td><td><a href="https://js.devexpress.com/Angular/Documentation/ApiReference/UI_Components/dxChat/">Chat</a></td><td><a href="https://www.infragistics.com/products/ignite-ui-angular/angular/components/chat">Chat</a></td></tr>
<tr><th scope="row">Chat bubble</th><td><a href="https://spartan.ng/components/bubble">Bubble</a></td><td><a href="https://zardui.com/docs/components/bubble">Bubble</a></td><td>&mdash;</td><td>&mdash;</td><td>&mdash;</td><td>&mdash;</td><td>&mdash;</td><td>&mdash;</td><td>&mdash;</td></tr>
<tr><th scope="row">File manager</th><td>&mdash;</td><td>&mdash;</td><td>&mdash;</td><td>&mdash;</td><td>&mdash;</td><td>&mdash;</td><td>&mdash;</td><td><a href="https://js.devexpress.com/Angular/Documentation/ApiReference/UI_Components/dxFileManager/">FileManager</a></td><td>&mdash;</td></tr>
<tr><th scope="row">File upload</th><td>&mdash;</td><td>&mdash;</td><td><a href="https://taiga-ui.dev/components/input-files/">Input Files</a></td><td>&mdash;</td><td>&mdash;</td><td><a href="https://ng.ant.design/components/upload/en">Upload</a></td><td><a href="https://www.telerik.com/kendo-angular-ui/components/uploads/upload">Upload</a><br /><a href="https://www.telerik.com/kendo-angular-ui/components/uploads/fileselect">FileSelect</a></td><td><a href="https://js.devexpress.com/Angular/Documentation/ApiReference/UI_Components/dxFileUploader/">FileUploader</a></td><td>&mdash;</td></tr>
<tr><th scope="row">Hash code</th><td>&mdash;</td><td>&mdash;</td><td>&mdash;</td><td>&mdash;</td><td>&mdash;</td><td><a href="https://ng.ant.design/components/hash-code/en">HashCode</a></td><td>&mdash;</td><td>&mdash;</td><td>&mdash;</td></tr>
<tr><th scope="row">Image</th><td>&mdash;</td><td>&mdash;</td><td>&mdash;</td><td>&mdash;</td><td><a href="https://primeng.dev/image">Image</a></td><td><a href="https://ng.ant.design/components/image/en">Image</a></td><td>&mdash;</td><td>&mdash;</td><td>&mdash;</td></tr>
<tr><th scope="row">Image gallery</th><td>&mdash;</td><td>&mdash;</td><td>&mdash;</td><td>&mdash;</td><td><a href="https://primeng.dev/galleria">Galleria</a></td><td>&mdash;</td><td>&mdash;</td><td><a href="https://js.devexpress.com/Angular/Documentation/ApiReference/UI_Components/dxGallery/">Gallery</a></td><td>&mdash;</td></tr>
<tr><th scope="row">Media preview</th><td>&mdash;</td><td>&mdash;</td><td><a href="https://taiga-ui.dev/components/preview/">Preview</a></td><td>&mdash;</td><td>&mdash;</td><td>&mdash;</td><td>&mdash;</td><td>&mdash;</td><td>&mdash;</td></tr>
<tr><th scope="row">Mention input</th><td>&mdash;</td><td>&mdash;</td><td>&mdash;</td><td>&mdash;</td><td>&mdash;</td><td><a href="https://ng.ant.design/components/mention/en">Mention</a></td><td>&mdash;</td><td>&mdash;</td><td>&mdash;</td></tr>
<tr><th scope="row">Message scroller</th><td><a href="https://spartan.ng/components/message-scroller">Message Scroller</a></td><td>&mdash;</td><td>&mdash;</td><td>&mdash;</td><td>&mdash;</td><td>&mdash;</td><td>&mdash;</td><td>&mdash;</td><td>&mdash;</td></tr>
<tr><th scope="row">PDF viewer</th><td>&mdash;</td><td>&mdash;</td><td><a href="https://taiga-ui.dev/components/pdf-viewer/">Pdf Viewer</a></td><td>&mdash;</td><td>&mdash;</td><td>&mdash;</td><td><a href="https://www.telerik.com/kendo-angular-ui/components/pdfviewer">PDFViewer</a></td><td>&mdash;</td><td>&mdash;</td></tr>
<tr><th scope="row">QR code</th><td>&mdash;</td><td>&mdash;</td><td>&mdash;</td><td>&mdash;</td><td>&mdash;</td><td><a href="https://ng.ant.design/components/qr-code/en">QRCode</a></td><td><a href="https://www.telerik.com/kendo-angular-ui/components/barcodes/qrcode">QR Code</a></td><td>&mdash;</td><td><a href="https://www.infragistics.com/products/ignite-ui-angular/angular/components/inputs/qr-code">QR Code</a></td></tr>
<tr><th scope="row">Questionnaire</th><td><a href="https://spartan.ng/components/questionnaire">Questionnaire</a></td><td>&mdash;</td><td>&mdash;</td><td>&mdash;</td><td>&mdash;</td><td>&mdash;</td><td>&mdash;</td><td>&mdash;</td><td>&mdash;</td></tr>
<tr><th scope="row">Rich-text editor</th><td>&mdash;</td><td>&mdash;</td><td>&mdash;</td><td>&mdash;</td><td>&mdash;</td><td>&mdash;</td><td><a href="https://www.telerik.com/kendo-angular-ui/components/editor">Editor</a></td><td><a href="https://js.devexpress.com/Angular/Documentation/ApiReference/UI_Components/dxHtmlEditor/">HtmlEditor</a></td><td>&mdash;</td></tr>
<tr><th scope="row">Smart paste button</th><td>&mdash;</td><td>&mdash;</td><td>&mdash;</td><td>&mdash;</td><td>&mdash;</td><td>&mdash;</td><td><a href="https://www.telerik.com/kendo-angular-ui/components/buttons/smartpastebutton">SmartPasteButton</a></td><td>&mdash;</td><td>&mdash;</td></tr>
<tr><th scope="row">Speech-to-text button</th><td>&mdash;</td><td>&mdash;</td><td>&mdash;</td><td>&mdash;</td><td>&mdash;</td><td>&mdash;</td><td><a href="https://www.telerik.com/kendo-angular-ui/components/buttons/speechtotextbutton">SpeechToTextButton</a></td><td>&mdash;</td><td>&mdash;</td></tr>
<tr><th scope="row">Spreadsheet</th><td>&mdash;</td><td>&mdash;</td><td>&mdash;</td><td>&mdash;</td><td>&mdash;</td><td>&mdash;</td><td><a href="https://www.telerik.com/kendo-angular-ui/components/spreadsheet">Spreadsheet</a></td><td>&mdash;</td><td><a href="https://www.infragistics.com/products/ignite-ui-angular/angular/components/spreadsheet-overview">Spreadsheet</a></td></tr>
<tr><th scope="row">Terminal</th><td>&mdash;</td><td>&mdash;</td><td>&mdash;</td><td>&mdash;</td><td><a href="https://primeng.dev/terminal">Terminal</a></td><td>&mdash;</td><td>&mdash;</td><td>&mdash;</td><td>&mdash;</td></tr>
<tr><th scope="row">Watermark</th><td>&mdash;</td><td>&mdash;</td><td>&mdash;</td><td>&mdash;</td><td>&mdash;</td><td><a href="https://ng.ant.design/components/watermark/en">Watermark</a></td><td>&mdash;</td><td>&mdash;</td><td>&mdash;</td></tr>
</tbody>
</table>

<h3 id="components-inputsandselection">Inputs and selection</h3>

<table class="component-matrix" tabindex="0" aria-labelledby="components-inputsandselection">
<thead>
<tr><th scope="col">Component</th><th scope="col"><a href="https://spartan.ng/documentation/introduction">Spartan</a></th><th scope="col"><a href="https://zardui.com/docs/components">Zard UI</a></th><th scope="col"><a href="https://taiga-ui.dev/">Taiga UI</a></th><th scope="col"><a href="https://material.angular.dev/components/categories">Angular Material</a></th><th scope="col"><a href="https://primeng.dev/components">PrimeNG</a></th><th scope="col"><a href="https://ng.ant.design/components/overview/en">NG-ZORRO</a></th><th scope="col"><a href="https://www.telerik.com/kendo-angular-ui/components/">Kendo UI for Angular</a></th><th scope="col"><a href="https://js.devexpress.com/Angular/Documentation/ApiReference/UI_Components/">DevExtreme Angular</a></th><th scope="col"><a href="https://www.infragistics.com/products/ignite-ui-angular/angular/components/general/open-source-vs-premium">Ignite UI for Angular</a></th></tr>
</thead>
<tbody>
<tr><th scope="row">Autocomplete</th><td><a href="https://spartan.ng/components/autocomplete">Autocomplete</a></td><td>&mdash;</td><td>&mdash;</td><td><a href="https://material.angular.dev/components/autocomplete">Autocomplete</a></td><td><a href="https://primeng.dev/autocomplete">AutoComplete</a></td><td><a href="https://ng.ant.design/components/auto-complete/en">AutoComplete</a></td><td><a href="https://www.telerik.com/kendo-angular-ui/components/dropdowns/autocomplete">AutoComplete</a></td><td><a href="https://js.devexpress.com/Angular/Documentation/ApiReference/UI_Components/dxAutocomplete/">Autocomplete</a></td><td><a href="https://www.infragistics.com/products/ignite-ui-angular/angular/components/autocomplete">Autocomplete (directive)</a></td></tr>
<tr><th scope="row">Cascading select</th><td>&mdash;</td><td>&mdash;</td><td>&mdash;</td><td>&mdash;</td><td><a href="https://primeng.dev/cascadeselect">CascadeSelect</a></td><td><a href="https://ng.ant.design/components/cascader/en">Cascader</a></td><td>&mdash;</td><td>&mdash;</td><td>&mdash;</td></tr>
<tr><th scope="row">Check list</th><td>&mdash;</td><td>&mdash;</td><td>&mdash;</td><td>&mdash;</td><td>&mdash;</td><td><a href="https://ng.ant.design/components/check-list/en">CheckList</a></td><td>&mdash;</td><td>&mdash;</td><td>&mdash;</td></tr>
<tr><th scope="row">Checkbox</th><td><a href="https://spartan.ng/components/checkbox">Checkbox</a></td><td><a href="https://zardui.com/docs/components/checkbox">Checkbox</a></td><td><a href="https://taiga-ui.dev/components/checkbox/">Checkbox</a></td><td><a href="https://material.angular.dev/components/checkbox">Checkbox</a></td><td><a href="https://primeng.dev/checkbox">Checkbox</a></td><td><a href="https://ng.ant.design/components/checkbox/en">Checkbox</a></td><td><a href="https://www.telerik.com/kendo-angular-ui/components/inputs/checkbox">CheckBox</a></td><td><a href="https://js.devexpress.com/Angular/Documentation/ApiReference/UI_Components/dxCheckBox/">CheckBox</a></td><td><a href="https://www.infragistics.com/products/ignite-ui-angular/angular/components/inputs/checkbox">Checkbox</a></td></tr>
<tr><th scope="row">Choice block</th><td>&mdash;</td><td>&mdash;</td><td><a href="https://taiga-ui.dev/components/block/">Block</a></td><td>&mdash;</td><td>&mdash;</td><td>&mdash;</td><td>&mdash;</td><td>&mdash;</td><td>&mdash;</td></tr>
<tr><th scope="row">Colour picker</th><td>&mdash;</td><td>&mdash;</td><td><a href="https://taiga-ui.dev/components/input-color/">Input Color</a></td><td>&mdash;</td><td><a href="https://primeng.dev/inputcolor">InputColor</a></td><td><a href="https://ng.ant.design/components/color-picker/en">ColorPicker</a></td><td><a href="https://www.telerik.com/kendo-angular-ui/components/inputs/colorgradient">ColorGradient</a><br /><a href="https://www.telerik.com/kendo-angular-ui/components/inputs/colorpalette">ColorPalette</a><br /><a href="https://www.telerik.com/kendo-angular-ui/components/inputs/colorpicker">ColorPicker</a><br /><a href="https://www.telerik.com/kendo-angular-ui/components/inputs/flatcolorpicker">FlatColorPicker</a></td><td><a href="https://js.devexpress.com/Angular/Documentation/ApiReference/UI_Components/dxColorBox/">ColorBox</a></td><td><a href="https://www.infragistics.com/products/ignite-ui-angular/angular/components/inputs/color-picker">Color Picker</a></td></tr>
<tr><th scope="row">Combobox</th><td><a href="https://spartan.ng/components/combobox">Combobox</a></td><td><a href="https://zardui.com/docs/components/combobox">Combobox</a></td><td><a href="https://taiga-ui.dev/components/combo-box/">Combo Box</a></td><td>&mdash;</td><td>&mdash;</td><td>&mdash;</td><td><a href="https://www.telerik.com/kendo-angular-ui/components/dropdowns/combobox">ComboBox</a><br /><a href="https://www.telerik.com/kendo-angular-ui/components/dropdowns/multicolumncombobox">MultiColumnComboBox</a></td><td>&mdash;</td><td><a href="https://www.infragistics.com/products/ignite-ui-angular/angular/components/combo">Combo</a><br /><a href="https://www.infragistics.com/products/ignite-ui-angular/angular/components/simple-combo">Simple Combo</a></td></tr>
<tr><th scope="row">Field label</th><td><a href="https://spartan.ng/components/label">Label</a></td><td>&mdash;</td><td><a href="https://taiga-ui.dev/components/label/">Label</a></td><td>&mdash;</td><td><a href="https://primeng.dev/label">Label</a></td><td>&mdash;</td><td><a href="https://www.telerik.com/kendo-angular-ui/components/labels/label">Label</a></td><td>&mdash;</td><td>&mdash;</td></tr>
<tr><th scope="row">Filter selection</th><td>&mdash;</td><td>&mdash;</td><td><a href="https://taiga-ui.dev/components/filter/">Filter</a></td><td>&mdash;</td><td>&mdash;</td><td>&mdash;</td><td>&mdash;</td><td>&mdash;</td><td>&mdash;</td></tr>
<tr><th scope="row">Floating input label</th><td>&mdash;</td><td>&mdash;</td><td>&mdash;</td><td>&mdash;</td><td><a href="https://primeng.dev/floatlabel">FloatLabel</a><br /><a href="https://primeng.dev/iftalabel">IftaLabel</a></td><td>&mdash;</td><td><a href="https://www.telerik.com/kendo-angular-ui/components/labels/floatinglabel">Floating Label</a></td><td>&mdash;</td><td>&mdash;</td></tr>
<tr><th scope="row">Form field</th><td><a href="https://spartan.ng/components/field">Field</a></td><td><a href="https://zardui.com/docs/components/field">Field</a></td><td>&mdash;</td><td><a href="https://material.angular.dev/components/form-field">Form Field</a></td><td>&mdash;</td><td>&mdash;</td><td>&mdash;</td><td>&mdash;</td><td>&mdash;</td></tr>
<tr><th scope="row">Inline input</th><td>&mdash;</td><td>&mdash;</td><td><a href="https://taiga-ui.dev/components/input-inline/">Input Inline</a></td><td>&mdash;</td><td>&mdash;</td><td>&mdash;</td><td>&mdash;</td><td>&mdash;</td><td>&mdash;</td></tr>
<tr><th scope="row">Input group</th><td><a href="https://spartan.ng/components/input-group">Input Group</a></td><td><a href="https://zardui.com/docs/components/input-group">Input Group</a></td><td>&mdash;</td><td>&mdash;</td><td><a href="https://primeng.dev/inputgroup">InputGroup</a></td><td>&mdash;</td><td>&mdash;</td><td>&mdash;</td><td><a href="https://www.infragistics.com/products/ignite-ui-angular/angular/components/input-group">Input Group</a></td></tr>
<tr><th scope="row">Input icon field</th><td>&mdash;</td><td>&mdash;</td><td>&mdash;</td><td>&mdash;</td><td><a href="https://primeng.dev/iconfield">IconField</a></td><td>&mdash;</td><td>&mdash;</td><td>&mdash;</td><td>&mdash;</td></tr>
<tr><th scope="row">Input mask</th><td>&mdash;</td><td>&mdash;</td><td>&mdash;</td><td>&mdash;</td><td><a href="https://primeng.dev/inputmask">InputMask</a></td><td>&mdash;</td><td><a href="https://www.telerik.com/kendo-angular-ui/components/inputs/maskedtextbox">MaskedTextBox</a></td><td>&mdash;</td><td><a href="https://www.infragistics.com/products/ignite-ui-angular/angular/components/mask">Mask (directive)</a></td></tr>
<tr><th scope="row">Knob</th><td>&mdash;</td><td>&mdash;</td><td>&mdash;</td><td>&mdash;</td><td><a href="https://primeng.dev/knob">Knob</a></td><td>&mdash;</td><td>&mdash;</td><td>&mdash;</td><td>&mdash;</td></tr>
<tr><th scope="row">Like button</th><td>&mdash;</td><td>&mdash;</td><td><a href="https://taiga-ui.dev/components/like/">Like</a></td><td>&mdash;</td><td>&mdash;</td><td>&mdash;</td><td>&mdash;</td><td>&mdash;</td><td>&mdash;</td></tr>
<tr><th scope="row">Multi-select</th><td>&mdash;</td><td>&mdash;</td><td>&mdash;</td><td>&mdash;</td><td>&mdash;</td><td>&mdash;</td><td><a href="https://www.telerik.com/kendo-angular-ui/components/dropdowns/multiselect">MultiSelect</a></td><td><a href="https://js.devexpress.com/Angular/Documentation/ApiReference/UI_Components/dxTagBox/">TagBox</a></td><td>&mdash;</td></tr>
<tr><th scope="row">Number input</th><td>&mdash;</td><td>&mdash;</td><td><a href="https://taiga-ui.dev/components/input-number/">Input Number</a></td><td>&mdash;</td><td><a href="https://primeng.dev/inputnumber">InputNumber</a></td><td><a href="https://ng.ant.design/components/input-number/en">InputNumber</a></td><td><a href="https://www.telerik.com/kendo-angular-ui/components/inputs/numerictextbox">NumericTextBox</a></td><td><a href="https://js.devexpress.com/Angular/Documentation/ApiReference/UI_Components/dxNumberBox/">NumberBox</a></td><td>&mdash;</td></tr>
<tr><th scope="row">On-screen keypad</th><td>&mdash;</td><td>&mdash;</td><td><a href="https://taiga-ui.dev/components/keypad/">Keypad</a></td><td>&mdash;</td><td>&mdash;</td><td>&mdash;</td><td>&mdash;</td><td>&mdash;</td><td>&mdash;</td></tr>
<tr><th scope="row">Password input</th><td>&mdash;</td><td>&mdash;</td><td>&mdash;</td><td>&mdash;</td><td><a href="https://primeng.dev/inputpassword">InputPassword</a></td><td>&mdash;</td><td>&mdash;</td><td>&mdash;</td><td>&mdash;</td></tr>
<tr><th scope="row">Payment-card input</th><td>&mdash;</td><td>&mdash;</td><td><a href="https://taiga-ui.dev/components/input-card/">Input Card</a><br /><a href="https://taiga-ui.dev/components/input-card-group/">Input Card Group</a></td><td>&mdash;</td><td>&mdash;</td><td>&mdash;</td><td>&mdash;</td><td>&mdash;</td><td>&mdash;</td></tr>
<tr><th scope="row">Phone input</th><td>&mdash;</td><td>&mdash;</td><td><a href="https://taiga-ui.dev/components/input-phone/">Input Phone</a><br /><a href="https://taiga-ui.dev/components/input-phone-international/">Input Phone International</a></td><td>&mdash;</td><td>&mdash;</td><td>&mdash;</td><td>&mdash;</td><td>&mdash;</td><td>&mdash;</td></tr>
<tr><th scope="row">PIN / OTP input</th><td><a href="https://spartan.ng/components/input-otp">Input OTP</a></td><td><a href="https://zardui.com/docs/components/input-otp">Input OTP</a></td><td><a href="https://taiga-ui.dev/components/input-pin/">Input Pin</a><br /><a href="https://taiga-ui.dev/components/pincode/">Pincode</a></td><td>&mdash;</td><td><a href="https://primeng.dev/inputotp">InputOtp</a></td><td>&mdash;</td><td><a href="https://www.telerik.com/kendo-angular-ui/components/inputs/otpinput">OTP Input</a></td><td>&mdash;</td><td>&mdash;</td></tr>
<tr><th scope="row">Radio group</th><td><a href="https://spartan.ng/components/radio-group">Radio Group</a></td><td><a href="https://zardui.com/docs/components/radio-group">Radio Group</a></td><td><a href="https://taiga-ui.dev/components/radio/">Radio</a></td><td><a href="https://material.angular.dev/components/radio">Radio Button</a></td><td><a href="https://primeng.dev/radiobutton">RadioButton</a></td><td><a href="https://ng.ant.design/components/radio/en">Radio</a></td><td><a href="https://www.telerik.com/kendo-angular-ui/components/inputs/radiobutton">RadioButton</a></td><td><a href="https://js.devexpress.com/Angular/Documentation/ApiReference/UI_Components/dxRadioGroup/">RadioGroup</a></td><td><a href="https://www.infragistics.com/products/ignite-ui-angular/angular/components/radio-button">Radio &amp; Radio Group</a></td></tr>
<tr><th scope="row">Range slider</th><td>&mdash;</td><td>&mdash;</td><td><a href="https://taiga-ui.dev/components/input-range/">Input Range</a><br /><a href="https://taiga-ui.dev/components/range/">Range</a></td><td>&mdash;</td><td>&mdash;</td><td>&mdash;</td><td><a href="https://www.telerik.com/kendo-angular-ui/components/inputs/rangeslider">RangeSlider</a></td><td><a href="https://js.devexpress.com/Angular/Documentation/ApiReference/UI_Components/dxRangeSlider/">RangeSlider</a></td><td>&mdash;</td></tr>
<tr><th scope="row">Rating</th><td>&mdash;</td><td>&mdash;</td><td><a href="https://taiga-ui.dev/components/rating/">Rating</a></td><td>&mdash;</td><td><a href="https://primeng.dev/rating">Rating</a></td><td><a href="https://ng.ant.design/components/rate/en">Rate</a></td><td><a href="https://www.telerik.com/kendo-angular-ui/components/inputs/rating">Rating</a></td><td>&mdash;</td><td><a href="https://www.infragistics.com/products/ignite-ui-angular/angular/components/rating">Rating</a></td></tr>
<tr><th scope="row">Select</th><td><a href="https://spartan.ng/components/native-select">Native Select</a><br /><a href="https://spartan.ng/components/select">Select</a></td><td><a href="https://zardui.com/docs/components/select">Select</a></td><td><a href="https://taiga-ui.dev/components/select/">Select</a></td><td><a href="https://material.angular.dev/components/select">Select</a></td><td><a href="https://primeng.dev/select">Select</a></td><td><a href="https://ng.ant.design/components/select/en">Select</a></td><td><a href="https://www.telerik.com/kendo-angular-ui/components/dropdowns/dropdownlist">DropDownList</a></td><td><a href="https://js.devexpress.com/Angular/Documentation/ApiReference/UI_Components/dxDropDownBox/">DropDownBox</a><br /><a href="https://js.devexpress.com/Angular/Documentation/ApiReference/UI_Components/dxLookup/">Lookup</a><br /><a href="https://js.devexpress.com/Angular/Documentation/ApiReference/UI_Components/dxSelectBox/">SelectBox</a></td><td><a href="https://www.infragistics.com/products/ignite-ui-angular/angular/components/select">Select</a></td></tr>
<tr><th scope="row">Signature input</th><td>&mdash;</td><td>&mdash;</td><td>&mdash;</td><td>&mdash;</td><td>&mdash;</td><td>&mdash;</td><td><a href="https://www.telerik.com/kendo-angular-ui/components/inputs/signature">Signature</a></td><td>&mdash;</td><td>&mdash;</td></tr>
<tr><th scope="row">Slider</th><td><a href="https://spartan.ng/components/slider">Slider</a></td><td><a href="https://zardui.com/docs/components/slider">Slider</a></td><td><a href="https://taiga-ui.dev/components/input-slider/">Input Slider</a><br /><a href="https://taiga-ui.dev/components/slider/">Slider</a></td><td><a href="https://material.angular.dev/components/slider">Slider</a></td><td><a href="https://primeng.dev/slider">Slider</a></td><td><a href="https://ng.ant.design/components/slider/en">Slider</a></td><td><a href="https://www.telerik.com/kendo-angular-ui/components/inputs/slider">Slider</a></td><td><a href="https://js.devexpress.com/Angular/Documentation/ApiReference/UI_Components/dxSlider/">Slider</a></td><td><a href="https://www.infragistics.com/products/ignite-ui-angular/angular/components/slider/slider">Slider</a></td></tr>
<tr><th scope="row">Switch</th><td><a href="https://spartan.ng/components/switch">Switch</a></td><td><a href="https://zardui.com/docs/components/switch">Switch</a></td><td><a href="https://taiga-ui.dev/components/switch/">Switch</a></td><td><a href="https://material.angular.dev/components/slide-toggle">Slide Toggle</a></td><td><a href="https://primeng.dev/toggleswitch">ToggleSwitch</a></td><td><a href="https://ng.ant.design/components/switch/en">Switch</a></td><td><a href="https://www.telerik.com/kendo-angular-ui/components/inputs/switch">Switch</a></td><td><a href="https://js.devexpress.com/Angular/Documentation/ApiReference/UI_Components/dxSwitch/">Switch</a></td><td><a href="https://www.infragistics.com/products/ignite-ui-angular/angular/components/inputs/switch">Switch</a></td></tr>
<tr><th scope="row">Text input</th><td><a href="https://spartan.ng/components/input">Input</a></td><td><a href="https://zardui.com/docs/components/input">Input</a></td><td><a href="https://taiga-ui.dev/components/input/">Input</a></td><td><a href="https://material.angular.dev/components/input">Input</a></td><td><a href="https://primeng.dev/inputtext">InputText</a></td><td><a href="https://ng.ant.design/components/input/en">Input</a></td><td><a href="https://www.telerik.com/kendo-angular-ui/components/inputs/textbox">TextBox</a></td><td><a href="https://js.devexpress.com/Angular/Documentation/ApiReference/UI_Components/dxTextBox/">TextBox</a></td><td><a href="https://www.infragistics.com/products/ignite-ui-angular/angular/components/label-input">Label &amp; Input</a></td></tr>
<tr><th scope="row">Textarea</th><td><a href="https://spartan.ng/components/textarea">Textarea</a></td><td><a href="https://zardui.com/docs/components/textarea">Textarea</a></td><td><a href="https://taiga-ui.dev/components/textarea/">Textarea</a></td><td>&mdash;</td><td><a href="https://primeng.dev/textarea">Textarea</a></td><td>&mdash;</td><td><a href="https://www.telerik.com/kendo-angular-ui/components/inputs/textarea">TextArea</a></td><td><a href="https://js.devexpress.com/Angular/Documentation/ApiReference/UI_Components/dxTextArea/">TextArea</a></td><td>&mdash;</td></tr>
<tr><th scope="row">Token / chip input</th><td>&mdash;</td><td>&mdash;</td><td><a href="https://taiga-ui.dev/components/input-chip/">Input Chip</a></td><td>&mdash;</td><td><a href="https://primeng.dev/inputtags">InputTags</a></td><td>&mdash;</td><td>&mdash;</td><td>&mdash;</td><td>&mdash;</td></tr>
<tr><th scope="row">Tree select</th><td>&mdash;</td><td>&mdash;</td><td>&mdash;</td><td>&mdash;</td><td><a href="https://primeng.dev/treeselect">TreeSelect</a></td><td><a href="https://ng.ant.design/components/tree-select/en">TreeSelect</a></td><td><a href="https://www.telerik.com/kendo-angular-ui/components/dropdowns/dropdowntree">DropDownTree</a><br /><a href="https://www.telerik.com/kendo-angular-ui/components/dropdowns/multiselecttree">MultiSelectTree</a></td><td>&mdash;</td><td>&mdash;</td></tr>
</tbody>
</table>

<h3 id="components-datadisplayandgrids">Data display and grids</h3>

<table class="component-matrix" tabindex="0" aria-labelledby="components-datadisplayandgrids">
<thead>
<tr><th scope="col">Component</th><th scope="col"><a href="https://spartan.ng/documentation/introduction">Spartan</a></th><th scope="col"><a href="https://zardui.com/docs/components">Zard UI</a></th><th scope="col"><a href="https://taiga-ui.dev/">Taiga UI</a></th><th scope="col"><a href="https://material.angular.dev/components/categories">Angular Material</a></th><th scope="col"><a href="https://primeng.dev/components">PrimeNG</a></th><th scope="col"><a href="https://ng.ant.design/components/overview/en">NG-ZORRO</a></th><th scope="col"><a href="https://www.telerik.com/kendo-angular-ui/components/">Kendo UI for Angular</a></th><th scope="col"><a href="https://js.devexpress.com/Angular/Documentation/ApiReference/UI_Components/">DevExtreme Angular</a></th><th scope="col"><a href="https://www.infragistics.com/products/ignite-ui-angular/angular/components/general/open-source-vs-premium">Ignite UI for Angular</a></th></tr>
</thead>
<tbody>
<tr><th scope="row">Avatar</th><td><a href="https://spartan.ng/components/avatar">Avatar</a></td><td><a href="https://zardui.com/docs/components/avatar">Avatar</a></td><td><a href="https://taiga-ui.dev/components/avatar/">Avatar</a></td><td>&mdash;</td><td><a href="https://primeng.dev/avatar">Avatar</a></td><td><a href="https://ng.ant.design/components/avatar/en">Avatar</a></td><td><a href="https://www.telerik.com/kendo-angular-ui/components/layout/avatar">Avatar</a></td><td>&mdash;</td><td><a href="https://www.infragistics.com/products/ignite-ui-angular/angular/components/layouts/avatar">Avatar</a></td></tr>
<tr><th scope="row">Badge</th><td><a href="https://spartan.ng/components/badge">Badge</a></td><td><a href="https://zardui.com/docs/components/badge">Badge</a></td><td><a href="https://taiga-ui.dev/components/badge/">Badge</a><br /><a href="https://taiga-ui.dev/components/badge-notification/">Badge Notification</a><br /><a href="https://taiga-ui.dev/components/badged-content/">Badged Content</a></td><td><a href="https://material.angular.dev/components/badge">Badge</a></td><td><a href="https://primeng.dev/badge">Badge</a></td><td><a href="https://ng.ant.design/components/badge/en">Badge</a></td><td><a href="https://www.telerik.com/kendo-angular-ui/components/indicators/badge">Badge</a></td><td>&mdash;</td><td><a href="https://www.infragistics.com/products/ignite-ui-angular/angular/components/inputs/badge">Badge</a></td></tr>
<tr><th scope="row">Card view</th><td>&mdash;</td><td>&mdash;</td><td>&mdash;</td><td>&mdash;</td><td>&mdash;</td><td>&mdash;</td><td>&mdash;</td><td><a href="https://js.devexpress.com/Angular/Documentation/ApiReference/UI_Components/dxCardView/">CardView</a></td><td>&mdash;</td></tr>
<tr><th scope="row">Carousel</th><td><a href="https://spartan.ng/components/carousel">Carousel</a></td><td><a href="https://zardui.com/docs/components/carousel">Carousel</a></td><td><a href="https://taiga-ui.dev/components/carousel/">Carousel</a></td><td>&mdash;</td><td><a href="https://primeng.dev/carousel">Carousel</a></td><td><a href="https://ng.ant.design/components/carousel/en">Carousel</a></td><td><a href="https://www.telerik.com/kendo-angular-ui/components/scrollview">ScrollView</a></td><td>&mdash;</td><td><a href="https://www.infragistics.com/products/ignite-ui-angular/angular/components/layouts/carousel">Carousel</a></td></tr>
<tr><th scope="row">Chip / tag</th><td>&mdash;</td><td>&mdash;</td><td><a href="https://taiga-ui.dev/components/chip/">Chip</a></td><td><a href="https://material.angular.dev/components/chips">Chips</a></td><td><a href="https://primeng.dev/chip">Chip</a><br /><a href="https://primeng.dev/tag">Tag</a></td><td><a href="https://ng.ant.design/components/tag/en">Tag</a></td><td><a href="https://www.telerik.com/kendo-angular-ui/components/buttons/chip">Chip</a><br /><a href="https://www.telerik.com/kendo-angular-ui/components/buttons/chiplist">ChipList</a></td><td>&mdash;</td><td><a href="https://www.infragistics.com/products/ignite-ui-angular/angular/components/chip">Chip</a></td></tr>
<tr><th scope="row">Comment</th><td>&mdash;</td><td>&mdash;</td><td><a href="https://taiga-ui.dev/components/comment/">Comment</a></td><td>&mdash;</td><td>&mdash;</td><td><a href="https://ng.ant.design/components/comment/en">Comment</a></td><td>&mdash;</td><td>&mdash;</td><td>&mdash;</td></tr>
<tr><th scope="row">Compass</th><td>&mdash;</td><td>&mdash;</td><td><a href="https://taiga-ui.dev/components/compass/">Compass</a></td><td>&mdash;</td><td>&mdash;</td><td>&mdash;</td><td>&mdash;</td><td>&mdash;</td><td>&mdash;</td></tr>
<tr><th scope="row">Counter</th><td>&mdash;</td><td>&mdash;</td><td><a href="https://taiga-ui.dev/components/counter/">Counter</a></td><td>&mdash;</td><td>&mdash;</td><td>&mdash;</td><td>&mdash;</td><td>&mdash;</td><td>&mdash;</td></tr>
<tr><th scope="row">Credit-card thumbnail</th><td>&mdash;</td><td>&mdash;</td><td><a href="https://taiga-ui.dev/components/thumbnail-card/">Thumbnail Card</a></td><td>&mdash;</td><td>&mdash;</td><td>&mdash;</td><td>&mdash;</td><td>&mdash;</td><td>&mdash;</td></tr>
<tr><th scope="row">Data table / grid</th><td><a href="https://spartan.ng/components/data-table">Data Table</a><br /><a href="https://spartan.ng/components/table">Table</a></td><td><a href="https://zardui.com/docs/components/table">Table</a></td><td><a href="https://taiga-ui.dev/components/table/">Table</a></td><td><a href="https://material.angular.dev/components/table">Table</a><br /><a href="https://material.angular.dev/cdk/table">CDK Table (primitive)</a></td><td><a href="https://primeng.dev/table">Table</a></td><td><a href="https://ng.ant.design/components/table/en">Table</a></td><td><a href="https://www.telerik.com/kendo-angular-ui/components/grid">Grid</a></td><td><a href="https://js.devexpress.com/Angular/Documentation/ApiReference/UI_Components/dxDataGrid/">DataGrid</a></td><td><a href="https://www.infragistics.com/products/ignite-ui-angular/angular/components/grid/grid">Data Grid</a></td></tr>
<tr><th scope="row">Data view</th><td>&mdash;</td><td>&mdash;</td><td>&mdash;</td><td>&mdash;</td><td><a href="https://primeng.dev/dataview">DataView</a></td><td>&mdash;</td><td>&mdash;</td><td>&mdash;</td><td>&mdash;</td></tr>
<tr><th scope="row">Descriptions</th><td>&mdash;</td><td>&mdash;</td><td>&mdash;</td><td>&mdash;</td><td>&mdash;</td><td><a href="https://ng.ant.design/components/descriptions/en">Descriptions</a></td><td>&mdash;</td><td>&mdash;</td><td>&mdash;</td></tr>
<tr><th scope="row">Details block</th><td>&mdash;</td><td>&mdash;</td><td><a href="https://taiga-ui.dev/layout/block-details/">Block Details</a></td><td>&mdash;</td><td>&mdash;</td><td>&mdash;</td><td>&mdash;</td><td>&mdash;</td><td>&mdash;</td></tr>
<tr><th scope="row">Dual-list transfer</th><td>&mdash;</td><td>&mdash;</td><td>&mdash;</td><td>&mdash;</td><td><a href="https://primeng.dev/picklist">PickList</a></td><td><a href="https://ng.ant.design/components/transfer/en">Transfer</a></td><td>&mdash;</td><td>&mdash;</td><td>&mdash;</td></tr>
<tr><th scope="row">Hierarchical grid</th><td>&mdash;</td><td>&mdash;</td><td>&mdash;</td><td>&mdash;</td><td>&mdash;</td><td>&mdash;</td><td>&mdash;</td><td>&mdash;</td><td><a href="https://www.infragistics.com/products/ignite-ui-angular/angular/components/hierarchicalgrid/hierarchical-grid">Hierarchical Grid</a></td></tr>
<tr><th scope="row">Icon</th><td>&mdash;</td><td>&mdash;</td><td><a href="https://taiga-ui.dev/components/icon/">Icon</a></td><td><a href="https://material.angular.dev/components/icon">Icon</a></td><td>&mdash;</td><td><a href="https://ng.ant.design/components/icon/en">Icon</a></td><td><a href="https://www.telerik.com/kendo-angular-ui/components/icons/icon">Icon</a><br /><a href="https://www.telerik.com/kendo-angular-ui/components/icons/svgicon">SVGIcon</a></td><td>&mdash;</td><td><a href="https://www.infragistics.com/products/ignite-ui-angular/angular/components/icon">Icon</a></td></tr>
<tr><th scope="row">Item group</th><td>&mdash;</td><td>&mdash;</td><td><a href="https://taiga-ui.dev/components/item-group/">Item Group</a></td><td>&mdash;</td><td>&mdash;</td><td>&mdash;</td><td>&mdash;</td><td>&mdash;</td><td>&mdash;</td></tr>
<tr><th scope="row">Item reordering</th><td>&mdash;</td><td>&mdash;</td><td><a href="https://taiga-ui.dev/components/reorder/">Reorder</a></td><td>&mdash;</td><td><a href="https://primeng.dev/orderlist">OrderList</a></td><td>&mdash;</td><td><a href="https://www.telerik.com/kendo-angular-ui/components/sortable">Sortable</a></td><td>&mdash;</td><td>&mdash;</td></tr>
<tr><th scope="row">Lightweight grid</th><td>&mdash;</td><td>&mdash;</td><td>&mdash;</td><td>&mdash;</td><td>&mdash;</td><td>&mdash;</td><td>&mdash;</td><td>&mdash;</td><td><a href="https://www.infragistics.com/products/ignite-ui-angular/angular/components/grid-lite/overview">Grid Lite</a></td></tr>
<tr><th scope="row">List</th><td>&mdash;</td><td>&mdash;</td><td><a href="https://taiga-ui.dev/components/data-list/">Data List</a><br /><a href="https://taiga-ui.dev/components/data-list-wrapper/">Data List Wrapper</a><br /><a href="https://taiga-ui.dev/components/list/">List</a></td><td><a href="https://material.angular.dev/components/list">List</a></td><td><a href="https://primeng.dev/listbox">Listbox</a></td><td><a href="https://ng.ant.design/components/list/en">List</a></td><td><a href="https://www.telerik.com/kendo-angular-ui/components/listbox">ListBox</a></td><td><a href="https://js.devexpress.com/Angular/Documentation/ApiReference/UI_Components/dxList/">List</a></td><td><a href="https://www.infragistics.com/products/ignite-ui-angular/angular/components/list">List</a></td></tr>
<tr><th scope="row">List item</th><td><a href="https://spartan.ng/components/item">Item</a></td><td><a href="https://zardui.com/docs/components/item">Item</a></td><td><a href="https://taiga-ui.dev/components/cell/">Cell</a></td><td>&mdash;</td><td>&mdash;</td><td>&mdash;</td><td>&mdash;</td><td>&mdash;</td><td>&mdash;</td></tr>
<tr><th scope="row">List view</th><td>&mdash;</td><td>&mdash;</td><td>&mdash;</td><td>&mdash;</td><td>&mdash;</td><td>&mdash;</td><td><a href="https://www.telerik.com/kendo-angular-ui/components/listview">ListView</a></td><td>&mdash;</td><td>&mdash;</td></tr>
<tr><th scope="row">Map pin</th><td>&mdash;</td><td>&mdash;</td><td><a href="https://taiga-ui.dev/components/pin/">Pin</a></td><td>&mdash;</td><td>&mdash;</td><td>&mdash;</td><td>&mdash;</td><td>&mdash;</td><td>&mdash;</td></tr>
<tr><th scope="row">Marker</th><td><a href="https://spartan.ng/components/marker">Marker</a></td><td><a href="https://zardui.com/docs/components/marker">Marker</a></td><td>&mdash;</td><td>&mdash;</td><td>&mdash;</td><td>&mdash;</td><td>&mdash;</td><td>&mdash;</td><td>&mdash;</td></tr>
<tr><th scope="row">Organisation chart</th><td>&mdash;</td><td>&mdash;</td><td>&mdash;</td><td>&mdash;</td><td><a href="https://primeng.dev/organizationchart">OrgChart</a></td><td>&mdash;</td><td>&mdash;</td><td>&mdash;</td><td>&mdash;</td></tr>
<tr><th scope="row">Pivot field chooser</th><td>&mdash;</td><td>&mdash;</td><td>&mdash;</td><td>&mdash;</td><td>&mdash;</td><td>&mdash;</td><td>&mdash;</td><td><a href="https://js.devexpress.com/Angular/Documentation/ApiReference/UI_Components/dxPivotGridFieldChooser/">PivotGridFieldChooser</a></td><td>&mdash;</td></tr>
<tr><th scope="row">Pivot grid</th><td>&mdash;</td><td>&mdash;</td><td>&mdash;</td><td>&mdash;</td><td>&mdash;</td><td>&mdash;</td><td><a href="https://www.telerik.com/kendo-angular-ui/components/pivotgrid">PivotGrid</a></td><td><a href="https://js.devexpress.com/Angular/Documentation/ApiReference/UI_Components/dxPivotGrid/">PivotGrid</a></td><td><a href="https://www.infragistics.com/products/ignite-ui-angular/angular/components/pivotgrid/pivot-grid">Pivot Grid</a></td></tr>
<tr><th scope="row">Query / filter builder</th><td>&mdash;</td><td>&mdash;</td><td>&mdash;</td><td>&mdash;</td><td>&mdash;</td><td>&mdash;</td><td><a href="https://www.telerik.com/kendo-angular-ui/components/filter">Filter</a></td><td><a href="https://js.devexpress.com/Angular/Documentation/ApiReference/UI_Components/dxFilterBuilder/">FilterBuilder</a></td><td><a href="https://www.infragistics.com/products/ignite-ui-angular/angular/components/query-builder">Query Builder</a></td></tr>
<tr><th scope="row">Sort header</th><td>&mdash;</td><td>&mdash;</td><td>&mdash;</td><td><a href="https://material.angular.dev/components/sort">Sort Header</a></td><td>&mdash;</td><td>&mdash;</td><td>&mdash;</td><td>&mdash;</td><td>&mdash;</td></tr>
<tr><th scope="row">Statistic</th><td>&mdash;</td><td>&mdash;</td><td>&mdash;</td><td>&mdash;</td><td>&mdash;</td><td><a href="https://ng.ant.design/components/statistic/en">Statistic</a></td><td>&mdash;</td><td>&mdash;</td><td>&mdash;</td></tr>
<tr><th scope="row">Status block</th><td>&mdash;</td><td>&mdash;</td><td><a href="https://taiga-ui.dev/layout/block-status/">Block Status</a></td><td>&mdash;</td><td>&mdash;</td><td>&mdash;</td><td>&mdash;</td><td>&mdash;</td><td>&mdash;</td></tr>
<tr><th scope="row">Table filters</th><td>&mdash;</td><td>&mdash;</td><td><a href="https://taiga-ui.dev/components/table-filters/">Table Filters</a></td><td>&mdash;</td><td>&mdash;</td><td>&mdash;</td><td>&mdash;</td><td>&mdash;</td><td>&mdash;</td></tr>
<tr><th scope="row">Text / typography</th><td>&mdash;</td><td>&mdash;</td><td>&mdash;</td><td>&mdash;</td><td>&mdash;</td><td><a href="https://ng.ant.design/components/typography/en">Typography</a></td><td>&mdash;</td><td>&mdash;</td><td>&mdash;</td></tr>
<tr><th scope="row">Text truncation</th><td>&mdash;</td><td>&mdash;</td><td><a href="https://taiga-ui.dev/components/line-clamp/">Line Clamp</a></td><td>&mdash;</td><td>&mdash;</td><td>&mdash;</td><td>&mdash;</td><td>&mdash;</td><td>&mdash;</td></tr>
<tr><th scope="row">Timeline</th><td>&mdash;</td><td>&mdash;</td><td><a href="https://taiga-ui.dev/components/timeline/">Timeline</a></td><td>&mdash;</td><td><a href="https://primeng.dev/timeline">Timeline</a></td><td><a href="https://ng.ant.design/components/timeline/en">Timeline</a></td><td><a href="https://www.telerik.com/kendo-angular-ui/components/layout/timeline">Timeline</a></td><td>&mdash;</td><td>&mdash;</td></tr>
<tr><th scope="row">Tree</th><td>&mdash;</td><td>&mdash;</td><td><a href="https://taiga-ui.dev/components/tree/">Tree</a></td><td><a href="https://material.angular.dev/components/tree">Tree</a><br /><a href="https://material.angular.dev/cdk/tree">CDK Tree (primitive)</a></td><td><a href="https://primeng.dev/tree">Tree</a></td><td><a href="https://ng.ant.design/components/tree/en">Tree</a><br /><a href="https://ng.ant.design/components/tree-view/en">TreeView</a></td><td><a href="https://www.telerik.com/kendo-angular-ui/components/treeview">TreeView</a></td><td><a href="https://js.devexpress.com/Angular/Documentation/ApiReference/UI_Components/dxTreeView/">TreeView</a></td><td><a href="https://www.infragistics.com/products/ignite-ui-angular/angular/components/tree">Tree</a></td></tr>
<tr><th scope="row">Tree grid</th><td>&mdash;</td><td>&mdash;</td><td>&mdash;</td><td>&mdash;</td><td><a href="https://primeng.dev/treetable">TreeTable</a></td><td>&mdash;</td><td><a href="https://www.telerik.com/kendo-angular-ui/components/treelist">TreeList</a></td><td><a href="https://js.devexpress.com/Angular/Documentation/ApiReference/UI_Components/dxTreeList/">TreeList</a></td><td><a href="https://www.infragistics.com/products/ignite-ui-angular/angular/components/treegrid/tree-grid">Tree Grid</a></td></tr>
<tr><th scope="row">Virtual scrolling</th><td>&mdash;</td><td>&mdash;</td><td>&mdash;</td><td>&mdash;</td><td><a href="https://primeng.dev/virtualscroller">VirtualScroller</a></td><td>&mdash;</td><td>&mdash;</td><td>&mdash;</td><td><a href="https://www.infragistics.com/products/ignite-ui-angular/angular/components/layouts/virtual-scroll">Virtual Scroll</a></td></tr>
</tbody>
</table>

<h3 id="components-actionsandnavigation">Actions and navigation</h3>

<table class="component-matrix" tabindex="0" aria-labelledby="components-actionsandnavigation">
<thead>
<tr><th scope="col">Component</th><th scope="col"><a href="https://spartan.ng/documentation/introduction">Spartan</a></th><th scope="col"><a href="https://zardui.com/docs/components">Zard UI</a></th><th scope="col"><a href="https://taiga-ui.dev/">Taiga UI</a></th><th scope="col"><a href="https://material.angular.dev/components/categories">Angular Material</a></th><th scope="col"><a href="https://primeng.dev/components">PrimeNG</a></th><th scope="col"><a href="https://ng.ant.design/components/overview/en">NG-ZORRO</a></th><th scope="col"><a href="https://www.telerik.com/kendo-angular-ui/components/">Kendo UI for Angular</a></th><th scope="col"><a href="https://js.devexpress.com/Angular/Documentation/ApiReference/UI_Components/">DevExtreme Angular</a></th><th scope="col"><a href="https://www.infragistics.com/products/ignite-ui-angular/angular/components/general/open-source-vs-premium">Ignite UI for Angular</a></th></tr>
</thead>
<tbody>
<tr><th scope="row">Action bar / toolbar</th><td>&mdash;</td><td>&mdash;</td><td><a href="https://taiga-ui.dev/components/actions-bar/">Actions Bar</a></td><td><a href="https://material.angular.dev/components/toolbar">Toolbar</a></td><td><a href="https://primeng.dev/toolbar">Toolbar</a></td><td>&mdash;</td><td><a href="https://www.telerik.com/kendo-angular-ui/components/toolbar/toolbar">ToolBar</a></td><td><a href="https://js.devexpress.com/Angular/Documentation/ApiReference/UI_Components/dxToolbar/">Toolbar</a></td><td><a href="https://www.infragistics.com/products/ignite-ui-angular/angular/components/action-strip">Action Strip</a><br /><a href="https://www.infragistics.com/products/ignite-ui-angular/angular/components/menus/toolbar">Toolbar</a></td></tr>
<tr><th scope="row">Anchor navigation</th><td>&mdash;</td><td>&mdash;</td><td>&mdash;</td><td>&mdash;</td><td>&mdash;</td><td><a href="https://ng.ant.design/components/anchor/en">Anchor</a></td><td>&mdash;</td><td>&mdash;</td><td>&mdash;</td></tr>
<tr><th scope="row">App bar</th><td>&mdash;</td><td>&mdash;</td><td><a href="https://taiga-ui.dev/navigation/app-bar/">App Bar</a></td><td>&mdash;</td><td>&mdash;</td><td>&mdash;</td><td><a href="https://www.telerik.com/kendo-angular-ui/components/navigation/appbar">AppBar</a></td><td>&mdash;</td><td>&mdash;</td></tr>
<tr><th scope="row">Breadcrumbs</th><td><a href="https://spartan.ng/components/breadcrumb">Breadcrumb</a></td><td><a href="https://zardui.com/docs/components/breadcrumb">Breadcrumb</a></td><td><a href="https://taiga-ui.dev/navigation/breadcrumbs/">Breadcrumbs</a></td><td>&mdash;</td><td><a href="https://primeng.dev/breadcrumb">Breadcrumb</a></td><td><a href="https://ng.ant.design/components/breadcrumb/en">Breadcrumb</a></td><td><a href="https://www.telerik.com/kendo-angular-ui/components/navigation/breadcrumb">BreadCrumb</a></td><td>&mdash;</td><td><a href="https://www.infragistics.com/products/ignite-ui-angular/angular/components/layouts/breadcrumbs">Breadcrumbs</a></td></tr>
<tr><th scope="row">Button</th><td><a href="https://spartan.ng/components/button">Button</a></td><td><a href="https://zardui.com/docs/components/button">Button</a></td><td><a href="https://taiga-ui.dev/components/button/">Button</a></td><td><a href="https://material.angular.dev/components/button">Button</a></td><td><a href="https://primeng.dev/button">Button</a></td><td><a href="https://ng.ant.design/components/button/en">Button</a></td><td><a href="https://www.telerik.com/kendo-angular-ui/components/buttons/button">Button</a></td><td><a href="https://js.devexpress.com/Angular/Documentation/ApiReference/UI_Components/dxButton/">Button</a></td><td><a href="https://www.infragistics.com/products/ignite-ui-angular/angular/components/inputs/button">Button (directive)</a></td></tr>
<tr><th scope="row">Button group</th><td><a href="https://spartan.ng/components/button-group">Button Group</a></td><td><a href="https://zardui.com/docs/components/button-group">Button Group</a></td><td><a href="https://taiga-ui.dev/components/button-group/">Button Group</a></td><td>&mdash;</td><td>&mdash;</td><td>&mdash;</td><td><a href="https://www.telerik.com/kendo-angular-ui/components/buttons/buttongroup">ButtonGroup</a></td><td><a href="https://js.devexpress.com/Angular/Documentation/ApiReference/UI_Components/dxButtonGroup/">ButtonGroup</a></td><td><a href="https://www.infragistics.com/products/ignite-ui-angular/angular/components/inputs/button-group">Button Group</a></td></tr>
<tr><th scope="row">Button-based select</th><td>&mdash;</td><td>&mdash;</td><td><a href="https://taiga-ui.dev/components/button-select/">Button Select</a></td><td>&mdash;</td><td>&mdash;</td><td>&mdash;</td><td>&mdash;</td><td>&mdash;</td><td>&mdash;</td></tr>
<tr><th scope="row">Command menu</th><td><a href="https://spartan.ng/components/command">Command</a></td><td><a href="https://zardui.com/docs/components/command">Command</a></td><td>&mdash;</td><td>&mdash;</td><td><a href="https://primeng.dev/commandmenu">CommandMenu</a></td><td>&mdash;</td><td>&mdash;</td><td>&mdash;</td><td>&mdash;</td></tr>
<tr><th scope="row">Context menu</th><td><a href="https://spartan.ng/components/context-menu">Context Menu</a></td><td><a href="https://zardui.com/docs/components/context-menu">Context Menu</a></td><td><a href="https://taiga-ui.dev/directives/dropdown-context/">Dropdown Context (directive)</a></td><td>&mdash;</td><td><a href="https://primeng.dev/contextmenu">ContextMenu</a></td><td>&mdash;</td><td><a href="https://www.telerik.com/kendo-angular-ui/components/menus/contextmenu">ContextMenu</a></td><td><a href="https://js.devexpress.com/Angular/Documentation/ApiReference/UI_Components/dxContextMenu/">ContextMenu</a></td><td>&mdash;</td></tr>
<tr><th scope="row">Dock menu</th><td>&mdash;</td><td>&mdash;</td><td>&mdash;</td><td>&mdash;</td><td><a href="https://primeng.dev/dock">Dock</a></td><td>&mdash;</td><td>&mdash;</td><td>&mdash;</td><td>&mdash;</td></tr>
<tr><th scope="row">Dropdown button</th><td>&mdash;</td><td>&mdash;</td><td>&mdash;</td><td>&mdash;</td><td>&mdash;</td><td>&mdash;</td><td><a href="https://www.telerik.com/kendo-angular-ui/components/buttons/dropdownbutton">DropDownButton</a></td><td><a href="https://js.devexpress.com/Angular/Documentation/ApiReference/UI_Components/dxDropDownButton/">DropDownButton</a></td><td>&mdash;</td></tr>
<tr><th scope="row">Dropdown menu</th><td><a href="https://spartan.ng/components/dropdown-menu">Dropdown Menu</a></td><td><a href="https://zardui.com/docs/components/dropdown">Dropdown</a></td><td>&mdash;</td><td><a href="https://material.angular.dev/components/menu">Menu</a><br /><a href="https://material.angular.dev/cdk/menu">CDK Menu (primitive)</a></td><td><a href="https://primeng.dev/menu">Menu</a></td><td><a href="https://ng.ant.design/components/dropdown/en">Dropdown</a><br /><a href="https://ng.ant.design/components/menu/en">Menu</a></td><td><a href="https://www.telerik.com/kendo-angular-ui/components/menus/menu">Menu</a></td><td><a href="https://js.devexpress.com/Angular/Documentation/ApiReference/UI_Components/dxMenu/">Menu</a></td><td><a href="https://www.infragistics.com/products/ignite-ui-angular/angular/components/drop-down">Drop Down</a></td></tr>
<tr><th scope="row">Floating action button</th><td>&mdash;</td><td>&mdash;</td><td>&mdash;</td><td>&mdash;</td><td><a href="https://primeng.dev/speeddial">SpeedDial</a></td><td><a href="https://ng.ant.design/components/float-button/en">FloatButton</a></td><td><a href="https://www.telerik.com/kendo-angular-ui/components/buttons/floatingactionbutton">FloatingActionButton</a></td><td><a href="https://js.devexpress.com/Angular/Documentation/ApiReference/UI_Components/dxSpeedDialAction/">SpeedDialAction</a></td><td>&mdash;</td></tr>
<tr><th scope="row">Floating toolbar</th><td>&mdash;</td><td>&mdash;</td><td>&mdash;</td><td>&mdash;</td><td>&mdash;</td><td>&mdash;</td><td><a href="https://www.telerik.com/kendo-angular-ui/components/toolbar/floating-toolbar">FloatingToolBar</a></td><td>&mdash;</td><td>&mdash;</td></tr>
<tr><th scope="row">Global navigation</th><td>&mdash;</td><td>&mdash;</td><td><a href="https://taiga-ui.dev/components/navigation/">Navigation</a></td><td>&mdash;</td><td>&mdash;</td><td>&mdash;</td><td>&mdash;</td><td>&mdash;</td><td><a href="https://www.infragistics.com/products/ignite-ui-angular/angular/components/navbar">Navbar</a></td></tr>
<tr><th scope="row">Icon button</th><td>&mdash;</td><td>&mdash;</td><td>&mdash;</td><td>&mdash;</td><td>&mdash;</td><td>&mdash;</td><td>&mdash;</td><td>&mdash;</td><td><a href="https://www.infragistics.com/products/ignite-ui-angular/angular/components/icon-button">Icon Button</a></td></tr>
<tr><th scope="row">Keyboard shortcut</th><td><a href="https://spartan.ng/components/kbd">Kbd</a></td><td><a href="https://zardui.com/docs/components/kbd">Kbd</a></td><td>&mdash;</td><td>&mdash;</td><td>&mdash;</td><td>&mdash;</td><td>&mdash;</td><td>&mdash;</td><td>&mdash;</td></tr>
<tr><th scope="row">Link</th><td>&mdash;</td><td>&mdash;</td><td><a href="https://taiga-ui.dev/components/link/">Link</a></td><td>&mdash;</td><td>&mdash;</td><td>&mdash;</td><td>&mdash;</td><td>&mdash;</td><td>&mdash;</td></tr>
<tr><th scope="row">Mega menu</th><td>&mdash;</td><td>&mdash;</td><td>&mdash;</td><td>&mdash;</td><td><a href="https://primeng.dev/megamenu">MegaMenu</a></td><td>&mdash;</td><td>&mdash;</td><td>&mdash;</td><td>&mdash;</td></tr>
<tr><th scope="row">Menu bar</th><td><a href="https://spartan.ng/components/menubar">Menubar</a></td><td>&mdash;</td><td>&mdash;</td><td>&mdash;</td><td><a href="https://primeng.dev/menubar">Menubar</a></td><td>&mdash;</td><td>&mdash;</td><td>&mdash;</td><td>&mdash;</td></tr>
<tr><th scope="row">Mobile tab bar</th><td>&mdash;</td><td>&mdash;</td><td><a href="https://taiga-ui.dev/navigation/tab-bar/">Tab Bar</a></td><td>&mdash;</td><td>&mdash;</td><td>&mdash;</td><td><a href="https://www.telerik.com/kendo-angular-ui/components/navigation/bottomnavigation">BottomNavigation</a></td><td>&mdash;</td><td><a href="https://www.infragistics.com/products/ignite-ui-angular/angular/components/tabbar">Bottom Navigation</a></td></tr>
<tr><th scope="row">Navigation menu</th><td><a href="https://spartan.ng/components/navigation-menu">Navigation Menu</a></td><td><a href="https://zardui.com/docs/components/navigation-menu">Navigation Menu</a></td><td>&mdash;</td><td>&mdash;</td><td>&mdash;</td><td>&mdash;</td><td>&mdash;</td><td>&mdash;</td><td>&mdash;</td></tr>
<tr><th scope="row">Overflow items</th><td>&mdash;</td><td>&mdash;</td><td><a href="https://taiga-ui.dev/components/items-with-more/">Items With More</a></td><td>&mdash;</td><td>&mdash;</td><td>&mdash;</td><td>&mdash;</td><td>&mdash;</td><td>&mdash;</td></tr>
<tr><th scope="row">Pagination</th><td><a href="https://spartan.ng/components/pagination">Pagination</a></td><td><a href="https://zardui.com/docs/components/pagination">Pagination</a></td><td><a href="https://taiga-ui.dev/components/pager/">Pager</a><br /><a href="https://taiga-ui.dev/components/table-pagination/">Table Pagination</a><br /><a href="https://taiga-ui.dev/navigation/pagination/">Pagination</a></td><td><a href="https://material.angular.dev/components/paginator">Paginator</a></td><td><a href="https://primeng.dev/paginator">Paginator</a></td><td><a href="https://ng.ant.design/components/pagination/en">Pagination</a></td><td><a href="https://www.telerik.com/kendo-angular-ui/components/pager">Pager</a></td><td><a href="https://js.devexpress.com/Angular/Documentation/ApiReference/UI_Components/dxPagination/">Pagination</a></td><td><a href="https://www.infragistics.com/products/ignite-ui-angular/angular/components/paginator">Paginator</a></td></tr>
<tr><th scope="row">Search</th><td>&mdash;</td><td>&mdash;</td><td><a href="https://taiga-ui.dev/components/search/">Search</a><br /><a href="https://taiga-ui.dev/components/search-bar/">Search Bar</a></td><td>&mdash;</td><td>&mdash;</td><td>&mdash;</td><td>&mdash;</td><td>&mdash;</td><td>&mdash;</td></tr>
<tr><th scope="row">Segmented control</th><td>&mdash;</td><td>&mdash;</td><td><a href="https://taiga-ui.dev/navigation/segmented/">Segmented</a></td><td>&mdash;</td><td>&mdash;</td><td><a href="https://ng.ant.design/components/segmented/en">Segmented</a></td><td><a href="https://www.telerik.com/kendo-angular-ui/components/buttons/segmentedcontrol">SegmentedControl</a></td><td>&mdash;</td><td>&mdash;</td></tr>
<tr><th scope="row">Split button</th><td>&mdash;</td><td>&mdash;</td><td>&mdash;</td><td>&mdash;</td><td><a href="https://primeng.dev/splitbutton">SplitButton</a></td><td>&mdash;</td><td><a href="https://www.telerik.com/kendo-angular-ui/components/buttons/splitbutton">SplitButton</a></td><td>&mdash;</td><td>&mdash;</td></tr>
<tr><th scope="row">Stepper</th><td>&mdash;</td><td>&mdash;</td><td><a href="https://taiga-ui.dev/navigation/stepper/">Stepper</a></td><td><a href="https://material.angular.dev/components/stepper">Stepper</a><br /><a href="https://material.angular.dev/cdk/stepper">CDK Stepper (primitive)</a></td><td><a href="https://primeng.dev/stepper">Stepper</a></td><td><a href="https://ng.ant.design/components/steps/en">Steps</a></td><td><a href="https://www.telerik.com/kendo-angular-ui/components/layout/stepper">Stepper</a></td><td><a href="https://js.devexpress.com/Angular/Documentation/ApiReference/UI_Components/dxStepper/">Stepper</a></td><td><a href="https://www.infragistics.com/products/ignite-ui-angular/angular/components/stepper">Stepper</a></td></tr>
<tr><th scope="row">Tabs</th><td><a href="https://spartan.ng/components/tabs">Tabs</a></td><td><a href="https://zardui.com/docs/components/tabs">Tabs</a></td><td><a href="https://taiga-ui.dev/navigation/tabs/">Tabs</a></td><td><a href="https://material.angular.dev/components/tabs">Tabs</a></td><td><a href="https://primeng.dev/tabs">Tabs</a></td><td><a href="https://ng.ant.design/components/tabs/en">Tabs</a></td><td><a href="https://www.telerik.com/kendo-angular-ui/components/layout/tabstrip">TabStrip</a></td><td><a href="https://js.devexpress.com/Angular/Documentation/ApiReference/UI_Components/dxTabPanel/">TabPanel</a><br /><a href="https://js.devexpress.com/Angular/Documentation/ApiReference/UI_Components/dxTabs/">Tabs</a></td><td><a href="https://www.infragistics.com/products/ignite-ui-angular/angular/components/tabs">Tabs</a></td></tr>
<tr><th scope="row">Tiered menu</th><td>&mdash;</td><td>&mdash;</td><td>&mdash;</td><td>&mdash;</td><td><a href="https://primeng.dev/tieredmenu">TieredMenu</a></td><td>&mdash;</td><td>&mdash;</td><td>&mdash;</td><td>&mdash;</td></tr>
<tr><th scope="row">Toggle button</th><td><a href="https://spartan.ng/components/toggle">Toggle</a></td><td><a href="https://zardui.com/docs/components/toggle">Toggle</a></td><td>&mdash;</td><td><a href="https://material.angular.dev/components/button-toggle">Button Toggle</a></td><td><a href="https://primeng.dev/togglebutton">ToggleButton</a></td><td>&mdash;</td><td>&mdash;</td><td>&mdash;</td><td>&mdash;</td></tr>
<tr><th scope="row">Toggle group</th><td><a href="https://spartan.ng/components/toggle-group">Toggle Group</a></td><td><a href="https://zardui.com/docs/components/toggle-group">Toggle Group</a></td><td>&mdash;</td><td>&mdash;</td><td><a href="https://primeng.dev/selectbutton">SelectButton</a></td><td>&mdash;</td><td>&mdash;</td><td>&mdash;</td><td>&mdash;</td></tr>
</tbody>
</table>

<h3 id="components-datescalendarsandtime">Dates, calendars and time</h3>

<table class="component-matrix" tabindex="0" aria-labelledby="components-datescalendarsandtime">
<thead>
<tr><th scope="col">Component</th><th scope="col"><a href="https://spartan.ng/documentation/introduction">Spartan</a></th><th scope="col"><a href="https://zardui.com/docs/components">Zard UI</a></th><th scope="col"><a href="https://taiga-ui.dev/">Taiga UI</a></th><th scope="col"><a href="https://material.angular.dev/components/categories">Angular Material</a></th><th scope="col"><a href="https://primeng.dev/components">PrimeNG</a></th><th scope="col"><a href="https://ng.ant.design/components/overview/en">NG-ZORRO</a></th><th scope="col"><a href="https://www.telerik.com/kendo-angular-ui/components/">Kendo UI for Angular</a></th><th scope="col"><a href="https://js.devexpress.com/Angular/Documentation/ApiReference/UI_Components/">DevExtreme Angular</a></th><th scope="col"><a href="https://www.infragistics.com/products/ignite-ui-angular/angular/components/general/open-source-vs-premium">Ignite UI for Angular</a></th></tr>
</thead>
<tbody>
<tr><th scope="row">Calendar</th><td><a href="https://spartan.ng/components/calendar">Calendar</a></td><td><a href="https://zardui.com/docs/components/calendar">Calendar</a></td><td><a href="https://taiga-ui.dev/components/calendar/">Calendar</a><br /><a href="https://taiga-ui.dev/components/mobile-calendar/">Mobile Calendar</a></td><td>&mdash;</td><td>&mdash;</td><td><a href="https://ng.ant.design/components/calendar/en">Calendar</a></td><td><a href="https://www.telerik.com/kendo-angular-ui/components/dateinputs/calendar">Calendar</a></td><td><a href="https://js.devexpress.com/Angular/Documentation/ApiReference/UI_Components/dxCalendar/">Calendar</a></td><td><a href="https://www.infragistics.com/products/ignite-ui-angular/angular/components/calendar">Calendar</a></td></tr>
<tr><th scope="row">Date and time input</th><td>&mdash;</td><td>&mdash;</td><td><a href="https://taiga-ui.dev/components/input-date-time/">Input Date Time</a></td><td>&mdash;</td><td>&mdash;</td><td>&mdash;</td><td><a href="https://www.telerik.com/kendo-angular-ui/components/dateinputs/datetimepicker">DateTimePicker</a></td><td>&mdash;</td><td><a href="https://www.infragistics.com/products/ignite-ui-angular/angular/components/date-time-editor">Date Time Editor (directive)</a></td></tr>
<tr><th scope="row">Date picker</th><td><a href="https://spartan.ng/components/date-picker">Date Picker</a></td><td><a href="https://zardui.com/docs/components/date-picker">Date Picker</a></td><td><a href="https://taiga-ui.dev/components/input-date/">Input Date</a></td><td><a href="https://material.angular.dev/components/datepicker">Datepicker</a></td><td><a href="https://primeng.dev/datepicker">DatePicker</a></td><td><a href="https://ng.ant.design/components/date-picker/en">DatePicker</a></td><td><a href="https://www.telerik.com/kendo-angular-ui/components/dateinputs/datepicker">DatePicker</a></td><td><a href="https://js.devexpress.com/Angular/Documentation/ApiReference/UI_Components/dxDateBox/">DateBox</a></td><td><a href="https://www.infragistics.com/products/ignite-ui-angular/angular/components/date-picker">Date Picker</a></td></tr>
<tr><th scope="row">Date range input</th><td>&mdash;</td><td>&mdash;</td><td><a href="https://taiga-ui.dev/components/input-date-range/">Input Date Range</a></td><td>&mdash;</td><td>&mdash;</td><td>&mdash;</td><td><a href="https://www.telerik.com/kendo-angular-ui/components/dateinputs/daterange">DateRange</a></td><td><a href="https://js.devexpress.com/Angular/Documentation/ApiReference/UI_Components/dxDateRangeBox/">DateRangeBox</a></td><td><a href="https://www.infragistics.com/products/ignite-ui-angular/angular/components/date-range-picker">Date Range Picker</a></td></tr>
<tr><th scope="row">Date text input</th><td>&mdash;</td><td>&mdash;</td><td>&mdash;</td><td>&mdash;</td><td>&mdash;</td><td>&mdash;</td><td><a href="https://www.telerik.com/kendo-angular-ui/components/dateinputs/dateinput">DateInput</a></td><td>&mdash;</td><td>&mdash;</td></tr>
<tr><th scope="row">Gantt</th><td>&mdash;</td><td>&mdash;</td><td>&mdash;</td><td>&mdash;</td><td>&mdash;</td><td>&mdash;</td><td><a href="https://www.telerik.com/kendo-angular-ui/components/gantt">Gantt</a></td><td><a href="https://js.devexpress.com/Angular/Documentation/ApiReference/UI_Components/dxGantt/">Gantt</a></td><td>&mdash;</td></tr>
<tr><th scope="row">Month picker / input</th><td>&mdash;</td><td>&mdash;</td><td><a href="https://taiga-ui.dev/components/calendar-month/">Calendar Month</a><br /><a href="https://taiga-ui.dev/components/input-month/">Input Month</a></td><td>&mdash;</td><td>&mdash;</td><td>&mdash;</td><td>&mdash;</td><td>&mdash;</td><td><a href="https://www.infragistics.com/products/ignite-ui-angular/angular/components/month-picker">Month Picker</a></td></tr>
<tr><th scope="row">Multiple-date input</th><td>&mdash;</td><td>&mdash;</td><td><a href="https://taiga-ui.dev/components/input-date-multi/">Input Date Multi</a></td><td>&mdash;</td><td>&mdash;</td><td>&mdash;</td><td>&mdash;</td><td>&mdash;</td><td>&mdash;</td></tr>
<tr><th scope="row">Range calendar</th><td>&mdash;</td><td>&mdash;</td><td><a href="https://taiga-ui.dev/components/calendar-range/">Calendar Range</a></td><td>&mdash;</td><td>&mdash;</td><td>&mdash;</td><td><a href="https://www.telerik.com/kendo-angular-ui/components/dateinputs/multiviewcalendar">MultiViewCalendar</a></td><td>&mdash;</td><td>&mdash;</td></tr>
<tr><th scope="row">Scheduling</th><td>&mdash;</td><td>&mdash;</td><td>&mdash;</td><td>&mdash;</td><td>&mdash;</td><td>&mdash;</td><td><a href="https://www.telerik.com/kendo-angular-ui/components/scheduler">Scheduler</a></td><td><a href="https://js.devexpress.com/Angular/Documentation/ApiReference/UI_Components/dxScheduler/">Scheduler</a></td><td>&mdash;</td></tr>
<tr><th scope="row">Time input</th><td>&mdash;</td><td>&mdash;</td><td><a href="https://taiga-ui.dev/components/input-time/">Input Time</a></td><td><a href="https://material.angular.dev/components/timepicker">Timepicker</a></td><td>&mdash;</td><td><a href="https://ng.ant.design/components/time-picker/en">TimePicker</a></td><td><a href="https://www.telerik.com/kendo-angular-ui/components/dateinputs/timepicker">TimePicker</a></td><td>&mdash;</td><td><a href="https://www.infragistics.com/products/ignite-ui-angular/angular/components/time-picker">Time Picker</a></td></tr>
<tr><th scope="row">Year input</th><td>&mdash;</td><td>&mdash;</td><td><a href="https://taiga-ui.dev/components/input-year/">Input Year</a></td><td>&mdash;</td><td>&mdash;</td><td>&mdash;</td><td>&mdash;</td><td>&mdash;</td><td>&mdash;</td></tr>
</tbody>
</table>

<h3 id="components-chartsandvisualisation">Charts and visualisation</h3>

<table class="component-matrix" tabindex="0" aria-labelledby="components-chartsandvisualisation">
<thead>
<tr><th scope="col">Component</th><th scope="col"><a href="https://spartan.ng/documentation/introduction">Spartan</a></th><th scope="col"><a href="https://zardui.com/docs/components">Zard UI</a></th><th scope="col"><a href="https://taiga-ui.dev/">Taiga UI</a></th><th scope="col"><a href="https://material.angular.dev/components/categories">Angular Material</a></th><th scope="col"><a href="https://primeng.dev/components">PrimeNG</a></th><th scope="col"><a href="https://ng.ant.design/components/overview/en">NG-ZORRO</a></th><th scope="col"><a href="https://www.telerik.com/kendo-angular-ui/components/">Kendo UI for Angular</a></th><th scope="col"><a href="https://js.devexpress.com/Angular/Documentation/ApiReference/UI_Components/">DevExtreme Angular</a></th><th scope="col"><a href="https://www.infragistics.com/products/ignite-ui-angular/angular/components/general/open-source-vs-premium">Ignite UI for Angular</a></th></tr>
</thead>
<tbody>
<tr><th scope="row">Arc gauge</th><td>&mdash;</td><td>&mdash;</td><td>&mdash;</td><td>&mdash;</td><td>&mdash;</td><td>&mdash;</td><td><a href="https://www.telerik.com/kendo-angular-ui/components/gauges/arcgauge">ArcGauge</a></td><td>&mdash;</td><td>&mdash;</td></tr>
<tr><th scope="row">Bar gauge</th><td>&mdash;</td><td>&mdash;</td><td>&mdash;</td><td>&mdash;</td><td>&mdash;</td><td>&mdash;</td><td>&mdash;</td><td><a href="https://js.devexpress.com/Angular/Documentation/ApiReference/UI_Components/dxBarGauge/">BarGauge</a></td><td>&mdash;</td></tr>
<tr><th scope="row">Bullet graph</th><td>&mdash;</td><td>&mdash;</td><td>&mdash;</td><td>&mdash;</td><td>&mdash;</td><td>&mdash;</td><td>&mdash;</td><td><a href="https://js.devexpress.com/Angular/Documentation/ApiReference/UI_Components/dxBullet/">Bullet</a></td><td><a href="https://www.infragistics.com/products/ignite-ui-angular/angular/components/bullet-graph">Bullet Graph</a></td></tr>
<tr><th scope="row">Chart axes / legend</th><td>&mdash;</td><td>&mdash;</td><td><a href="https://taiga-ui.dev/charts/axes/">Axes</a><br /><a href="https://taiga-ui.dev/charts/legend-item/">Legend Item</a></td><td>&mdash;</td><td>&mdash;</td><td>&mdash;</td><td>&mdash;</td><td>&mdash;</td><td>&mdash;</td></tr>
<tr><th scope="row">Chart wizard</th><td>&mdash;</td><td>&mdash;</td><td>&mdash;</td><td>&mdash;</td><td>&mdash;</td><td>&mdash;</td><td><a href="https://www.telerik.com/kendo-angular-ui/components/chart-wizard">Chart Wizard</a></td><td>&mdash;</td><td>&mdash;</td></tr>
<tr><th scope="row">Charts</th><td><a href="https://spartan.ng/components/chart">Chart</a></td><td><a href="https://zardui.com/docs/components/chart">Chart</a></td><td><a href="https://taiga-ui.dev/charts/arc-chart/">Arc Chart</a><br /><a href="https://taiga-ui.dev/charts/bar/">Bar</a><br /><a href="https://taiga-ui.dev/charts/bar-chart/">Bar Chart</a><br /><a href="https://taiga-ui.dev/charts/bar-set/">Bar Set</a><br /><a href="https://taiga-ui.dev/charts/line-chart/">Line Chart</a><br /><a href="https://taiga-ui.dev/charts/line-days-chart/">Line Days Chart</a><br /><a href="https://taiga-ui.dev/charts/pie-chart/">Pie Chart</a><br /><a href="https://taiga-ui.dev/charts/ring-chart/">Ring Chart</a></td><td>&mdash;</td><td><a href="https://primeng.dev/chart">Chart (retiring)</a></td><td>&mdash;</td><td><a href="https://www.telerik.com/kendo-angular-ui/components/charts">Chart</a></td><td><a href="https://js.devexpress.com/Angular/Documentation/ApiReference/UI_Components/dxChart/">Chart</a><br /><a href="https://js.devexpress.com/Angular/Documentation/ApiReference/UI_Components/dxPieChart/">PieChart</a></td><td><a href="https://www.infragistics.com/products/ignite-ui-angular/angular/components/charts/chart-overview">Charts</a><br /><a href="https://www.infragistics.com/products/ignite-ui-angular/angular/components/charts/types/bar-chart">Bar Chart</a><br /><a href="https://www.infragistics.com/products/ignite-ui-angular/angular/components/charts/types/line-chart">Line Chart</a><br /><a href="https://www.infragistics.com/products/ignite-ui-angular/angular/components/charts/types/pie-chart">Pie Chart</a></td></tr>
<tr><th scope="row">Circular gauge</th><td>&mdash;</td><td>&mdash;</td><td>&mdash;</td><td>&mdash;</td><td>&mdash;</td><td>&mdash;</td><td><a href="https://www.telerik.com/kendo-angular-ui/components/gauges/circulargauge">CircularGauge</a></td><td><a href="https://js.devexpress.com/Angular/Documentation/ApiReference/UI_Components/dxCircularGauge/">CircularGauge</a></td><td>&mdash;</td></tr>
<tr><th scope="row">Diagram</th><td>&mdash;</td><td>&mdash;</td><td>&mdash;</td><td>&mdash;</td><td>&mdash;</td><td>&mdash;</td><td><a href="https://www.telerik.com/kendo-angular-ui/components/diagrams">Diagram</a><br /><a href="https://www.telerik.com/kendo-angular-ui/components/diagrams/workflow-diagram">Workflow Diagram</a></td><td><a href="https://js.devexpress.com/Angular/Documentation/ApiReference/UI_Components/dxDiagram/">Diagram</a></td><td>&mdash;</td></tr>
<tr><th scope="row">Financial chart</th><td>&mdash;</td><td>&mdash;</td><td>&mdash;</td><td>&mdash;</td><td>&mdash;</td><td>&mdash;</td><td><a href="https://www.telerik.com/kendo-angular-ui/components/charts/stock-chart">Stockchart</a></td><td>&mdash;</td><td><a href="https://www.infragistics.com/products/ignite-ui-angular/angular/components/charts/types/stock-chart">Stock (Financial) Chart</a></td></tr>
<tr><th scope="row">Funnel</th><td>&mdash;</td><td>&mdash;</td><td>&mdash;</td><td>&mdash;</td><td>&mdash;</td><td>&mdash;</td><td>&mdash;</td><td><a href="https://js.devexpress.com/Angular/Documentation/ApiReference/UI_Components/dxFunnel/">Funnel</a></td><td>&mdash;</td></tr>
<tr><th scope="row">Linear gauge</th><td>&mdash;</td><td>&mdash;</td><td>&mdash;</td><td>&mdash;</td><td>&mdash;</td><td>&mdash;</td><td><a href="https://www.telerik.com/kendo-angular-ui/components/gauges/lineargauge">LinearGauge</a></td><td><a href="https://js.devexpress.com/Angular/Documentation/ApiReference/UI_Components/dxLinearGauge/">LinearGauge</a></td><td><a href="https://www.infragistics.com/products/ignite-ui-angular/angular/components/linear-gauge">Linear Gauge</a></td></tr>
<tr><th scope="row">Map</th><td>&mdash;</td><td>&mdash;</td><td>&mdash;</td><td>&mdash;</td><td>&mdash;</td><td>&mdash;</td><td><a href="https://www.telerik.com/kendo-angular-ui/components/map">Map</a></td><td><a href="https://js.devexpress.com/Angular/Documentation/ApiReference/UI_Components/dxMap/">Map</a><br /><a href="https://js.devexpress.com/Angular/Documentation/ApiReference/UI_Components/dxVectorMap/">VectorMap</a></td><td><a href="https://www.infragistics.com/products/ignite-ui-angular/angular/components/geo-map">Geographic Map</a></td></tr>
<tr><th scope="row">Polar chart</th><td>&mdash;</td><td>&mdash;</td><td>&mdash;</td><td>&mdash;</td><td>&mdash;</td><td>&mdash;</td><td>&mdash;</td><td><a href="https://js.devexpress.com/Angular/Documentation/ApiReference/UI_Components/dxPolarChart/">PolarChart</a></td><td><a href="https://www.infragistics.com/products/ignite-ui-angular/angular/components/charts/types/polar-chart">Polar Chart</a></td></tr>
<tr><th scope="row">Radial gauge</th><td>&mdash;</td><td>&mdash;</td><td>&mdash;</td><td>&mdash;</td><td>&mdash;</td><td>&mdash;</td><td><a href="https://www.telerik.com/kendo-angular-ui/components/gauges/radialgauge">RadialGauge</a></td><td>&mdash;</td><td><a href="https://www.infragistics.com/products/ignite-ui-angular/angular/components/radial-gauge">Radial Gauge</a></td></tr>
<tr><th scope="row">Range selector / chart zoom</th><td>&mdash;</td><td>&mdash;</td><td>&mdash;</td><td>&mdash;</td><td>&mdash;</td><td>&mdash;</td><td>&mdash;</td><td><a href="https://js.devexpress.com/Angular/Documentation/ApiReference/UI_Components/dxRangeSelector/">RangeSelector</a></td><td><a href="https://www.infragistics.com/products/ignite-ui-angular/angular/components/zoomslider-overview">Zoom Slider</a></td></tr>
<tr><th scope="row">Sankey</th><td>&mdash;</td><td>&mdash;</td><td>&mdash;</td><td>&mdash;</td><td>&mdash;</td><td>&mdash;</td><td><a href="https://www.telerik.com/kendo-angular-ui/components/charts/sankey">Sankey</a></td><td><a href="https://js.devexpress.com/Angular/Documentation/ApiReference/UI_Components/dxSankey/">Sankey</a></td><td>&mdash;</td></tr>
<tr><th scope="row">Sparkline</th><td>&mdash;</td><td>&mdash;</td><td>&mdash;</td><td>&mdash;</td><td>&mdash;</td><td>&mdash;</td><td><a href="https://www.telerik.com/kendo-angular-ui/components/charts/sparkline">Sparkline</a></td><td><a href="https://js.devexpress.com/Angular/Documentation/ApiReference/UI_Components/dxSparkline/">Sparkline</a></td><td><a href="https://www.infragistics.com/products/ignite-ui-angular/angular/components/charts/types/sparkline-chart">Sparkline Chart</a></td></tr>
<tr><th scope="row">Treemap</th><td>&mdash;</td><td>&mdash;</td><td>&mdash;</td><td>&mdash;</td><td>&mdash;</td><td>&mdash;</td><td>&mdash;</td><td><a href="https://js.devexpress.com/Angular/Documentation/ApiReference/UI_Components/dxTreeMap/">TreeMap</a></td><td><a href="https://www.infragistics.com/products/ignite-ui-angular/angular/components/charts/types/treemap-chart">Treemap Chart</a></td></tr>
</tbody>
</table>

<h3 id="components-headlessinteractionprimitives">Headless interaction primitives</h3>

<table class="component-matrix" tabindex="0" aria-labelledby="components-headlessinteractionprimitives">
<thead>
<tr><th scope="col">Component</th><th scope="col"><a href="https://spartan.ng/documentation/introduction">Spartan</a></th><th scope="col"><a href="https://zardui.com/docs/components">Zard UI</a></th><th scope="col"><a href="https://taiga-ui.dev/">Taiga UI</a></th><th scope="col"><a href="https://material.angular.dev/components/categories">Angular Material</a></th><th scope="col"><a href="https://primeng.dev/components">PrimeNG</a></th><th scope="col"><a href="https://ng.ant.design/components/overview/en">NG-ZORRO</a></th><th scope="col"><a href="https://www.telerik.com/kendo-angular-ui/components/">Kendo UI for Angular</a></th><th scope="col"><a href="https://js.devexpress.com/Angular/Documentation/ApiReference/UI_Components/">DevExtreme Angular</a></th><th scope="col"><a href="https://www.infragistics.com/products/ignite-ui-angular/angular/components/general/open-source-vs-premium">Ignite UI for Angular</a></th></tr>
</thead>
<tbody>
<tr><th scope="row">Drag and drop</th><td>&mdash;</td><td>&mdash;</td><td>&mdash;</td><td><a href="https://material.angular.dev/cdk/drag-drop">CDK Drag and Drop (primitive)</a></td><td>&mdash;</td><td>&mdash;</td><td>&mdash;</td><td>&mdash;</td><td><a href="https://www.infragistics.com/products/ignite-ui-angular/angular/components/drag-drop">Drag and Drop (directive)</a></td></tr>
<tr><th scope="row">Listbox</th><td>&mdash;</td><td>&mdash;</td><td>&mdash;</td><td><a href="https://material.angular.dev/cdk/listbox">CDK Listbox (primitive)</a></td><td>&mdash;</td><td>&mdash;</td><td>&mdash;</td><td>&mdash;</td><td>&mdash;</td></tr>
</tbody>
</table>]]></content><author><name></name></author><summary type="html"><![CDATA[Explore Spartan, Zard UI and Taiga UI for Angular in 2026, alongside Angular Material, PrimeNG and NG-ZORRO, with screenshots and practical examples.]]></summary><media:thumbnail xmlns:media="http://search.yahoo.com/mrss/" url="https://www.modernlearner.org/assets/img/covers/w600/ui-frameworks-for-angular-2026.jpg" /><media:content medium="image" url="https://www.modernlearner.org/assets/img/covers/w600/ui-frameworks-for-angular-2026.jpg" xmlns:media="http://search.yahoo.com/mrss/" /></entry><entry><title type="html">Error Tracking for Games</title><link href="https://www.modernlearner.org/error-tracking-for-games/" rel="alternate" type="text/html" title="Error Tracking for Games" /><published>2026-01-31T18:03:01-05:00</published><updated>2026-01-31T18:03:01-05:00</updated><id>https://www.modernlearner.org/error-tracking-for-games</id><content type="html" xml:base="https://www.modernlearner.org/error-tracking-for-games/"><![CDATA[<p>When releasing a game for mobile, the web, VR, PC, whether it's a live service or single-player game, error tracking is a must-have. When a new release goes out, you want to know if players are experiencing issues due to that release. You will want to know where the error occurred and if there are commonalities to the players who are experiencing the issue.</p>

<h2 id="tools-for-error-tracking-and-application-performance-monitoring">Tools for Error Tracking and Application Performance Monitoring</h2>

<p>This is where error tracking tools come into play. There are many to choose from and they have different features and price points.</p>

<p>Here are some great options for error tracking tools, in a table for easier comparison. Note that each of the products and services may offer more than just error tracking in its feature set.</p>

<table>
  <thead>
    <tr>
      <th>Service</th>
      <th>Can it be self-hosted?</th>
      <th>Free Tier</th>
    </tr>
  </thead>
  <tbody>
    <tr>
      <td><a href="https://rollbar.com/?ref=modernlearner.org">Rollbar</a></td>
      <td>No</td>
      <td><a href="https://rollbar.com/pricing?ref=modernlearner.org">Yes, 5,000 occurrences and 1,000 replays per month; 30-day data retention</a></td>
    </tr>
    <tr>
      <td><a href="https://www.datadoghq.com/?ref=modernlearner.org">Datadog</a></td>
      <td>No</td>
      <td><a href="https://www.datadoghq.com/pricing/?product=error-tracking&amp;ref=modernlearner.org#products">No ongoing free tier; 14-day trial</a></td>
    </tr>
    <tr>
      <td><a href="https://www.bugsnag.com/?ref=modernlearner.org">BugSnag</a></td>
      <td>No</td>
      <td><a href="https://www.bugsnag.com/pricing/?ref=modernlearner.org">Yes, 7,500 events and 1M spans per month for one user</a></td>
    </tr>
    <tr>
      <td><a href="https://raygun.com/?ref=modernlearner.org">Raygun</a></td>
      <td>No</td>
      <td><a href="https://raygun.com/pricing?ref=modernlearner.org">14-day trial; paid Crash Reporting starts at $40 per 100,000 errors/month when billed annually</a></td>
    </tr>
    <tr>
      <td><a href="https://posthog.com/error-tracking?ref=modernlearner.org">PostHog</a></td>
      <td>Yes, <a href="https://posthog.com/docs/self-host/overview?ref=modernlearner.org">self-hosting documentation</a></td>
      <td><a href="https://posthog.com/pricing?ref=modernlearner.org">Yes, 100,000 exceptions per month</a></td>
    </tr>
    <tr>
      <td><a href="https://glitchtip.com/?ref=modernlearner.org">GlitchTip</a></td>
      <td>Yes, <a href="https://glitchtip.com/documentation/install?ref=modernlearner.org">installation instructions</a></td>
      <td><a href="https://glitchtip.com/pricing?ref=modernlearner.org">Yes, 1,000 events per month, unlimited projects and team members</a></td>
    </tr>
    <tr>
      <td><a href="https://launchdarkly.com/platform/observability/">Highlight, now LaunchDarkly Observability</a></td>
      <td>No; <a href="https://www.highlight.io/blog/launchdarkly-migration">Highlight service ended February 28, 2026</a></td>
      <td>Highlight is discontinued; LaunchDarkly Observability has separate pricing</td>
    </tr>
    <tr>
      <td><a href="https://www.bugsink.com/?ref=modernlearner.org">Bugsink</a></td>
      <td>Yes, <a href="https://www.bugsink.com/blog/new-license-new-pricing/?ref=modernlearner.org">self-hosting is free for non-competing use under the Polyform Shield license</a></td>
      <td><a href="https://www.bugsink.com/blog/new-hosted-pricing/?ref=modernlearner.org">Yes, 15,000 events per month for one user</a></td>
    </tr>
  </tbody>
</table>

<p><strong>However, not all error tracking tools have official support for some programming languages and frameworks.</strong> <em>Not all of them have clear documentation, tutorials and guides.</em> It's important to evaluate error tracking tools based on whether they support the programming languages your team is using, the user interface to view the errors, whether it supports SAML and Single Sign On, and whether the documentation is helpful. For example, <a href="https://posthog.com/docs/error-tracking/installation/manual?ref=modernlearner.org">PostHog has an official Android SDK but does not have an SDK for iOS although that gap can be filled by capturing errors and exceptions and manually sending them via HTTPS</a>. Self-hosted open source versions of the error tracking service may also differ in the feature set and offer fewer features than the cloud-hosted version.</p>

<h2 id="implementing-error-tracking">Implementing Error Tracking</h2>

<p>Typically, the SDKs for each error tracking service will provide a way to capture all errors and exceptions and send them to the service, the only requirement being that you create an account and supply an API key. Other parameters such as the version release number and user information can be included when sending data about the error that occurred.</p>

<p>The following is a reference with links to packages for each error tracking tool along with code samples to show how to add them to your project.</p>

<p>BugSnag:</p>

<ul>
  <li><a href="https://docs.bugsnag.com/platforms/android/?ref=modernlearner.org">BugSnag for Android</a></li>
  <li><a href="https://docs.bugsnag.com/platforms/ios/?ref=modernlearner.org">BugSnag for iOS</a></li>
  <li><a href="https://docs.bugsnag.com/platforms/unity/?ref=modernlearner.org">BugSnag package for Unity</a></li>
  <li><a href="https://docs.bugsnag.com/platforms/unreal-engine/?ref=modernlearner.org">BugSnag package for Unreal Engine</a></li>
  <li><a href="https://docs.bugsnag.com/platforms/cocos2dx/?ref=modernlearner.org">BugSnag integration for Cocos2d-x</a></li>
</ul>

<p><a href="https://www.bugsink.com/sentry-sdk-compatible/?ref=modernlearner.org">BugSink supports the Sentry SDKs</a>:</p>

<ul>
  <li><a href="https://docs.sentry.io/platforms/android/?ref=modernlearner.org">Sentry SDK for Android</a></li>
  <li><a href="https://docs.sentry.io/platforms/apple/guides/ios/?ref=modernlearner.org">Sentry SDK for iOS</a></li>
  <li><a href="https://docs.sentry.io/platforms/unity/?ref=modernlearner.org">Sentry SDK for Unity</a></li>
  <li><a href="https://docs.sentry.io/platforms/unreal/?ref=modernlearner.org">Sentry SDK for Unreal Engine</a></li>
  <li><a href="https://docs.sentry.io/platforms/godot/?ref=modernlearner.org">Sentry SDK for Godot Engine</a></li>
  <li><a href="https://docs.sentry.io/platforms/javascript/?ref=modernlearner.org">Sentry SDK for browser JavaScript</a></li>
</ul>

<p>DataDog:</p>

<ul>
  <li><a href="https://docs.datadoghq.com/error_tracking/frontend/mobile/android/?tab=kotlin&amp;ref=modernlearner.org">Datadog for Android</a></li>
  <li><a href="https://docs.datadoghq.com/error_tracking/frontend/mobile/ios?tab=swiftpackagemanagerspm&amp;ref=modernlearner.org">Datadog for iOS</a></li>
  <li><a href="https://docs.datadoghq.com/error_tracking/frontend/mobile/unity?ref=modernlearner.org">Datadog for Unity</a></li>
</ul>

<p>GlitchTip:</p>

<ul>
  <li><a href="https://glitchtip.com/sdkdocs/java-android?ref=modernlearner.org">GlitchTip for Android</a></li>
  <li><a href="https://glitchtip.com/sdkdocs/cocoa?ref=modernlearner.org">GlitchTip for Objective-C</a></li>
  <li><a href="https://glitchtip.com/sdkdocs/csharp?ref=modernlearner.org">GlitchTip for C#</a></li>
  <li><a href="https://glitchtip.com/sdkdocs/native?ref=modernlearner.org">GlitchTip for C/C++</a></li>
  <li><a href="https://glitchtip.com/sdkdocs/javascript?ref=modernlearner.org">GlitchTip for browser JavaScript</a></li>
</ul>

<p>Highlight / LaunchDarkly:</p>

<ul>
  <li><a href="https://launchdarkly.com/docs/sdk/observability/android?ref=modernlearner.org">LaunchDarkly for Android</a></li>
  <li><a href="https://launchdarkly.com/docs/sdk/observability/ios?ref=modernlearner.org">LaunchDarkly for iOS</a></li>
  <li><a href="https://launchdarkly.com/docs/sdk/observability/javascript?ref=modernlearner.org">LaunchDarkly for JavaScript</a></li>
  <li><a href="https://www.highlight.io/docs/getting-started/browser/other?ref=modernlearner.org">Highlight for JavaScript</a></li>
</ul>

<p>PostHog:</p>

<ul>
  <li><a href="https://posthog.com/docs/error-tracking/installation/android?ref=modernlearner.org">PostHog for Android</a></li>
  <li><a href="https://posthog.com/docs/error-tracking/installation/web?ref=modernlearner.org">PostHog for browser JavaScript</a></li>
  <li><a href="https://posthog.com/docs/error-tracking/installation/react?ref=modernlearner.org">PostHog for React</a></li>
</ul>

<p>Raygun:</p>

<ul>
  <li><a href="https://raygun.com/documentation/language-guides/android/crash-reporting/installation/?ref=modernlearner.org">Raygun for Android</a></li>
  <li><a href="https://raygun.com/documentation/language-guides/apple/crash-reporting/installation/?ref=modernlearner.org">Raygun for iOS</a></li>
  <li><a href="https://raygun.com/documentation/language-guides/cpp/crash-reporting/installation/?ref=modernlearner.org">Raygun for C++</a></li>
  <li><a href="https://raygun.com/documentation/language-guides/javascript/crash-reporting/installation/?ref=modernlearner.org">Raygun for JavaScript</a></li>
  <li><a href="https://raygun.com/documentation/language-guides/unity/crash-reporting/installation/?ref=modernlearner.org">Raygun for Unity</a></li>
</ul>

<p>Rollbar:</p>

<ul>
  <li><a href="https://docs.rollbar.com/docs/android?ref=modernlearner.org">Rollbar for Android</a></li>
  <li><a href="https://docs.rollbar.com/docs/apple?ref=modernlearner.org">Rollbar for iOS</a></li>
  <li><a href="https://github.com/rollbar/Rollbar.NET/blob/master/Samples/Sample.Net.ConsoleApp/Program.cs?ref=modernlearner.org">Rollbar for C#</a></li>
</ul>

<h3 id="implementing-error-tracking-for-a-python-server">Implementing Error Tracking for a Python Server</h3>

<p>The following are some code samples for implementing Error</p>

<h4 id="rollbar-for-python"><a href="https://docs.rollbar.com/docs/python?ref=modernlearner.org">Rollbar for Python</a></h4>

<p>Rollbar can be implemented for <a href="https://docs.rollbar.com/docs/fastapi?ref=modernlearner.org">FastAPI</a>, <a href="https://docs.rollbar.com/docs/django?ref=modernlearner.org">Django</a>, <a href="https://dev.to/mblayman/rollbar-monitoring-of-celery-in-a-django-app-3j2o">Celery</a>, or directly in Python like this:</p>

<pre><code class="language-python">import os
import rollbar

rollbar.init(os.getenv('ROLLBAR_API_KEY'), os.getenv('SERVER_ENVIRONMENT'), code_version=os.getenv('COMMIT_SHA'))

try:
    main_app_loop()
except IOError:
    rollbar.report_message('Got an IOError in the main loop', 'warning')
except:
    # catch-all
    rollbar.report_exc_info()

</code></pre>

<h4 id="bugsnag-for-python"><a href="https://docs.bugsnag.com/platforms/python/?ref=modernlearner.org">BugSnag for Python</a></h4>

<p>BugSnag for standalone Python scripts:</p>

<pre><code class="language-python">import os
import os.path
import bugsnag

bugsnag.configure(
    api_key=os.getenv("BUGSNAG_API_KEY"),
    project_root=os.path.abspath(os.path.dirname(__file__)),
)

</code></pre>

<p><a href="https://docs.bugsnag.com/platforms/python/django/?ref=modernlearner.org">BugSnag for Django applications</a>:</p>

<pre><code class="language-python"># settings.py
import os
import os.path
import bugsnag

BUGSNAG = {
    "api_key": os.getenv("BUGSNAG_API_KEY"),
    "project_root": os.path.abspath(os.path.join(os.path.dirname(__file__), "..")),
}

# ...

MIDDLEWARE = (
    "bugsnag.django.middleware.BugsnagMiddleware",
)

</code></pre>

<h3 id="implementing-error-tracking-in-javascript-for-browser-based-games">Implementing Error Tracking in JavaScript for Browser-Based Games</h3>

<h4 id="rollbar-for-javascript-and-typescript"><a href="https://github.com/rollbar/rollbar.js/tree/master/examples?ref=modernlearner.org">Rollbar for JavaScript and TypeScript</a></h4>

<p>Rollbar can be added to <a href="https://docs.rollbar.com/docs/react-ts?ref=modernlearner.org">React</a>, <a href="https://docs.rollbar.com/docs/angular?ref=modernlearner.org">Angular</a>, and <a href="https://docs.rollbar.com/docs/vue-js?ref=modernlearner.org">Vue</a>:</p>

<pre><code class="language-javascript">import Rollbar from 'rollbar';

const rollbar = new Rollbar({
  accessToken: 'ROLLBAR_ACCESS_TOKEN',
  environment: 'production',
});

</code></pre>

<h4 id="bugsnag-for-javascript"><a href="https://docs.bugsnag.com/platforms/javascript/?ref=modernlearner.org">BugSnag for JavaScript</a></h4>

<pre><code class="language-javascript">import Bugsnag from '@bugsnag/js';

Bugsnag.start({
  apiKey: 'BUGSNAG_API_KEY',
  onError: (event) =&gt; {
    event.setUser('user-id', 'user-email@localhost', 'User Name');
  }
);

</code></pre>

<h4 id="datadog-for-javascript"><a href="https://docs.datadoghq.com/error_tracking/frontend/browser/?tab=npm&amp;ref=modernlearner.org">Datadog for JavaScript</a></h4>

<pre><code class="language-javascript">import { datadogRum } from '@datadog/browser-rum';

datadogRum.init({
  applicationId: 'APP_ID',
  clientToken: 'CLIENT_TOKEN',
  service: 'SERVICE_NAME',
  env: 'ENVIRONMENT_NAME',
  version: '1.0.0',
  trackUserInteractions: true,
  trackResources: true
});

</code></pre>

<h2 id="migrating-from-sentry-to-bugsink-or-glitchtip">Migrating From Sentry to BugSink or GlitchTip</h2>

<p>The advantage of BugSink and GlitchTip are that they are open source and can be self-hosted. In addition, both error tracking services are compatible with Sentry SDKs. That means you can use the Sentry SDK with any language that they support, set the <code>dsn</code> URL endpoint to BugSink or GlitchTip and start tracking.</p>

<p>If you choose to use the cloud version of Bugsink or GlitchTip, here's how their error tracking plans compare to Sentry (as of October 2026), with the number of error events the plan can track per month. Bugsink prices are converted from euros using the <a href="https://www.ecb.europa.eu/stats/policy_and_exchange_rates/euro_reference_exchange_rates/html/index.en.html">ECB reference rate for October 2, 2026</a> (€1 = $1.1225) and rounded to the nearest dollar:</p>

<table>
  <thead>
    <tr>
      <th>Service</th>
      <th>Plan</th>
      <th>Monthly Price</th>
      <th># of Errors Included</th>
    </tr>
  </thead>
  <tbody>
    <tr>
      <td>Sentry</td>
      <td>Developer</td>
      <td>Free</td>
      <td>5k</td>
    </tr>
    <tr>
      <td>Bugsink</td>
      <td>Free</td>
      <td>Free</td>
      <td>15k</td>
    </tr>
    <tr>
      <td>GlitchTip</td>
      <td>Free</td>
      <td>Free</td>
      <td>1k</td>
    </tr>
    <tr>
      <td>Sentry</td>
      <td>Team</td>
      <td>$26</td>
      <td>50k</td>
    </tr>
    <tr>
      <td>Bugsink</td>
      <td>75K</td>
      <td>$18</td>
      <td>75k</td>
    </tr>
    <tr>
      <td>GlitchTip</td>
      <td>Small</td>
      <td>$15</td>
      <td>100k</td>
    </tr>
    <tr>
      <td>Bugsink</td>
      <td>600K</td>
      <td>$56</td>
      <td>600k</td>
    </tr>
    <tr>
      <td>Sentry</td>
      <td>Business</td>
      <td>$80</td>
      <td>50k</td>
    </tr>
    <tr>
      <td>GlitchTip</td>
      <td>Medium</td>
      <td>$50</td>
      <td>500k</td>
    </tr>
    <tr>
      <td>Bugsink</td>
      <td>3M</td>
      <td>$177</td>
      <td>3 million</td>
    </tr>
    <tr>
      <td>GlitchTip</td>
      <td>Large</td>
      <td>$250</td>
      <td>3 million</td>
    </tr>
    <tr>
      <td>Bugsink</td>
      <td>15M</td>
      <td>$637</td>
      <td>15 million</td>
    </tr>
    <tr>
      <td>Bugsink</td>
      <td>50M</td>
      <td>$1,446</td>
      <td>50 million</td>
    </tr>
  </tbody>
</table>

<p>This is the example code in Python that will send error traces to BugSink by configuring the Sentry SDK:</p>

<pre><code class="language-python">import sentry_sdk
import time
 
sentry_sdk.init(
    dsn="http://your_key@localhost:8001/1",
    traces_sample_rate=1.0
)

print("Causing an error")
1 / 0

</code></pre>

<p>This is JavaScript/TypeScript/HTML example code that will send errors to GlitchTip, again by configuring the Sentry SDK to use a different <code>dsn</code> URL endpoint value:</p>

<pre><code class="language-html">&lt;!DOCTYPE html&gt;
&lt;html&gt;
&lt;body&gt;
    &lt;h1&gt;GlitchTip Test&lt;/h1&gt;
    &lt;button onclick="throwError()"&gt;Throw Error&lt;/button&gt;
    &lt;script
      src="https://browser.sentry-cdn.com/10.38.0/bundle.min.js"
  integrity="sha384-/oTG1DxxBD0jT/ShtVYNvpwDmS2j9zVqquIKPRo4LxMLUCnwdUywlKzgEIwS1mEY"
  crossorigin="anonymous"
    &gt;&lt;/script&gt;
    &lt;script&gt;
        const GLITCHTIP_DSN = "http://your_key@localhost:8000/1";
        Sentry.init({ dsn: GLITCHTIP_DSN });
        function throwError() { throw new Error("Hello GlitchTip!"); }
    &lt;/script&gt;
&lt;/body&gt;
&lt;/html&gt;

</code></pre>

<p>The following is a Docker compose that will run both BugSink and GlitchTip for testing the Python and JavaScript code above:</p>

<details>
  <summary>Show the Docker compose file</summary>

  <pre><code class="language-yaml">x-environment: &amp;default-environment
  DATABASE_URL: postgres://postgres:postgres@postgres:5432/postgres
  VALKEY_URL: "" # Set to enable Valkey. Ex: redis://valkey:6379
  SECRET_KEY: change_me_to_something_random # best to run openssl rand -hex 32
  EMAIL_URL: consolemail:// # Example smtp://email:password@smtp_url:port https://glitchtip.com/documentation/install#configuration
  GLITCHTIP_DOMAIN: https://glitchtip.example.com # Change this to your domain
  DEFAULT_FROM_EMAIL: email@example.com # Change this to your email
  ENABLE_ADMIN: "False" # Set to True to enable Django Admin at /admin/
  ENABLE_OPENAPI: "False" # Set to True to enable OpenAPI spec at /api/docs
  # PORT: 8000 # If changing, change the web service port too

services:
  # GlitchTip
  # https://glitchtip.com/assets/compose.minimal.yml
  glitchtip_postgres:
    image: postgres:18
    environment:
      POSTGRES_HOST_AUTH_METHOD: "trust"
    restart: unless-stopped
    volumes:
      - pg-data:/var/lib/postgresql
  glitchtip:
    image: glitchtip/glitchtip:6 # Check https://glitchtip.com/blog/ for new major versions
    depends_on:
      - glitchtip_postgres
    ports:
      - "8000:8000"
    environment: *default-environment
    command: ./bin/run-all-in-one.sh # Runs web/worker/migrate all in one process
    restart: unless-stopped
    volumes:
      - uploads:/code/uploads

  # BugSink
  # https://github.com/bugsink/bugsink/blob/main/docker-compose-sample.yaml
  bugsink_db:
    image: postgres:17-alpine
    restart: unless-stopped
    environment:
      POSTGRES_USER: bugsinkuser 
      POSTGRES_PASSWORD: your_super_secret_password  # Change this
      POSTGRES_DB: bugsink
    volumes:
      - db-data:/var/lib/postgresql/data
    healthcheck:
      test: pg_isready -h db      
      retries: 5
      start_period: 10s
      interval: 5s
      timeout: 5s

  bugsink:
    image: bugsink/bugsink:2
    depends_on:
      bugsink_db:
        condition: service_healthy
    restart: unless-stopped
    ports:
      - "8001:8000"
    environment:
      SECRET_KEY: django-insecure-RMLYThim9NybWgXiUGat32Aa0Qbgqscf4NPDQuZO2glcZPOiXn  # Change this (and remove django-insecure prefix), e.g. openssl rand -base64 50
      CREATE_SUPERUSER: email:password  # Change this (or remove it and execute 'createsuperuser' against the running container)
      PORT: 8000
      DATABASE_URL: postgresql://bugsinkuser:your_super_secret_password@db:5432/bugsink # Change password to match POSTGRES_PASSWORD above
      BEHIND_HTTPS_PROXY: "false"  # Change this for setups behind a proxy w/ ssl enabled
      BASE_URL: "http://localhost:8000"
    healthcheck:
      test: ["CMD-SHELL", "python -c 'import requests; requests.get(\"http://localhost:8000/\").raise_for_status()'"]
      interval: 5s
      timeout: 20s
      retries: 10

volumes:
  db-data:
  pg-data:
  uploads:

</code></pre>

</details>

<p>If you would rather run them on Kubernetes, the following manifest deploys the same two services into an <code>error-tracking</code> namespace. Each one gets its own PostgreSQL <code>StatefulSet</code> and a <code>Secret</code> for credentials. Replace every <code>change_me</code> value before using it anywhere other than a local test:</p>

<details>
  <summary>Show the Kubernetes manifest</summary>

  <pre><code class="language-yaml">apiVersion: v1
kind: Namespace
metadata:
  name: error-tracking
---
# GlitchTip
# Compose reference: https://glitchtip.com/assets/compose.minimal.yml
apiVersion: v1
kind: Secret
metadata:
  name: glitchtip
  namespace: error-tracking
type: Opaque
stringData:
  POSTGRES_PASSWORD: change_me # Change this
  DATABASE_URL: postgres://postgres:change_me@glitchtip-postgres:5432/postgres # Password must match POSTGRES_PASSWORD
  SECRET_KEY: change_me_to_something_random # best to run openssl rand -hex 32
---
apiVersion: v1
kind: Service
metadata:
  name: glitchtip-postgres
  namespace: error-tracking
spec:
  clusterIP: None
  selector:
    app: glitchtip-postgres
  ports:
    - port: 5432
---
apiVersion: apps/v1
kind: StatefulSet
metadata:
  name: glitchtip-postgres
  namespace: error-tracking
spec:
  serviceName: glitchtip-postgres
  replicas: 1
  selector:
    matchLabels:
      app: glitchtip-postgres
  template:
    metadata:
      labels:
        app: glitchtip-postgres
    spec:
      containers:
        - name: postgres
          image: postgres:18
          ports:
            - containerPort: 5432
          env:
            - name: POSTGRES_PASSWORD
              valueFrom:
                secretKeyRef:
                  name: glitchtip
                  key: POSTGRES_PASSWORD
          volumeMounts:
            - name: pg-data
              mountPath: /var/lib/postgresql
          readinessProbe:
            exec:
              command: ["pg_isready", "-U", "postgres"]
            initialDelaySeconds: 5
            periodSeconds: 5
  volumeClaimTemplates:
    - metadata:
        name: pg-data
      spec:
        accessModes: ["ReadWriteOnce"]
        resources:
          requests:
            storage: 5Gi
---
apiVersion: v1
kind: PersistentVolumeClaim
metadata:
  name: glitchtip-uploads
  namespace: error-tracking
spec:
  accessModes: ["ReadWriteOnce"]
  resources:
    requests:
      storage: 1Gi
---
apiVersion: apps/v1
kind: Deployment
metadata:
  name: glitchtip
  namespace: error-tracking
spec:
  replicas: 1 # The all-in-one script runs web, worker and migrations in one process
  strategy:
    type: Recreate # The uploads volume is ReadWriteOnce
  selector:
    matchLabels:
      app: glitchtip
  template:
    metadata:
      labels:
        app: glitchtip
    spec:
      initContainers:
        - name: wait-for-db
          image: postgres:18
          command: ["sh", "-c", "until pg_isready -h glitchtip-postgres -p 5432; do sleep 2; done"]
      containers:
        - name: glitchtip
          image: glitchtip/glitchtip:6 # Check https://glitchtip.com/blog/ for new major versions
          command: ["./bin/run-all-in-one.sh"]
          ports:
            - containerPort: 8000
          envFrom:
            - secretRef:
                name: glitchtip
          env:
            - name: VALKEY_URL
              value: "" # Set to enable Valkey. Ex: redis://valkey:6379
            - name: EMAIL_URL
              value: consolemail:// # Example smtp://email:password@smtp_url:port https://glitchtip.com/documentation/install#configuration
            - name: GLITCHTIP_DOMAIN
              value: http://localhost:8000 # Change this to your domain
            - name: DEFAULT_FROM_EMAIL
              value: email@example.com # Change this to your email
            - name: ENABLE_ADMIN
              value: "False" # Set to True to enable Django Admin at /admin/
            - name: ENABLE_OPENAPI
              value: "False" # Set to True to enable OpenAPI spec at /api/docs
          volumeMounts:
            - name: uploads
              mountPath: /code/uploads
          readinessProbe:
            tcpSocket:
              port: 8000
            initialDelaySeconds: 15
            periodSeconds: 10
      volumes:
        - name: uploads
          persistentVolumeClaim:
            claimName: glitchtip-uploads
---
apiVersion: v1
kind: Service
metadata:
  name: glitchtip
  namespace: error-tracking
spec:
  selector:
    app: glitchtip
  ports:
    - port: 8000
      targetPort: 8000
---
# BugSink
# Compose reference: https://github.com/bugsink/bugsink/blob/main/docker-compose-sample.yaml
apiVersion: v1
kind: Secret
metadata:
  name: bugsink
  namespace: error-tracking
type: Opaque
stringData:
  POSTGRES_USER: bugsinkuser
  POSTGRES_PASSWORD: your_super_secret_password # Change this
  POSTGRES_DB: bugsink
  DATABASE_URL: postgresql://bugsinkuser:your_super_secret_password@bugsink-db:5432/bugsink # Password must match POSTGRES_PASSWORD
  SECRET_KEY: change-me-to-a-long-random-string-of-at-least-50-characters # Change this; Bugsink refuses to start with a short or django-insecure- key. e.g. openssl rand -base64 50
  CREATE_SUPERUSER: admin@example.com:change_me # Format is email:password. Change this (or remove it and run 'createsuperuser' in the running pod)
---
apiVersion: v1
kind: Service
metadata:
  name: bugsink-db
  namespace: error-tracking
spec:
  clusterIP: None
  selector:
    app: bugsink-db
  ports:
    - port: 5432
---
apiVersion: apps/v1
kind: StatefulSet
metadata:
  name: bugsink-db
  namespace: error-tracking
spec:
  serviceName: bugsink-db
  replicas: 1
  selector:
    matchLabels:
      app: bugsink-db
  template:
    metadata:
      labels:
        app: bugsink-db
    spec:
      containers:
        - name: postgres
          image: postgres:17-alpine
          ports:
            - containerPort: 5432
          env:
            - name: POSTGRES_USER
              valueFrom:
                secretKeyRef:
                  name: bugsink
                  key: POSTGRES_USER
            - name: POSTGRES_PASSWORD
              valueFrom:
                secretKeyRef:
                  name: bugsink
                  key: POSTGRES_PASSWORD
            - name: POSTGRES_DB
              valueFrom:
                secretKeyRef:
                  name: bugsink
                  key: POSTGRES_DB
            - name: PGDATA
              value: /var/lib/postgresql/data/pgdata # Subdirectory avoids the volume's lost+found
          volumeMounts:
            - name: db-data
              mountPath: /var/lib/postgresql/data
          readinessProbe:
            exec:
              command: ["pg_isready", "-U", "bugsinkuser", "-d", "bugsink"]
            initialDelaySeconds: 5
            periodSeconds: 5
  volumeClaimTemplates:
    - metadata:
        name: db-data
      spec:
        accessModes: ["ReadWriteOnce"]
        resources:
          requests:
            storage: 5Gi
---
apiVersion: apps/v1
kind: Deployment
metadata:
  name: bugsink
  namespace: error-tracking
spec:
  replicas: 1
  selector:
    matchLabels:
      app: bugsink
  template:
    metadata:
      labels:
        app: bugsink
    spec:
      initContainers:
        - name: wait-for-db
          image: postgres:17-alpine
          command: ["sh", "-c", "until pg_isready -h bugsink-db -p 5432; do sleep 2; done"]
      containers:
        - name: bugsink
          image: bugsink/bugsink:2
          ports:
            - containerPort: 8000
          envFrom:
            - secretRef:
                name: bugsink
          env:
            - name: PORT
              value: "8000"
            - name: BEHIND_HTTPS_PROXY
              value: "false" # Change this for setups behind a proxy w/ ssl enabled
            - name: BASE_URL
              value: http://localhost:8001 # Change this to your domain
          readinessProbe:
            tcpSocket:
              port: 8000
            initialDelaySeconds: 15
            periodSeconds: 10
---
apiVersion: v1
kind: Service
metadata:
  name: bugsink
  namespace: error-tracking
spec:
  selector:
    app: bugsink
  ports:
    - port: 8000
      targetPort: 8000

</code></pre>

</details>

<p>Apply it and use <code>kubectl port-forward</code> to reach each service on the same ports as the Docker compose, so the <code>dsn</code> values in the Python and JavaScript examples above work unchanged:</p>

<pre><code class="language-bash">kubectl apply -f error-tracking.yaml
kubectl -n error-tracking port-forward svc/glitchtip 8000:8000
kubectl -n error-tracking port-forward svc/bugsink 8001:8000
</code></pre>

<p>BugSink won't start with a short or <code>django-insecure-</code> prefixed <code>SECRET_KEY</code>, and <code>CREATE_SUPERUSER</code> must be in <code>email:password</code> format. The first login for BugSink is the email and password from that value.</p>]]></content><author><name></name></author><summary type="html"><![CDATA[When releasing a game for mobile, the web, VR, PC, whether it's a live service or single-player game, error tracking is a must-have. When a new release goes out, you want to know if players are experiencing issues due to that release. You will want to]]></summary><media:thumbnail xmlns:media="http://search.yahoo.com/mrss/" url="https://www.modernlearner.org/storage.ghost.io/c/5b/07/5b07656c-4414-4a45-8b13-53dbb3dcc520/content/images/size/w600/2026/01/Error-Tracking-for-Games.jpg" /><media:content medium="image" url="https://www.modernlearner.org/storage.ghost.io/c/5b/07/5b07656c-4414-4a45-8b13-53dbb3dcc520/content/images/size/w600/2026/01/Error-Tracking-for-Games.jpg" xmlns:media="http://search.yahoo.com/mrss/" /></entry><entry><title type="html">Understanding DAU and MAU: Key Metrics Explained</title><link href="https://www.modernlearner.org/dau-mau-ratio/" rel="alternate" type="text/html" title="Understanding DAU and MAU: Key Metrics Explained" /><published>2025-03-28T00:05:42-04:00</published><updated>2025-03-28T00:05:42-04:00</updated><id>https://www.modernlearner.org/dau-mau-ratio</id><content type="html" xml:base="https://www.modernlearner.org/dau-mau-ratio/"><![CDATA[<p>Measuring the number of active players is vital to the health of your studio’s game. DAU (Daily Active Users) is the number of players that are playing on a daily basis, while MAU (Monthly Active Users) is how many unique players are playing over the month. The MAU can be measured on a 30-day rolling basis or on a calendar basis. The metrics serve as key indicators of player engagement and retention. When conducting marketing campaigns and releasing new features, the MAU can be used as a baseline. Then both metrics can be measured after the campaign or launch is over to see if there’s a sustained positive impact. The DAU and MAU are also important to track for your game’s website and e-commerce/merch store.</p>

<h1 id="how-they-indicate-game-health">How they indicate game health</h1>

<p>Healthy games have a good amount of DAU and MAU and have high stickiness, with players returning to enjoy the game or find out what’s new. The metrics can show seasonal trends and trends around holidays. A low amount of daily players can indicate marketing or distribution issues, while a low DAU/MAU ratio can indicate other issues.</p>

<p>Different types of games can have different measures of what a successful DAU/MAU ratio is. Single-player games that are bought once can have a low DAU/MAU ratio. However, that type of game can still have a high player satisfaction rating and can be profitable in terms of number of units sold. Multiplayer games and live ops games need a minimum amount of players in the pool for matches to take place or to populate the game world. For that type of game, the DAU/MAU can indicate whether there needs to be a boost in players with a marketing campaign or by updating or releasing new features. This is where quantitative data can lead to more investigation via qualitative means such as player surveys and reading through player feedback in game reviews.</p>

<p>There are limitations to DAU/MAU metrics. While they reflect on engagement and retention, they are high-level averages that may not correlate with the actual revenue performance or player satisfaction with the game.</p>

<h1 id="interpreting-daumau-ratio-for-engagement">Interpreting DAU/MAU ratio for engagement</h1>

<p>The DAU and MAU ratio compares how often a player engages with the game in a day versus a month. If there are 10,000 players in a month and there are around 300 players in a day, then the ratio is 300 DAU to 10,000 MAU which is 3%; if there are 5,000 DAU and 25,000 MAU, the ratio is 20%. This ratio is a high-level view of how sticky your game is and how often players return to the game. A ratio of 3% is low, while a ratio of 20% is considered widely to be great and higher ratios of 50% are incredible.</p>

<h1 id="simple-steps-to-start-tracking-these-metrics">Simple steps to start tracking these metrics</h1>

<ol>
  <li>Define what an “active” player is: do they need to log in once and play a move in the game or play for at least a few minutes or take some other actions?</li>
  <li>Track when they hit the milestones to be considered active in a day</li>
  <li>Build a dashboard that tracks this number over 24 hours and the past 30 days
    <ol>
      <li>Create charts to show the DAU and MAU</li>
      <li>Create cohorts and filters for player attributes to understand differences in DAU and MAU across the player base</li>
    </ol>
  </li>
</ol>

<h1 id="how-to-create-and-view-daumau-charts">How to create and view DAU/MAU charts</h1>

<p>Many analytics dashboards now offer charts of DAU and MAU. However, each product can define an “active” user differently, so it is important to choose an event that represents meaningful activity for your game before comparing tools or interpreting the ratio.</p>

<p>Google Analytics provides a starting point for tracking these metrics. The <a href="https://support.google.com/analytics/answer/13391283?hl=en">engagement overview report</a> includes a <a href="https://support.google.com/analytics/answer/12995458?hl=en">user activity over time</a> card that shows activity over the past 1, 7, and 30 days. The <a href="https://support.google.com/analytics/answer/12993725?hl=en">user stickiness documentation</a> explains how Google Analytics calculates DAU/MAU, DAU/WAU, and WAU/MAU. Google Analytics counts users who engaged with a website while it was in focus or an app while it was in the foreground. For games, it is better to use a meaningful in-game event for your active-player definition instead of assuming that opening the game is sufficient.</p>

<p>Mixpanel can also be used to measure these metrics. Its <a href="https://docs.mixpanel.com/guides/strategic-playbooks/guide-to-product-analytics/get-to-know-your-users">guide to DAU, WAU, and MAU</a> recommends selecting an event that active users should perform. The <a href="https://docs.mixpanel.com/docs/reports/insights">Insights documentation</a> explains how to select the event, measure unique users or DAU/WAU/MAU, choose a date range, and view the results as a time-series chart.</p>

<p>PostHog provides a <a href="https://posthog.com/tutorials/dau-mau-ratio">tutorial for calculating the DAU/MAU ratio</a>. It shows how to create an insight with daily active users and monthly active users, divide the series with a formula, and display the result as a percentage. The <a href="https://posthog.com/docs/product-analytics/trends/overview">Trends documentation</a> explains how to select Daily active users, change the date range, group the chart by day or month, and save the insight.</p>

<p>There are also open-source analytics products and services that can be used for these metrics. Countly has a native <a href="https://support.countly.com/hc/en-us/articles/4431589003545-Analytics">Active Users view</a> that displays daily, weekly, and monthly active users in a chart or table. Countly defines active users as unique users who initiated at least one session, which may be broader than the definition used for a game.</p>

<p>Matomo is an open-source and self-hostable analytics platform. Where the Custom Reports feature is available, the <a href="https://matomo.org/faq/reports/create-and-analyse-custom-reports/">Custom Reports guide</a> explains how to select dimensions, metrics, filters, and an evolution graph for a custom active-user report. Matomo also documents how to use its <a href="https://matomo.org/faq/looker-studio/create-time-series-chart/">Looker Studio connector to create a time-series chart</a>. Use the event or user metric that matches the active-player definition instead of assuming that Matomo’s default visitors metric is DAU or MAU.</p>

<p>Umami is another open-source option. Its <a href="https://docs.umami.is/docs/using-boards">Boards documentation</a> explains how to create and view dashboards, and the <a href="https://docs.umami.is/docs/design-a-board">board design guide</a> documents visitor and custom-event charts. Umami’s documented board components focus on visitor and custom-event charts rather than a native DAU/MAU view. Use a custom event definition and the <a href="https://docs.umami.is/docs/api">Umami API</a> to calculate and chart DAU/MAU when the built-in visitor metrics do not match your needs.</p>

<p>Whichever tool you choose, save the definition of “active” with the dashboard. A ratio built from app opens is not directly comparable to one built from completed matches, purchases, or another meaningful player action.</p>]]></content><author><name></name></author><summary type="html"><![CDATA[Measuring the number of active players is vital to the health of your studio’s game. DAU (Daily Active Users) is the number of players that are playing on a daily basis, while MAU (Monthly Active Users) is how many unique players are playing over the month. The MAU can]]></summary><media:thumbnail xmlns:media="http://search.yahoo.com/mrss/" url="https://www.modernlearner.org/storage.ghost.io/c/5b/07/5b07656c-4414-4a45-8b13-53dbb3dcc520/content/images/size/w600/2025/10/Understanding-Metrics.jpg" /><media:content medium="image" url="https://www.modernlearner.org/storage.ghost.io/c/5b/07/5b07656c-4414-4a45-8b13-53dbb3dcc520/content/images/size/w600/2025/10/Understanding-Metrics.jpg" xmlns:media="http://search.yahoo.com/mrss/" /></entry><entry><title type="html">Unlocking the Power of Product Analytics: Metrics and Platforms Explained</title><link href="https://www.modernlearner.org/product-analytics-introduction/" rel="alternate" type="text/html" title="Unlocking the Power of Product Analytics: Metrics and Platforms Explained" /><published>2022-12-11T19:51:43-05:00</published><updated>2022-12-11T19:51:43-05:00</updated><id>https://www.modernlearner.org/product-analytics-introduction</id><content type="html" xml:base="https://www.modernlearner.org/product-analytics-introduction/"><![CDATA[<h2 id="what-is-product-analytics">What is Product Analytics?</h2>

<p>Product analytics is a way for you to track what players, customers, users are doing on your website, within your game, or within your mobile app. It is a quantitative way to understand interactions and workflows within your product.</p>

<p>When combined with qualitative user research, such as surveys, product analytics can provide a comprehensive view of user experience and guide decision-making to improve the overall user experience and drive business success. As a decision-maker, understanding and leveraging product analytics is crucial for making informed, data-driven decisions and staying competitive in today's market.</p>

<h2 id="why-is-it-important">Why is it important?</h2>

<p>Product analytics is critical for understanding how people are using your product. With data from product analytics, we can identify which features are most commonly used. It enables us to identify opportunities for improvement of features whether through product and engineering or through marketing efforts. It can also show how often and when users are logging in and how often they return to the product, giving you significant insight in user engagement and retention.</p>

<p>Your competitors are measuring engagement and retention in their games, and it’s giving them an edge in understanding how to drive revenues and improve the player experience.</p>

<p>Before implementing analytics, it is essential to establish clear goals, such as increasing engagement with specific features, driving revenue through NFTs or In-App Purchases, or improving the overall player experience.</p>

<figure class="kg-card kg-image-card kg-width-wide"><img src="/storage.ghost.io/c/5b/07/5b07656c-4414-4a45-8b13-53dbb3dcc520/content/images/2022/12/Article-Images---Product-Analytics-Services.png" class="kg-image" alt="" loading="lazy" width="900" height="600" srcset="/storage.ghost.io/c/5b/07/5b07656c-4414-4a45-8b13-53dbb3dcc520/content/images/size/w600/2022/12/Article-Images---Product-Analytics-Services.png 600w, /storage.ghost.io/c/5b/07/5b07656c-4414-4a45-8b13-53dbb3dcc520/content/images/2022/12/Article-Images---Product-Analytics-Services.png 900w" /></figure>

<h3 id="metrics-for-games-and-web3-nft-gaming">Metrics for Games and Web3 NFT Gaming</h3>

<p>Some of the metrics for games that are important include (<a href="https://docs.gameanalytics.com/docs/features/event-types/metrics-dimensions/?ref=modernlearner.org">GameAnalytics as a great list of metrics and KPIs</a>):</p>

<ul>
  <li>Average session length</li>
  <li>DAU, daily active users</li>
  <li>Retention, the number of players returning every day or after some number of days</li>
  <li>Load times, how quickly the game loads and how quickly each screen or level loads</li>
  <li>Paying users, number of users who have made purchases in day</li>
  <li>Win percentage, how often players are completing levels or winning rounds in the game</li>
</ul>

<p>It may also be important to keep track of which devices and operating systems players are playing the game on. For Web3 NFT games, the type of wallet used can be useful to know for QA purposes to ensure that there is more testing with those wallets. Knowing that some players spend a lot on NFTs can also be a useful way to segment the audience for airdrops or game features.</p>

<p>For all games, DAU and MAU are important to measure. The number of daily active users and monthly active users provides an overview of the player base and are indicative of the engagement that a game has. During holidays and marketing launches, the number of daily active users may increase a lot for a short period of time.</p>

<h3 id="metrics-for-websites-and-e-commerce">Metrics for Websites and E-commerce</h3>

<p>Some of the metrics a website or e-commerce site will want to keep track of are:</p>

<ul>
  <li>Revenue</li>
  <li>Popular products and product categories viewed</li>
  <li>Popular products added to cart</li>
  <li>Average session length</li>
  <li>Traffic sources</li>
</ul>

<p>E-commerce and websites will want to track every link click and page navigation event to understand which pages, articles, products and product categories are being viewed.</p>

<p>For e-commerce, the checkout process is a funnel that needs to be measured to see where customers are dropping off. It could be because there are too many distractions on the checkout page, or it could be because form validation is not working correctly, or because there is some other problem with the checkout user experience.</p>

<figure class="kg-card kg-image-card kg-width-wide"><img src="/storage.ghost.io/c/5b/07/5b07656c-4414-4a45-8b13-53dbb3dcc520/content/images/2022/12/Product-Analytics-Services.png" class="kg-image" alt="" loading="lazy" width="900" height="600" srcset="/storage.ghost.io/c/5b/07/5b07656c-4414-4a45-8b13-53dbb3dcc520/content/images/size/w600/2022/12/Product-Analytics-Services.png 600w, /storage.ghost.io/c/5b/07/5b07656c-4414-4a45-8b13-53dbb3dcc520/content/images/2022/12/Product-Analytics-Services.png 900w" /></figure>

<h2 id="what-product-analytics-tools-and-mobile-game-analytics-services-are-available">What product analytics tools and mobile game analytics services are available?</h2>

<p>There are several product analytics tools available on the market, both cloud-based SaaS options and self-hosted solutions. You can compare them based on whether they automatically track events, what their reports are like, whether they can send data to other databases and reporting tools, pricing plans. Certain product analytics services are better suited for mobile game analytics than others.</p>

<h3 id="gameanalytics">GameAnalytics</h3>

<p>GameAnalytics is a service that provides event tracking with a focus on game industry metrics. They include KPIs (Key Performance Indicators) in their dashboards and reporting that are designed for game developers and publishers to better understand players in-game actions. They have an additional product for A/B testing and managing game configurations remotely so that you can customize the game experience for each player.</p>

<p>GameAnalytics provides a default dashboard that tracks key metrics such as playtime, daily active users (DAU), in-app purchase (IAP) revenue, and retention. Additionally, they allow you to define custom cohort groups to track events over a specific time period, providing valuable insights for strategic decision-making.</p>

<figure class="kg-card kg-image-card kg-width-wide kg-card-hascaption"><img src="/storage.ghost.io/c/5b/07/5b07656c-4414-4a45-8b13-53dbb3dcc520/content/images/2022/12/gameanalytics-engagement-dashboard.jpeg" class="kg-image" alt="Example image of dashboard from the GameAnalytics product analytics service" loading="lazy" width="1248" height="690" srcset="/storage.ghost.io/c/5b/07/5b07656c-4414-4a45-8b13-53dbb3dcc520/content/images/size/w600/2022/12/gameanalytics-engagement-dashboard.jpeg 600w, /storage.ghost.io/c/5b/07/5b07656c-4414-4a45-8b13-53dbb3dcc520/content/images/size/w1000/2022/12/gameanalytics-engagement-dashboard.jpeg 1000w, /storage.ghost.io/c/5b/07/5b07656c-4414-4a45-8b13-53dbb3dcc520/content/images/2022/12/gameanalytics-engagement-dashboard.jpeg 1248w" /><figcaption><span style="white-space: pre-wrap;">GameAnalytics - Dashboard of User Engagement Metrics</span></figcaption></figure>

<p>GameAnalytics is a game industry-focused product that offers a comprehensive suite of event tracking tools. Their seven event types (business, resource, progression, error, design, ads, and impression) provide a complete picture of player behavior, from the moment they click on an ad to the moment they level up in the game.</p>

<p>With GameAnalytics, game developers can gain valuable insights into player behavior and optimize their game for the best possible experience.</p>

<p>GameAnalytics SDKs have first-class support for Unity, Unreal Engine, Roblox, Meta Quest 2, GameMaker, Godot, Cocos2D, Construct and Defold. They also have SDKs for C++, C# and JavaScript.</p>

<p>If you are using any other programming language such as Python or Java, you can use their Collection API directly with an HTTP client library.</p>

<div class="kg-card kg-button-card kg-align-center"><a href="/services/" class="kg-btn kg-btn-accent">Get Expert Advice on Product Analytics</a></div>

<h3 id="mixpanel">Mixpanel</h3>

<p>Mixpanel is a powerful analytics tool that is specifically designed for mobile apps and web apps. In addition to its focus on mobile and web app analytics, Mixpanel can also be used for tracking user behavior in games.</p>

<p>It offers powerful features such as support for cohort analysis and easy-to-use reporting tools.</p>

<p>Mixpanel provides four main types of reports: insights, funnels, retention, and flows. The <em>insights report</em> provides detailed information about how long game sessions are, which features and pages in the game are being visited. The funnel report allows you to track how many users are seeing a notification and then taking a specific action, such as clicking a link or using a new feature.</p>

<p>The retention report shows you the D1, D5, D7 and D30 retention, and can answer the question of how many players are coming back after a week which can help you understand user engagement and retention.</p>

<p>Finally, the flow report allows you to see how users are moving through your app, which can help you identify where players are starting from before they engage with a specific event or feature.</p>

<figure class="kg-card kg-image-card kg-card-hascaption"><img src="/storage.ghost.io/c/5b/07/5b07656c-4414-4a45-8b13-53dbb3dcc520/content/images/2022/12/mixpanel-flows-report.png" class="kg-image" alt="Example image of a flow report on the Mixpanel product analytics service" loading="lazy" width="1574" height="1104" srcset="/storage.ghost.io/c/5b/07/5b07656c-4414-4a45-8b13-53dbb3dcc520/content/images/size/w600/2022/12/mixpanel-flows-report.png 600w, /storage.ghost.io/c/5b/07/5b07656c-4414-4a45-8b13-53dbb3dcc520/content/images/size/w1000/2022/12/mixpanel-flows-report.png 1000w, /storage.ghost.io/c/5b/07/5b07656c-4414-4a45-8b13-53dbb3dcc520/content/images/2022/12/mixpanel-flows-report.png 1574w" /><figcaption><span style="white-space: pre-wrap;">Mixpanel - Flow Report</span></figcaption></figure>

<p>Mixpanel has SDKs for JavaScript, Unity, React Native, Flutter, iOS and Android. This makes it easy to integrate Mixpanel into your existing tech stack and start tracking important metrics right away.</p>

<p>One of the standout features of Mixpanel is the excellent documentation provided. This documentation not only guides you through the process of implementing Mixpanel, but also highlights many of the key considerations that you should keep in mind when setting up your analytics.</p>

<p>For example, the documentation discusses the pros and cons of performing analytics on the client-side versus the server-side, offers suggestions on how to name the events that you track, and provides guidance on how to use Mixpanel's "time event" feature to measure durations.</p>

<div class="kg-card kg-callout-card kg-callout-card-yellow"><div class="kg-callout-emoji">💡</div><div class="kg-callout-text">If the reporting capabilities of Mixpanel are not enough, you can use raw exports to export the analytics data to an AWS S3 bucket or to another file store. It is also possible to use schematized exports to export the data into Google BigQuery and other databases to be able to generate reports with SQL.</div></div>

<p>Mixpanel has its own query language, JQL, which can be used to query raw events to generate custom reports.</p>

<h3 id="google-analytics">Google Analytics</h3>

<p>Google Analytics is a powerful and widely used tool for tracking events on websites, blogs, and ecommerce sites. With Google Analytics, you can track user interactions on your website or app, such as page views, clicks, and form submissions, and gain valuable insights into the behavior of your users. This information can help you improve the user experience, increase engagement, and drive conversions on your website or app.</p>

<p>However, Google Analytics is not as widely used for tracking events in games and mobile apps. This is because games and mobile apps often have different tracking needs and requirements, and there are other specialized tools that are better suited for this purpose. Despite this, it is still possible to use Google Analytics for tracking events in games and mobile apps, although it may require some additional setup and configuration.</p>

<p>By default, when implementing Google Analytics it keeps track of each page that is viewed and the traffic source. This information is particularly valuable for ecommerce sites where it’s important to understand whether customers are arriving on a landing page and buying a product or are exploring the website through various category pages or if they’re having issues with searching for a product.</p>

<p>In addition to tracking page views and traffic sources, Google Analytics (and other tools) also tracks the country and device type that your website or app is being accessed from. For a website, this information can inform decisions about which web browsers to test on or which web browsers to drop support for or if the mobile layout of the site needs to be improved.</p>

<p>The advantage of Google Analytics for ecommerce is that it can be connected to the Google Search console and to Google Ads. This enables an ecommerce site owner to understand which search keywords are being searched and leading to a product or article page. It helps them understand which paid advertisements are driving traffic to their website.</p>

<div class="kg-card kg-callout-card kg-callout-card-blue"><div class="kg-callout-emoji">📄</div><div class="kg-callout-text">While not designed specifically for games, Google Analytics can be used to track events and page screens and can help in understanding the event flow of the game. In their dashboard, there is an Events subsection under the Behavior section which displays the events and pages/screens that are tracked. For games, this section and the Audience sections will be helpful in understanding player behavior.</div></div>

<p>Overall, Google Analytics is a valuable tool for website and app owners who want to gain insights into user behavior and improve the user experience on their platform. While it may not be the best option for tracking events in games and mobile apps, it can still be used for this purpose with some additional effort.</p>

<div class="kg-card kg-button-card kg-align-center"><a href="/services/" class="kg-btn kg-btn-accent">Get Expert Advice on Product Analytics</a></div>]]></content><author><name></name></author><category term="product analytics" /><summary type="html"><![CDATA[What is Product Analytics? Product analytics is a way for you to track what players, customers, users are doing on your website, within your game, or within your mobile app. It is a quantitative way to understand interactions and workflows within your product. When combined with qualitative user research, such]]></summary><media:thumbnail xmlns:media="http://search.yahoo.com/mrss/" url="https://www.modernlearner.org/storage.ghost.io/c/5b/07/5b07656c-4414-4a45-8b13-53dbb3dcc520/content/images/size/w600/2025/10/power-of-product-analytics.jpg" /><media:content medium="image" url="https://www.modernlearner.org/storage.ghost.io/c/5b/07/5b07656c-4414-4a45-8b13-53dbb3dcc520/content/images/size/w600/2025/10/power-of-product-analytics.jpg" xmlns:media="http://search.yahoo.com/mrss/" /></entry><entry><title type="html">How to Start Developing Smart Contracts for Cosmos</title><link href="https://www.modernlearner.org/how-to-start-developing-smart-contracts/" rel="alternate" type="text/html" title="How to Start Developing Smart Contracts for Cosmos" /><published>2022-09-10T10:14:56-04:00</published><updated>2022-09-10T10:14:56-04:00</updated><id>https://www.modernlearner.org/how-to-start-developing-smart-contracts</id><content type="html" xml:base="https://www.modernlearner.org/how-to-start-developing-smart-contracts/"><![CDATA[<p>Smart contracts, web3, decentralized finance and NFTs have gained popularity once again in the past few years. For a consulting contract, we worked on the implementation of a smart contract for a web3 game. The smart contract functioned on a Cosmos-based blockchain.</p>

<p>A smart contract is a program that runs on a blockchain. Smart contracts can have custom logic and their own method of keeping track of who owns what. They are used for NFTs and decentralized financial protocols. All collectible NFTs on Ethereum and on various Cosmos-based blockchains are kept track of within a smart contract.</p>

<p>DeFi protocols use smart contracts for keeping track of loan collateral, wrapped tokens, swaps, trades, decentralized exchanges and more. Smart contracts are executed on nodes within the blockchain and can be queried for data and information.</p>

<p><a href="https://cosmos.network/intro">Cosmos is a blockchain that makes building new chains easier than before, also known as an internet of blockchains</a>. Cosmos functions as a foundation that can be used to build application-specific blockchains that are interoperable.</p>

<figure class="kg-card kg-image-card"><img src="/assets/img/cosmos-logo.png" class="kg-image" alt="" loading="lazy" width="1440" height="512" /></figure>

<p><a href="https://tutorials.cosmos.network/">Cosmos supports smart contracts through CosmWasm. You can write smart contracts using the Rust programming language for Cosmos-based blockchains that support CosmWasm</a>. Rust is a typesafe and performant language that can be used to write any sort of software from web servers to game engines to smart contracts. It improves the reliability of programs and can be used in resource-constrained environments where efficiency is a priority.</p>

<p>The following Cosmos-based blockchains support running CosmWasm smart contracts:</p>

<ul>
  <li><a href="https://docs.cudos.org/mainnet/main-smart-contracts.html#install-rustup">Cudos</a>, a cloud computing blockchain</li>
  <li><a href="https://docs.junonetwork.io/juno/home-of-cosmwasm">Juno</a>, a chain for smart contracts and app development</li>
  <li><a href="https://docs.osmosis.zone/cosmwasm/local/localosmosis/">Osmosis</a>, a decentralized exchange, recently enabled CosmWasm support</li>
  <li><a href="https://docs.scrt.network/secret-network-documentation/development/secret-contracts/differences-from-vanilla-cw">Secret Network</a>, a privacy-first chain, supports a modified version of CosmWasm</li>
</ul>

<p>Here are the base libraries you will need to get started with writing CosmWasm smart contracts:</p>

<ul>
  <li><a href="https://github.com/CosmWasm/cosmwasm/tree/main/packages/std">cosmwasm-std</a> contains standard utility functions for working with wallet addresses and coins</li>
  <li><a href="https://github.com/CosmWasm/cosmwasm/tree/v1.5.0/packages/storage">cosmwasm-storage</a> contains code for storing data as maps/dictionaries/hashes and as individual values</li>
  <li><a href="https://docs.rs/cosmwasm-schema/1.1.0/cosmwasm_schema/">cosmwasm-schema</a> helps generate the JSON schema for interacting with the smart contract</li>
</ul>

<p>If you want to write an NFT smart contract, your contract’s interface will need to adhere to the CW721 interface. <a href="https://github.com/CosmWasm/cw-nfts">You can use the cw721-base code to build your own NFTs smart contract</a>.</p>

<p>During a smart contract consulting project, we implemented a way for NFTs of one type to be exchanged for another type of NFT that was randomly chosen from the set of remaining unowned NFTs. We had to adhere to the CW721 NFT contract interface to make it work.</p>

<div class="kg-card kg-header-card kg-width-full kg-size-small kg-style-dark"><h2 class="kg-header-card-header" id="how-does-a-cosmos-smart-contract-interact-with-another-smart-contract"><span style="white-space: pre-wrap;">How does a Cosmos smart contract interact with another smart contract?</span></h2><h3 class="kg-header-card-subheader" id="interactions-between-smart-contracts-allow-composability-of-contracts-where-you-can-build-on-top-of-nft-collections-and-defi-protocols"><span style="white-space: pre-wrap;">Interactions between smart contracts allow composability of contracts, where you can build on top of NFT collections and DeFi protocols.</span></h3></div>

<p>As part of an NFT consultation and implementation project, we had to interact with other smart contracts. One of the interactions was with a CW721 NFT smart contract in order to verify ownership of an NFT that would be exchanged. Another interaction was with a randomness oracle smart contract, LoTerra, which would return a random number.</p>

<p>As part of the smart contract execution, the query messages would be sent out to the other smart contracts, return with responses and continue on the happy path to update the ownership of the NFTs.</p>

<p>To interact with another contract, you can execute a message, which can change state and update the storage in the other contract, or you can query that contract for information. In the Rust smart contract code, this is implemented by creating new message structs that are converted and passed along to the CosmWasm querier.</p>

<p>This code shows how to build a query message that queries another smart contract:</p>

<pre><code class="language-rust">fn is_airdrop_eligible(deps: Deps, owner: String) -&gt; bool {
    let msg = example_nfts::msg::QueryMsg::Balance { owner, token_id: "example".to_string() };
    let wasm = WasmQuery::Smart {
        contract_addr: EXAMPLE_NFTS_CONTRACT_ADDR.to_string(),
        msg: to_binary(&amp;msg).unwrap(),
    };
    let res: StdResult&lt;example_nfts::msg::BalanceResponse&gt; = deps.querier.query(&amp;wasm.into());
    match res {
        Ok(res) =&gt; res.balance.u128() == 1u128,
        _ =&gt; false,
    }
}
</code></pre>

<div class="kg-card kg-header-card kg-width-full kg-size-small kg-style-dark"><h2 class="kg-header-card-header" id="unit-testing-and-mocks-and-test-data-for-cosmwasm-smart-contracts"><span style="white-space: pre-wrap;">Unit Testing and Mocks and Test Data for CosmWasm smart contracts</span></h2></div>

<p>What’s great about Rust is that you can add unit tests with mocks to thoroughly test various query and execute responses from another smart contract.</p>

<p>Through unit testing, it’s possible to test a large variety of different parameters and thanks to Rust’s speed and performance, you can write more tests and create more test data for more thorough test scenarios.</p>

<p>Here is an example of a unit test for a Cosmos smart contract:</p>

<pre><code class="language-rust">#[cfg(test)]
mod tests {
    use super::*;
    use crate::mock_querier::mock_dependencies_custom;
    use cosmwasm_std::testing::{mock_dependencies, mock_info, MOCK_CONTRACT_ADDR};
    use cosmwasm_std::{
        coins, from_binary, Addr, BlockInfo, ContractInfo,
    };

    // ...

    #[test]
    fn mint_nft() {
        let mut deps = mock_dependencies_custom(&amp;[]);
        let res = instantiate(
            deps.as_mut(),
            mock_env(0),
            mock_info("creator_address", &amp;coins(1000, "earth")),
            InstantiateMsg {},
        ).unwrap();
        assert_eq!(0, res.messages.len());

        let res = execute(
            deps.as_mut(),
            mock_env(1),
            mock_info(
                "player_address",
                &amp;[Coin {
                    amount: Uint128::from(1_000_000u128),
                    denom: "uusd".to_string(),
                }],
            ),
            ExecuteMsg::MintNft {},
        ).unwrap();
        assert_eq!(0, res.messages.len());

        let res = query(
            deps.as_ref(),
            mock_env(2),
            QueryMsg::Inventory {
                address: "player_address".to_string(),
            },
        ).unwrap();
        let inventory: InventoryResponse = from_binary(&amp;res).unwrap();
        println!("{:?}", inventory);
        assert_eq!(2, inventory.nfts.len(), "there should be two nfts from mint + airdrop");

        // ...
    }
}
</code></pre>

<p>Here is an example of a mock querier used in a unit test where the response is mocked with fake data for testing:</p>

<pre><code class="language-rust">#[derive(Clone, Default, Serialize)]
pub struct ExampleNftsBalanceResponse {
    pub balance: Uint128,
}

impl ExampleNftsBalanceResponse {
    pub fn new(balance: Uint128) -&gt; Self {
        ExampleNftsBalanceResponse { balance }
    }
}

// ...

impl WasmMockQuerier {
    pub fn handle_query(&amp;self, request: &amp;QueryRequest&lt;TerraQueryWrapper&gt;) -&gt; QuerierResult {
        match &amp;request {
            QueryRequest::Wasm(WasmQuery::Smart { contract_addr, msg }) =&gt; {
                if contract_addr == &amp;"terra1EXAMPLE".to_string() {
                    let msg_example_nfts_balance = ExampleNftsBalanceResponse {
                        balance: Uint128::from(1u128)
                    };
                    return SystemResult::Ok(ContractResult::from(to_binary(&amp;msg_example_nfts_balance)));
                }
                panic!("DO NOT ENTER HERE");
            },
            _ =&gt; self.base.handle_query(request),
        }
    }

    pub fn new(base: MockQuerier&lt;TerraQueryWrapper&gt;) -&gt; Self {
        WasmMockQuerier { base }
    }
}
</code></pre>

<div class="kg-card kg-header-card kg-width-full kg-size-small kg-style-dark"><h2 class="kg-header-card-header" id="testing-in-local-development-testnet"><span style="white-space: pre-wrap;">Testing in Local Development Testnet</span></h2></div>

<p>One great benefit of CosmWasm and Cosmos-based blockchains is that you can run an array of tests within a local development testnet to ensure that interactions with your smart contract are working correctly in terms of transactions, wallet balances and storage updates.</p>

<p>Local development testnets provide a way to test for various scenarios. It’s recommended to test thoroughly on a testnet and, especially for DeFi protocols, to hire an auditing firm to audit the smart contract code.</p>

<p>Here is an example of how to run JavaScript code that executes transactions on a local testnet:</p>

<pre><code class="language-javascript">const coins = { uluna: 1_000_000, uusd: 1_000_000 };
console.log('sending coins from multiple senders to one receiving wallet');
for (let wallet of wallets) {
    if (wallet.address === wallets[0].address) {
        continue;
    }

    const send = new MsgSend(
        wallet.address,
        wallets[0].address,
        coins
    );
    try {
        const tx = await terraWalletFromMnemonic(wallet.mnemonic).createAndSignTx({
            msgs: [send],
            memo: 'terrajs-test-harness',
            fee: new Fee(2_000_000, { uusd: 10_000_000 })
        });
        const result = await terra.tx.broadcast(tx);
        await displayTxInfo(result.txhash);
    } catch (e) {
        console.log(e);
    }
}
</code></pre>

<p><small>Article originally published at <a href="https://rudolfolah.com/smart-contracts-for-cosmos-blockchain/">https://rudolfolah.com/smart-contracts-for-cosmos-blockchain/</a> by Rudolf Olah</small></p>]]></content><author><name></name></author><category term="smart contracts" /><category term="blockchain" /><summary type="html"><![CDATA[A smart contract is a program that runs on a blockchain. Smart contracts can have custom logic and their own method of keeping track of who owns what. They can be written with Rust and CosmWasm for Cosmos-based blockchains]]></summary><media:thumbnail xmlns:media="http://search.yahoo.com/mrss/" url="https://www.modernlearner.org/storage.ghost.io/c/5b/07/5b07656c-4414-4a45-8b13-53dbb3dcc520/content/images/size/w600/2025/10/How-to-Start-Developing-Smart-Contracts-for-Cosmos.jpg" /><media:content medium="image" url="https://www.modernlearner.org/storage.ghost.io/c/5b/07/5b07656c-4414-4a45-8b13-53dbb3dcc520/content/images/size/w600/2025/10/How-to-Start-Developing-Smart-Contracts-for-Cosmos.jpg" xmlns:media="http://search.yahoo.com/mrss/" /></entry><entry><title type="html">Machine Learning Basics with Ludwig</title><link href="https://www.modernlearner.org/machine-learning-basics-with-ludwig/" rel="alternate" type="text/html" title="Machine Learning Basics with Ludwig" /><published>2021-01-10T19:01:04-05:00</published><updated>2021-01-10T19:01:04-05:00</updated><id>https://www.modernlearner.org/machine-learning-basics-with-ludwig</id><content type="html" xml:base="https://www.modernlearner.org/machine-learning-basics-with-ludwig/"><![CDATA[<p><em>Written by Rudolf Olah</em></p>

<p>We're going to walk through the basics of machine learning and applying it to the problem of email spam prediction. We are going to do this by loading training data sets, building a few machine learning models and then checking their performance on test data sets. The data sets we are using are small enough to be understandable and the models only have a few features. This makes it easier to puzzle out how the machine learning algorithm and neural networks are interpreting the input and producing the output.</p>

<p>Machine learning and deep learning techniques have become popular topics over the past five years. Machine learning is being applied to many problems and we are seeing some interesting and effective results. Machine learning is a way to process and analyze big data and make predictions about future data. For instance, you can analyze millions of emails to identify which ones are spam and which ones are not, and you can analyze this based on hundreds or thousands of features or signals.</p>

<p>To get you started with machine learning, you could start with TensorFlow, a machine learning library open-sourced by Google in 2015. Alternatively, you could start with scikit-learn, or perhaps another library.</p>

<p>However if you want to get started quickly, you should consider trying out Ludwig.</p>

<p><strong><a href="https://github.com/modernlearner/machine-learning-with-ludwig">The code for this article is available on Github: https://github.com/modernlearner/machine-learning-with-ludwig</a></strong></p>

<p>Ludwig is a free/open source machine learning library created by the software engineers are Uber. It combines <a href="https://www.tensorflow.org/">TensorFlow</a>, SciKit-Learn and other Python packages into an easy-to-use package where you can load data sets from CSV files, train your machine learning model, and then apply it to new data. It can visualize the performance of the machine learning models you build and show you comparisons. It can save a snapshot of your model so that you do not have to re-train it from scratch and just need to feed it additional data. It is by far the simplest way to get started in applying machine learning.</p>

<h2 id="assumed-knowledge">Assumed Knowledge</h2>

<p>For this article, we assume that you know how to write code in Python and how to run Python programs. We are using Python 3.8 in this article.</p>

<p>I am also assuming that you have a small amount of knowledge about machine learning, such as what a neural network is.</p>

<h2 id="installing-python-and-ludwig">Installing Python and Ludwig</h2>
<p>Let's begin by installing virtual env and creating the environment:</p>

<pre><code class="language-shell">sudo pip install virtualenv virtualenv –python=python3.8 env
</code></pre>

<p>Then let's install the dependencies:</p>

<pre><code class="language-shell">source env/bin/activate pip install -r requirements.txt
</code></pre>

<p>Install English-specific encodings for spacy language processing:</p>

<pre><code class="language-shell">python -m spacy download en
</code></pre>

<h3 id="installing-ludwig">Installing Ludwig</h3>
<p>The dependencies list looks like this:</p>

<pre><code>ludwig[text,viz]==0.3.1
</code></pre>

<p>This will install Ludwig, TensorFlow, SciKit-Learn, Pandas, Numpy. It will also install SpaCy for text and natural language processing. Additionally, it will install visualization tools like matplotlib and seaborn.</p>

<h2 id="starting-code">Starting Code</h2>

<p>In the Python files that we create, you should start with this chunk of code:</p>

<pre><code class="language-python">import os
os.environ['TF_CPP_MIN_LOG_LEVEL'] = '3'
import tensorflow as tf
tf.compat.v1.logging.set_verbosity(tf.compat.v1.logging.ERROR)
import os.path

import pandas as pd
from ludwig.api import LudwigModel
</code></pre>

<p>The first part will disable the output of some logging from TensorFlow. This can be a bit noisy. The environment variable <code>TF_CPP_MIN_LOG_LEVEL</code> controls the level of logging. Its value can range from 0 to 4, where the highest number 4 will show more logs (info, warning, error, fatals) and the lowest number 0 will show no logging information.</p>

<p>The other half of that code will import the necessary modules to be able to use Ludwig.</p>

<p>And with that we’re ready to write our first machine learning program.</p>

<h2 id="basic-prediction-with-ludwig">Basic Prediction with Ludwig</h2>
<p>We are going to build a machine learning model and train it to identify which emails are spam and which are not. Let’s take a look at the data set we are going to use to train the model.</p>

<h3 id="the-dataset-email-spam">The Dataset: Email Spam</h3>

<p>Our data set is a CSV (comma-separated values) file with three columns:</p>

<ul>
  <li>subject</li>
  <li>content</li>
  <li>spam</li>
</ul>

<p>All three columns are strings of text. However, as we will see in the next section, they are processed differently when it comes to defining our machine learning model.</p>

<p>Here is a sample of the data (<a href="https://github.com/modernlearner/machine-learning-with-ludwig">you can check out the code repo on Github to see all of the data</a>):</p>

<pre><code>"cruise winner!","Hello! You just won a cruise!","spam"
"BANK WARNING","This is your bank, warning you that someone has tried to access your account","spam"
"RE: AI meeting","The agenda for our company meeting is AI and machine learning. Please be on time. Thanks!","not_spam"
</code></pre>

<p>As you can see from this sample, the last column in some rows of data is “spam” and in other rows it is “not_spam”.</p>

<h4 id="important-notes-about-the-data-set">Important Notes about the Data Set</h4>
<p>One important thing to note here is that I, the author, of this article, have classified the data rows as either spam or not spam.</p>

<p><em>It is up to you</em> to double-check the data set you are using for training matches is correct.</p>

<p><em>It is up to you</em> to analyze the data set and see if there are biases and make sure to correct for them.</p>

<p>Another important thing: this sample of data is <em>not enough</em> to properly train the machine learning model, there are not enough data points. The small data set in the code repo has some more data points and it is <em>just barely enough</em> to train the model. It’s a good <em>starting point</em> and we are using a small data set so we can understand roughly what is happening within our model. Remember that companies such as Google, Facebook and Uber train their machine learning models on data sets where there are <em>millions</em> of data points. To train this model further you can use “online” training which is provided by the Ludwig method: <a href="https://ludwig.ai/latest/user_guide/api/LudwigModel/#ludwig.api.LudwigModel.train_online">train_online</a></p>

<h3 id="ludwig-configuration-input-and-output">Ludwig Configuration: Input and Output</h3>
<p>So we have a data set with three columns. Our machine learning model needs input features to “learn” from, to be trained on, and it needs output features that we would like to predict or calculate. The “features” of a data set describe the shape of the data.</p>

<h4 id="input-features">Input Features</h4>
<p>The input features for the email data set are going to be the “subject” and the “content” columns.</p>

<p>With Ludwig, you can start with this very simple definition of model input features:</p>

<pre><code class="language-python">input_features = [
    {
        'name': 'subject',
        'type': 'text',
    },
    {
        'name': 'content',
        'type': 'text',
    },
]
</code></pre>

<p>Ludwig provides default values for the encoding of the columns that are used as input features and it provides default configurations and parameters for the underlying machine learning neural network to use.</p>

<p>You can override the default configuration of the input features and specify your own configuration:</p>

<pre><code class="language-python">input_features = [
    {
        'name': 'subject',
        'type': 'text',
        'preprocessing': {
            'lowercase': True,
        },
    },
    {
        'name': 'content',
        'type': 'text',
        'preprocessing': {
            'lowercase': True,
        },
        'encoder': 'stacked_parallel_cnn',
        'reduce_output': 'sum',
        'activation': 'relu',
    },
]
</code></pre>

<h4 id="preprocessing-data">Preprocessing Data</h4>
<p>The preprocessing step we are using for the subject and content fields is “lowercase”. This means an email with the subject “Hello WORLD” will look the same as “hello world” and this could affect your training results and the performance of the machine learning model.</p>

<p>Other preprocessing options for text features include controlling how characters are mapped, how words and characters are tokenized, and the number of common words to consider. You can read more about them here: <a href="https://ludwig.ai/latest/configuration/features/text_features/#preprocessing">text feature preprocessing</a></p>

<h4 id="encoding-data-into-a-neural-net">Encoding Data into a Neural Net</h4>
<p>The “text” type of input feature uses the spaCy natural language processing library to tokenize the text. For example, “hello world” in an email subject will be transformed into a list of two word tokens, “hello” and “world”. The machine learning model will keep track of these tokens and how often they are used across all the data points.</p>

<p>For the “subject” input feature we’re using the defaults that Ludwig supplies for the “text” feature type.</p>

<p>However, for the “content” input feature, we are overriding the default encoder, we are overriding how the output is reduced in the encoder and how the activation of neural net nodes functions. The encoder specified is <code>stacked_parallel_cnn</code>. This is a convolutional neural network that has multiple layers that are stacked. Within each stacked layer there are parallel layers. As inputs are processed they go through these layers which combine and activate in a particular way.</p>

<p>You can read more about it in the Ludwig User Guide: <a href="https://ludwig.ai/latest/configuration/features/text_features/#stacked-parallel-cnn-encoder">stacked parallel CNN encoder</a></p>

<p>Remember, Ludwig gives you easier access to creating machine learning models and creating a pipeline for data and model training.</p>

<p><em>It is up to you</em> to understand <em>how</em> and <em>why</em> to use specific encoders and specific options for the encoders. With respect to the spam emails you may get better results with a different encoder entirely than the one used here.</p>

<h4 id="output-features">Output Features</h4>
<p>After defining the input features, we need to define the output features:</p>

<pre><code class="language-python">output_features = [
    {
        'name': 'spam',
        'type': 'category',
    }
]
</code></pre>

<p>We want to know which category the given input features amount to. The category is either <code>spam</code> or <code>not_spam</code>.</p>

<p>After we train the model on the dataset, we will be making a prediction for another dataset that only includes the two input features and we expect the prediction of the output feature <code>category</code> to match our expectation.</p>

<h2 id="training-and-testing-a-ludwig-machine-learning-model">Training and Testing a Ludwig Machine Learning Model</h2>
<p>Now that we have the input and output features of the model, we can define the model configuration:</p>

<pre><code class="language-python">base_model_definition = {
    'input_features': input_features,
    'output_features': output_features,
}
</code></pre>

<p>We need a function that will load an existing model or create a new model using that model configuration:</p>

<pre><code class="language-python">def load_or_create_model(model_dir, model_config, **model_kwargs):
    if os.path.exists(model_dir):
        print('Loading the model: {}'.format(model_dir))
        return (LudwigModel.load(model_dir, **model_kwargs), True)
    else:
        print('Defining the model')
        return (LudwigModel(model_config, **model_kwargs), False)
</code></pre>

<p>First we check if the model already has been trained and saved to a directory. If that’s the case, we simply use <code>LudwigModel.load</code> to load up the pre-trained model. However, if that is not the case, we need to create a new <code>LudwigModel</code> using the model configuration.</p>

<p>Now let’s use this function to try to create/load the model:</p>

<pre><code class="language-python">base_model, base_model_loaded = load_or_create_model(
    'trained/basic', base_model_definition, gpus=[0], gpu_memory_limit=2000
)
if not base_model_loaded:
    print('Training the model')
    base_model.train(
        training_set='./datasets/spam_train.csv',
        test_set='./datasets/spam_test.csv',
        skip_save_processed_input=True,
    )
    base_model.save('trained/basic')
</code></pre>

<p>Notice that we supplied two keyword arguments, <code>gpus</code> and <code>gpu_memory_limit</code>, if you do not have a GPU you can remove those. If you have one or more GPUs or more GPU memory available, you can update the list of GPU IDs and increase the memory limit. When running just on CPU with no GPU, it can take much longer to train a model. We want a faster feedback loop if we are adjusting multiple parts of the model and trying to compare a group of machine learning models.</p>

<p>Back to the code! If the model is newly created, we’re going to use the <code>train</code> method with a training set and a test set. The training set is the data that is processed and used to train the model. The test set is another set of data (usually a subset of the training) that is used to check the machine learning model for accuracy. If the model is trained well, it will have a higher accuracy rate on the test data set.</p>

<p>Additionally, we skip over saving any processed input, we want the input to be processed every time. It’s just one less thing to delete if you’re changing the model and re-training a few times).</p>

<p>Then we save the model after it has been trained into a directory.</p>

<p>Now we’re going to evaluate the model against the test dataset:</p>

<pre><code class="language-python">stats = base_model.evaluate(
    dataset='./datasets/spam_test.csv'
)[0]
print(stats)
</code></pre>

<p>When we print out the stats, we shall see the accuracy of the model. When you run the code, you will see that the performance is at a certain level. To improve that performance you can delete the trained model from its directory and then update the model configuration and re-run the program.</p>

<h2 id="creating-a-second-model">Creating a Second Model</h2>
<p>Now let’s create a second model that is adjusted and compare its performance to the first model.</p>

<p>We begin by copying the first model’s configuration:</p>

<pre><code class="language-python">print('Creating a 2nd model classifier with some adjustments')
other_model_definition = base_model_definition.copy()
</code></pre>

<p>Then we override the input features:</p>

<pre><code class="language-python">other_model_definition['input_features'] = [
    {
        'name': 'subject',
        'type': 'text',
        'preprocessing': {
            'lowercase': True,
        },
    },
    {
        'name': 'content',
        'type': 'text',
        'preprocessing': {
            'lowercase': True,
        },
        'encoder': 'bert', # See: https://ludwig-ai.github.io/ludwig-docs/user_guide/#bert-encoder
        'reduce_output': 'avg',
        'activation': 'tanh', # Activation used for *all* layers.
        'num_filters': 64,
        'stacked_layers': [
            [
                { 'filter_size': 2 },
                { 'filter_size': 3 },
                { 'filter_size': 4 },
                { 'filter_size': 5 }
            ],
            [
                { 'filter_size': 2 },
                { 'filter_size': 3 },
                { 'filter_size': 4 },
                { 'filter_size': 5 }
            ],
            [
                { 'filter_size': 2 },
                { 'filter_size': 3 },
                { 'filter_size': 4 },
                { 'filter_size': 5 }
            ]
        ],
    },
]
</code></pre>

<p>There are a lot of changes to unpack here.</p>

<h2 id="differences-between-the-first-model-and-the-second-model">Differences Between the First Model and the Second Model</h2>

<h4 id="encoders">Encoders</h4>
<p>The first difference in our models is that this second model uses the BERT encoder when encoding the <code>content</code> input feature. This means that the text is processed and encoded using <a href="https://arxiv.org/abs/1810.04805?ref=modernlearner.org">BERT (Bidirectional Encoder Representations from Transformers)</a>. <em>This encoder is pre-trained to work on English text.</em> This is important because if you want to classify spam in other languages, you will either need to use a BERT model that’s pre-trained on your target language or you will need to train it yourself.</p>

<p>If you want to change the language, add <code>pretrained_model_name_or_path</code> and set it to one of the values here: <a href="https://huggingface.co/models">Hugging Face models</a></p>

<p>Later on you can change the encoder from BERT to GPT or T5 or ELECTRA. There are many text encoders available with Ludwig.</p>

<h3 id="reduction-of-the-neural-net-output">Reduction of the Neural Net Output</h3>
<p>The next difference is that we’re are reducing the output of the neural network from <code>'sum'</code> to <code>'avg'</code>. This reduces the output tensor using the average value instead of the sum, for example if we’re seeing 0.5 and 0.5, we’d get 1.0 in the first model and 0.5 in the second model.</p>

<p>Other ways to reduce the output include <code>'min'</code>, <code>'max'</code>, <code>'concat'</code>, <code>'last'</code> and <code>'null'</code>. Again, <em>you</em> will need to read further about each of these to understand which is the best to use.</p>

<p>This is one of the important parts of machine learning. You have to understand the problem you’re applying machine learning to and then you have to understand what tools are available in the toolbox and dig deep into the details to see if you can produce a more accurate machine learning model.</p>

<h3 id="neural-net-activation-method">Neural Net Activation Method</h3>
<p>The activation method is a function applied to the output. The first model uses the default which is the <code>relu</code> function. The second model uses <code>tanh</code> instead. “Relu” means “rectified linear unit” while “tanh” means “hyperbolic tangent”.</p>

<p>Here are charts of how these activation functions look:</p>

<figure class="kg-card kg-image-card kg-card-hascaption"><img src="/assets/img/ReLU_and_GELU.svg.png" class="kg-image" alt="" loading="lazy" title="Ringdongdang, CC BY-SA 4.0 &lt;https://creativecommons.org/licenses/by-sa/4.0&gt;, via Wikimedia Commons" width="256" height="213" /><figcaption><span style="white-space: pre-wrap;">relu activation function</span></figcaption></figure>

<figure class="kg-card kg-image-card kg-card-hascaption"><img src="/assets/img/Sinh_cosh_tanh.svg.png" class="kg-image" alt="" loading="lazy" title="Fylwind at English Wikipedia, Public domain, via Wikimedia Commons" width="256" height="256" /><figcaption><span style="white-space: pre-wrap;">tanh activation function</span></figcaption></figure>

<p>You can find more activation functions in the TensorFlow (or Keras) documentation: <a href="https://keras.io/api/layers/activations/#layer-activation-functions">https://keras.io/api/layers/activations/#layer-activation-functions</a></p>

<h3 id="number-of-filters">Number of Filters</h3>
<p>The number of filters is also different between the two models. In the first model, we’re using the default which is 256, while in the second model we’re using far fewer filters, 64. The number of filters controls how many output channels there are.</p>

<p>If you want to learn more about filters and how they work in a neural network as part of machine learning, check out this article: <a href="https://machinelearningmastery.com/convolutional-layers-for-deep-learning-neural-networks/">https://machinelearningmastery.com/convolutional-layers-for-deep-learning-neural-networks/</a></p>

<h3 id="filter-size-in-each-neural-network-layer">Filter Size in Each Neural Network Layer</h3>
<p>The filter size controls the width of the convolutional filter. The filter size is set within each layer of the neural network with different filter sizes in different layers.</p>

<h3 id="training-the-second-model">Training the Second Model</h3>
<p>Now let’s load or create the model and train it:</p>

<pre><code class="language-python">other_model, other_model_loaded = load_or_create_model(
    'trained/basic_other', other_model_definition, gpus=[0], gpu_memory_limit=2000
)
if not other_model_loaded:
    print('Training the model')
    other_model.train(
        training_set='./datasets/spam_train.csv',
        test_set='./datasets/spam_test.csv',
        skip_save_processed_input=True,
    )[0]['training']
    other_model.save('trained/basic_other')
other_stats = other_model.evaluate(
    dataset='./datasets/spam_test.csv'
)[0]
</code></pre>

<h2 id="comparing-the-performance">Comparing the Performance</h2>
<p>Ludwig provides multiple visualization functions to show you graphs and charts of the performance and accuracy of the machine learning models. Remember that Ludwig is made so you can create many models and compare their performance easily to select the most promising model and adjust its parameters further.</p>

<p>Let’s see how well our first model for email spam detection works in comparison to our second model:</p>

<pre><code class="language-python">visualize.compare_performance(
    test_stats_per_model=[stats, other_stats],
    output_feature_name='spam',
    model_names=['Base Model', 'Other Model'],
)
</code></pre>

<p>We’re using the <code>compare_performance</code> function from Ludwig, you can read more about it here: <a href="https://ludwig.ai/latest/user_guide/visualizations/#compare_performance">compare_performance</a></p>

<h2 id="applying-the-models-and-using-them-to-predict-spam-emails">Applying the Models and Using Them to Predict Spam Emails</h2>
<p>We have two machine learning models that are trained and tested and we have compared their performance. Let’s use those models and predict some more spam emails.</p>

<p>Here’s a convenient way to run the predictions and print out the result:</p>

<pre><code class="language-python">def print_predictions(unpredicted_emails, model):
    prediction_result, output_directory = model.predict(dataset=unpredicted_emails)
    emails = unpredicted_emails.join(prediction_result)
    for index, row in emails.iterrows():
        print('{} ({:.6f}): {} / {}'.format(
            row.get('spam_predictions'),
            row.get('spam_probability'),
            row.get('subject')[0:30],
            row.get('content')[0:30],
        ))
</code></pre>

<p>We’re using the <code>predict</code> method on the model and this is what you would use to see if a new email is spam. If the model is incorrect, you can train it further by correcting the data and re-training model (or by using online training).</p>

<p>And now let’s run the two models and predict spam emails in the “unpredicted” CSV file:</p>

<pre><code class="language-python">unpredicted_emails = pd.read_csv('./datasets/spam_unpredicted.csv')
print('Prediction Results for Base Model')
print_predictions(unpredicted_emails, base_model)
print('Prediction Results for Other Model')
print_predictions(unpredicted_emails, other_model)
</code></pre>

<p>Here’s how to run the code:</p>

<pre><code class="language-shell">$ source env/bin/activate
$ python basic.py
</code></pre>

<p>Then you will see the comparison between the models and then the prediction for each email and whether or not the model considers it to be spam.</p>

<h2 id="where-to-go-from-here">Where To Go From Here</h2>

<p>With this base of knowledge, you can do the following:</p>

<ul>
  <li>Find new datasets and create new models for them: you could try recognizing digits on a larger dataset, or train a classifier for something other than spam emails.</li>
  <li>Tweak the models: iterate on the models and tune them in different ways to see which will get you the best performance.</li>
  <li>Learn TensorFlow directly: skip Ludwig and learn how to create a neural network using TensorFlow and learn how all the layers and configuration parameters work.</li>
  <li>Get the example running on a cloud-based GPU: use <a href="https://lambda.ai/instances">Lambda</a> or <a href="https://colab.research.google.com/notebooks/gpu.ipynb">Google Colab</a> to create a compute instance that includes a GPU for you to train and test the models on.</li>
</ul>]]></content><author><name></name></author><category term="AI" /><category term="machine learning" /><summary type="html"><![CDATA[Learn how to create a machine learning AI model using the Ludwig library toolkit]]></summary><media:thumbnail xmlns:media="http://search.yahoo.com/mrss/" url="https://www.modernlearner.org/storage.ghost.io/c/5b/07/5b07656c-4414-4a45-8b13-53dbb3dcc520/content/images/size/w600/2025/10/Ludwig-Machine-Learning.jpg" /><media:content medium="image" url="https://www.modernlearner.org/storage.ghost.io/c/5b/07/5b07656c-4414-4a45-8b13-53dbb3dcc520/content/images/size/w600/2025/10/Ludwig-Machine-Learning.jpg" xmlns:media="http://search.yahoo.com/mrss/" /></entry><entry><title type="html">Using Facebook Infer Static Analysis for Loop Invariant Function Hoisting</title><link href="https://www.modernlearner.org/facebook-infer-static-analysis-loop-invariant-video/" rel="alternate" type="text/html" title="Using Facebook Infer Static Analysis for Loop Invariant Function Hoisting" /><published>2020-11-05T22:25:29-05:00</published><updated>2020-11-05T22:25:29-05:00</updated><id>https://www.modernlearner.org/facebook-infer-static-analysis-loop-invariant-video</id><content type="html" xml:base="https://www.modernlearner.org/facebook-infer-static-analysis-loop-invariant-video/"><![CDATA[<p>We just released another short video for our free series on the Infer static analysis tool:</p>

<figure class="kg-card kg-embed-card"><iframe width="612" height="344" src="https://www.youtube.com/embed/2M3SbDgbXLc?feature=oembed" frameborder="0" allow="accelerometer; autoplay; clipboard-write; encrypted-media; gyroscope; picture-in-picture" allowfullscreen=""></iframe></figure>

<p>We cover an example that Facebook Infer would flag and warn you about. The idea is that you want a loop to be as efficient as possible and if you find a function that's being called repeatedly with the same result (a.k.a. an invariant), it can be safely hoisted outside of the loop.</p>

<p>You can read more about this at the Facebook Infer documentation site: <a href="https://fbinfer.com/docs/all-issue-types?ref=modernlearner.org#invariant_call">https://fbinfer.com/docs/all-issue-types#invariant_call</a></p>]]></content><author><name></name></author><summary type="html"><![CDATA[Learn and watch a video about how Facebook Infer static analysis will detect loop invariants, with an example of how to correct this issue.]]></summary><media:thumbnail xmlns:media="http://search.yahoo.com/mrss/" url="https://www.modernlearner.org/storage.ghost.io/c/5b/07/5b07656c-4414-4a45-8b13-53dbb3dcc520/content/images/size/w1200/2024/02/Modern-Learner-Website-Cover.png" /><media:content medium="image" url="https://www.modernlearner.org/storage.ghost.io/c/5b/07/5b07656c-4414-4a45-8b13-53dbb3dcc520/content/images/size/w1200/2024/02/Modern-Learner-Website-Cover.png" xmlns:media="http://search.yahoo.com/mrss/" /></entry><entry><title type="html">Multiline Strings in Python</title><link href="https://www.modernlearner.org/multiline-strings-in-python/" rel="alternate" type="text/html" title="Multiline Strings in Python" /><published>2020-10-22T18:26:45-04:00</published><updated>2020-10-22T18:26:45-04:00</updated><id>https://www.modernlearner.org/multiline-strings-in-python</id><content type="html" xml:base="https://www.modernlearner.org/multiline-strings-in-python/"><![CDATA[<p>We covered how to create multiline strings in the Ruby programming language, but what about if you're using Python? Well in Python there are two ways to create a multiline string.</p>

<h1 id="triple-quotes-for-a-multiline-python-string">Triple Quotes for a Multiline Python String</h1>

<p>You can use a triple quote or triple double-quote to create a multiline string in Python:</p>

<pre><code class="language-python">multiline = '''
a string
  with many lines
    in python.
'''

multiline = """
You can use double-quotes
  for a multiline string too,
  and "quotes" within the 'string'.
"""

</code></pre>

<h1 id="brackets-to-enclose-a-multiline-string">Brackets to Enclose a Multiline String</h1>

<p>The other way is to use a bracket to enclose multiple strings that use single or double quotes:</p>

<pre><code class="language-python">multiline = (
'first'
'second'
)

multiline = (
  "hello"
  "world"
)

</code></pre>

<p><strong>You will need to add a '\n' at the end of each line to preserve the newlines.</strong> Just like this:</p>

<pre><code class="language-python">multiline = ("first line\n"
  "second line\n"
)

</code></pre>]]></content><author><name></name></author><summary type="html"><![CDATA[We covered how to create multiline strings in the Ruby programming language, but what about if you're using Python? Well in Python there are two ways to create a multiline string. Triple Quotes for a Multiline Python String You can use a triple quote or triple double-quote]]></summary><media:thumbnail xmlns:media="http://search.yahoo.com/mrss/" url="https://www.modernlearner.org/storage.ghost.io/c/5b/07/5b07656c-4414-4a45-8b13-53dbb3dcc520/content/images/size/w1200/2024/02/Modern-Learner-Website-Cover.png" /><media:content medium="image" url="https://www.modernlearner.org/storage.ghost.io/c/5b/07/5b07656c-4414-4a45-8b13-53dbb3dcc520/content/images/size/w1200/2024/02/Modern-Learner-Website-Cover.png" xmlns:media="http://search.yahoo.com/mrss/" /></entry><entry><title type="html">UI Frameworks for Angular</title><link href="https://www.modernlearner.org/ui-frameworks-for-angular/" rel="alternate" type="text/html" title="UI Frameworks for Angular" /><published>2020-10-21T20:30:02-04:00</published><updated>2020-10-21T20:30:02-04:00</updated><id>https://www.modernlearner.org/ui-frameworks-for-angular</id><content type="html" xml:base="https://www.modernlearner.org/ui-frameworks-for-angular/"><![CDATA[<p>The Angular web framework is an awesome tool for creating frontend web interfaces. In fact, it's so awesome that we use it for creating the frontend of <a href="https://modernlearner.org/?ref=modernlearner.org">the Modern Learner app</a>.</p>

<p>However when you build a web app, you really want some UI widgets that work out of the box rather than re-creating things like an autocomplete search box, or better styling for input boxes and buttons. So here is a list of some awesome UI frameworks for Angular.</p>

<p><img src="/storage.ghost.io/c/5b/07/5b07656c-4414-4a45-8b13-53dbb3dcc520/content/images/2020/10/angular-ui-package-downloads.png" alt="angular-ui-package-downloads" /></p>

<ul>
  <li><a href="https://material.angular.io/?ref=modernlearner.org">Angular Material</a>: uses the Google Material Design paradigm</li>
  <li><a href="https://ng.ant.design/docs/introduce/en?ref=modernlearner.org">NG Zorro</a>: uses Ant Financial's design paradigm</li>
  <li><a href="https://www.telerik.com/kendo-ui?ref=modernlearner.org">Kendo UI</a>: Telerik's UI framework, also works for React, jQuery and Vue (paid with a free trial)</li>
  <li><a href="https://www.primefaces.org/primeng/?ref=modernlearner.org">PrimeNG</a>: works for Angular, React and Vue.</li>
  <li><a href="https://valor-software.com/ngx-bootstrap/?ref=modernlearner.org#/">ngx-bootstrap</a></li>
  <li><a href="https://js.devexpress.com/Overview/Angular/?ref=modernlearner.org">DevExtreme</a></li>
  <li><a href="https://www.jqwidgets.com/angular/?ref=modernlearner.org">jQWidgets</a></li>
  <li><a href="https://ng-bootstrap.github.io/?ref=modernlearner.org#/home">ng-bootstrap</a></li>
  <li><a href="https://teradata.github.io/covalent/v3/?ref=modernlearner.org#/">Covalent UI</a></li>
  <li><a href="https://github.com/nthompson777/ngx-foundation">ngx-foundation</a>: uses Foundation CSS for its theming</li>
  <li><a href="https://clarity.design/documentation/get-started?ref=modernlearner.org">Clarity</a></li>
  <li><a href="https://ng-lightning.github.io/ng-lightning/?ref=modernlearner.org#/">NG Lightning</a>: uses the Salesforce Lightning design paradigm</li>
  <li><a href="https://www.infragistics.com/products/ignite-ui-angular?ref=modernlearner.org">Ignite UI</a>: made for apps that need a lot of data grids and charts</li>
</ul>

<p>We take a look at some of them in-depth below.</p>

<h1 id="angular-material-ui">Angular Material UI</h1>

<p><a href="https://material.angular.io/?ref=modernlearner.org">Angular Material</a> follows the Material design system created by Google. It contains many components for UI widgets such as buttons, badges, dialogs, datepickers, cards, side navigation and more.</p>

<p><img src="/storage.ghost.io/c/5b/07/5b07656c-4414-4a45-8b13-53dbb3dcc520/content/images/2020/10/angular-ui-components-1.png" alt="angular-ui-components-1" /></p>

<p><img src="/storage.ghost.io/c/5b/07/5b07656c-4414-4a45-8b13-53dbb3dcc520/content/images/2020/10/angular-ui-components-2.png" alt="angular-ui-components-2" /></p>

<p>It also contains the <a href="https://material.angular.io/cdk/categories?ref=modernlearner.org">CDK, Component Dev Kit</a>, which are directives that can be used to create your own custom components. For example, let's say you want to create a component that has a virtual scroll, or needs drag and drop functionality, you can use the <a href="https://material.angular.io/cdk/scrolling/overview?ref=modernlearner.org">ScrollingModule</a> and <a href="https://material.angular.io/cdk/drag-drop/overview?ref=modernlearner.org">DragDropModule</a> from the Angular UI CDK.</p>

<h1 id="ng-zorro">NG-Zorro</h1>

<p><a href="https://ng.ant.design/docs/introduce/en?ref=modernlearner.org">The NG-Zorro UI framework uses the Ant Design system for its enterprise-ready component library</a>. It contains over 60 components that have a great look though you can create your own custom themes for them. Companies such as ThoughtWorks and Alibaba use the NG-Zorro framework to create their web apps.</p>

<p>It contains components for buttons, icons, grid layouts, breadcrumbs, page headers, and many components for data entry such as the cascader and autocomplete and datepicker. If you need cards or badges or a carousel, the NG-Zorro UI components have those covered.</p>

<p><img src="/storage.ghost.io/c/5b/07/5b07656c-4414-4a45-8b13-53dbb3dcc520/content/images/2020/10/ng-zorro-timeline.png" alt="ng-zorro-timeline" /></p>

<p>One of the coolest components in NG-Zorro include the timeline component. It displays a timeline of labels to indicate when an event happens. This component is useful for any app that needs to display a log of events.</p>

<p><img src="/storage.ghost.io/c/5b/07/5b07656c-4414-4a45-8b13-53dbb3dcc520/content/images/2020/10/ng-zorro-transfer.png" alt="ng-zorro-transfer" /></p>

<p>The transfer component in NG-Zorro is useful for displaying two lists that an item can be transferred between. For example, a list of enabled currencies or files or folders.</p>

<p><img src="/storage.ghost.io/c/5b/07/5b07656c-4414-4a45-8b13-53dbb3dcc520/content/images/2020/10/ng-zorro-cascader.png" alt="ng-zorro-cascader" /></p>

<p>The cascader component is a dropdown for selecting an item through a cascading menu. You can drill down in menus and sub-menus to select an item. Very handy if you have a lot of items or for an ecommerce categories and sub-categories menu.</p>

<h1 id="kendo-ui">Kendo UI</h1>

<p><a href="https://www.telerik.com/kendo-angular-ui?ref=modernlearner.org">The Kendo UI component framework</a> is a professional grade components library.</p>

<p>Not only does Kendo UI contain the typical UI widgets such as buttons and dropdowns and layouts, it also contains a variety of <em>charts</em>. When using most UI frameworks for Angular, you will need to use a separate chart library. Not so with Kendo UI which has pie charts, funnels, radar charts among other types of charts.</p>

<p><img src="/storage.ghost.io/c/5b/07/5b07656c-4414-4a45-8b13-53dbb3dcc520/content/images/2020/10/kendo-ui-radar-chart.png" alt="kendo-ui-radar-chart" /></p>

<p>If you're into stock markets (or cryptocurrency markets), there's even a box plot candlestick chart that you can use. And a specific StockChart component.</p>

<p><img src="/storage.ghost.io/c/5b/07/5b07656c-4414-4a45-8b13-53dbb3dcc520/content/images/2020/10/kendo-ui-stockchart.png" alt="kendo-ui-stockchart" /></p>

<p>Another cool component that Kendo UI has is the scheduler. This looks like a meeting or appointment calendar view that shows which blocks of time are busy.</p>

<p><img src="/storage.ghost.io/c/5b/07/5b07656c-4414-4a45-8b13-53dbb3dcc520/content/images/2020/10/kendo-ui-scheduler.png" alt="kendo-ui-scheduler" /></p>

<p><a href="https://www.telerik.com/purchase/kendo-ui?ref=modernlearner.org">Kendo UI can be purchased for additional support</a>. This means bugs and questions you have will be prioritized by the Kendo UI team.</p>

<h1 id="primeng">PrimeNG</h1>

<p><a href="https://www.primefaces.org/primeng/?ref=modernlearner.org">The PrimeNG Angular UI Components library has great components for forms, data, overlays and even charts</a>.</p>

<p>The <code>Captcha</code> component is one of the more interesting components in the PrimeNG library. Sign up for reCaptcha, put in your site key in the component, and start using it. The <code>CodeHighlighter</code> component uses Prism.js for highlighting code blocks. The <code>Terminal</code> component is interesting because it shows a command line terminal for a user to enter commands; you can use the terminal service to listen for specific user commands and then act on them.</p>

<p><img src="/storage.ghost.io/c/5b/07/5b07656c-4414-4a45-8b13-53dbb3dcc520/content/images/2020/10/primeng-tree.png" alt="primeng-tree" /></p>

<p>There are other useful components such as the <code>Tree</code>.</p>

<p><img src="/storage.ghost.io/c/5b/07/5b07656c-4414-4a45-8b13-53dbb3dcc520/content/images/2020/10/primeng-orderlist.png" alt="primeng-orderlist" /></p>

<p>The <code>OrderList</code> is useful for ecommerce apps.</p>

<p>For theming, the PrimeNG framework has a few Bootstrap-style themes and Material-style themes.</p>]]></content><author><name></name></author><summary type="html"><![CDATA[The Angular web framework is an awesome tool for creating frontend web interfaces. In fact, it's so awesome that we use it for creating the frontend of the Modern Learner app. However when you build a web app, you really want some UI widgets that work out of]]></summary><media:thumbnail xmlns:media="http://search.yahoo.com/mrss/" url="https://www.modernlearner.org/storage.ghost.io/c/5b/07/5b07656c-4414-4a45-8b13-53dbb3dcc520/content/images/size/w1200/2024/02/Modern-Learner-Website-Cover.png" /><media:content medium="image" url="https://www.modernlearner.org/storage.ghost.io/c/5b/07/5b07656c-4414-4a45-8b13-53dbb3dcc520/content/images/size/w1200/2024/02/Modern-Learner-Website-Cover.png" xmlns:media="http://search.yahoo.com/mrss/" /></entry><entry><title type="html">Checking Equality of Objects in Ruby</title><link href="https://www.modernlearner.org/checking-equality-of-objects-in-ruby/" rel="alternate" type="text/html" title="Checking Equality of Objects in Ruby" /><published>2020-10-19T11:29:53-04:00</published><updated>2020-10-19T11:29:53-04:00</updated><id>https://www.modernlearner.org/checking-equality-of-objects-in-ruby</id><content type="html" xml:base="https://www.modernlearner.org/checking-equality-of-objects-in-ruby/"><![CDATA[<p>There are four methods for checking equality of objects in the Ruby programming language:</p>

<ul>
  <li><code>===</code> used for case comparison</li>
  <li><code>==</code> used for equality of objects</li>
  <li><code>eql?</code> used for determining object identity</li>
  <li><code>equal</code> used for comparing the hash key of two objects</li>
</ul>

<h1 id="case-equality-with">Case Equality with <code>===</code></h1>

<p>The <a href="https://ruby-doc.org/core-2.7.1/Object.html?ref=modernlearner.org#method-i-3D-3D-3D">=== method is used for checking the case equality of two objects</a>. When you use the <code>case</code> statement, this method will be the one used to see whether or not there is a match.</p>

<p>Here's an example. We have a class <code>Book</code> where we are storing a unique id, the <code>isbn</code>. When two books are compared, they are equal if their ISBNs are the same.</p>

<pre><code class="language-ruby">class Book
  attr_accessor :isbn
  
  def initialize(isbn)
    @isbn = isbn
  end

  def ===(other)
    isbn == other.isbn
  end
end

bookA = Book.new(1000)
bookB = Book.new(2000)

puts bookA === bookA # =&gt; true
puts bookA === Book.new(1000) # =&gt; false
puts bookB === bookA # =&gt; false
puts bookB === bookB # =&gt; true
puts bookB === Book.new(1000) # =&gt; false
puts bookB === Book.new(2000) # =&gt; true

puts case Book.new(2000)
  when bookA
    'ISBN matches book A'
  when bookB
    'ISBN matches book b'
  else
    'no match'
end # =&gt; ISBN matche book b

</code></pre>

<p>If we did <em>not</em> override the <code>===</code> equality method, the default comparison would have used the <code>==</code> method.</p>

<p>Let's consider another example: a user session for <a href="/product-analytics-introduction/">product analytics</a>. The class has a field for the user id and the session start time. We can define the equality to be a comparison between both fields. Since only comparing the user ids would result in all sessions from one user to be seen as equivalent, both fields must be compared.</p>

<pre><code class="language-ruby">class UserSession
  attr_accessor :user_id, :session_start_time
  
  def ==(other)
    self.user_id == other.user_id &amp;&amp; self.session_start_time == other.session_start_time
  end
end

</code></pre>

<h1 id="equality-comparison"><code>==</code> equality comparison</h1>

<p>The <a href="https://ruby-doc.org/core-2.7.1/BasicObject.html?ref=modernlearner.org#method-i-3D-3D">== method is typically overridden by classes to provide class-specific meaning to the equality comparison</a>.</p>

<p>This is similar to what we did above in the <code>Book</code> code example:</p>

<pre><code class="language-ruby">class Book
  attr_accessor :title
  
  def initialize(title)
    @title = title
  end

  def ==(other)
    title.downcase == other.title.downcase
  end
end

</code></pre>

<h1 id="eql-comparison"><code>eql?</code> comparison</h1>

<p>The <a href="https://ruby-doc.org/core-2.7.1/Object.html?ref=modernlearner.org#method-i-eql-3F">eql? method</a> compares the <a href="https://ruby-doc.org/core-2.7.1/Object.html?ref=modernlearner.org#method-i-hash">object hash key</a>.</p>

<p>For example:</p>

<pre><code class="language-ruby">value = {'a': 1}

other = {'a': 1}
puts value == other # =&gt; true
puts value.eql?(other) # =&gt; true

other = value
puts value == other # =&gt; true
puts value.eql?(other) # =&gt; true

</code></pre>

<h1 id="equal-comparison"><code>equal?</code> comparison</h1>

<p>In contrast to <code>eql?</code>, the <code>equal?</code> method compares the object <em>identity</em>.</p>

<p>For example:</p>

<pre><code class="language-ruby">value = {'a': 1}

other = {'a': 1}
puts value == other # =&gt; true
puts value.equal?(other) # =&gt; false

other = value
puts value == other # =&gt; true
puts value.equal?(other) # =&gt; true

</code></pre>]]></content><author><name></name></author><summary type="html"><![CDATA[There are four methods for checking equality of objects in the Ruby programming language: * === used for case comparison * == used for equality of objects * eql? used for determining object identity * equal used for comparing the hash key of two objects Case Equality with === The === method is used for checking the case]]></summary><media:thumbnail xmlns:media="http://search.yahoo.com/mrss/" url="https://www.modernlearner.org/storage.ghost.io/c/5b/07/5b07656c-4414-4a45-8b13-53dbb3dcc520/content/images/size/w1200/2024/02/Modern-Learner-Website-Cover.png" /><media:content medium="image" url="https://www.modernlearner.org/storage.ghost.io/c/5b/07/5b07656c-4414-4a45-8b13-53dbb3dcc520/content/images/size/w1200/2024/02/Modern-Learner-Website-Cover.png" xmlns:media="http://search.yahoo.com/mrss/" /></entry><entry><title type="html">Multiline Strings in Ruby</title><link href="https://www.modernlearner.org/multi-line-strings-in-ruby/" rel="alternate" type="text/html" title="Multiline Strings in Ruby" /><published>2020-10-19T08:01:37-04:00</published><updated>2020-10-19T08:01:37-04:00</updated><id>https://www.modernlearner.org/multi-line-strings-in-ruby</id><content type="html" xml:base="https://www.modernlearner.org/multi-line-strings-in-ruby/"><![CDATA[<p>The Ruby programming language lets you create variables that store strings that are plain, interpolated or multiline.</p>

<p>Multiline strings can be created in many ways. One of those ways is to use a double-quoted string:</p>

<pre><code class="language-ruby">puts "Hello,

World"

# Output:
# Hello,
# 
# World

</code></pre>

<p>Another way to create a multiline string is as HEREDOCs, which were inspired by the Perl programming language.</p>

<p>Here is how you can create a multiline string variable in Ruby with a HEREDOC:</p>

<pre><code class="language-ruby">sentence = 'hello world'.
interpolated = "#{sentence} #{sentence} another sentence added."
multiline = &lt;&lt;-TEXT
This is a string
  with multiple lines
The string used to start it,
Is also the string that ends it.
TEXT

more_multiline = &lt;&lt;-EOF
Hello
World
EOF

</code></pre>

<p>Multiline strings are very useful if you need to create complex SQL queries, such as for <a href="/product-analytics-introduction/">product analytics data</a> where you may have a query or sub-queries:</p>

<pre><code class="language-ruby">query = &lt;&lt;-SQL
  SELECT user_id, SUM(engagement_score) as total_score
  FROM user_engagements
  WHERE engagement_date &gt;= DATE_SUB(CURRENT_DATE, INTERVAL 1 MONTH)
  GROUP BY user_id
  HAVING total_score &gt; 100
SQL

results = ActiveRecord::Base.connection.execute(query)

</code></pre>

<figure class="kg-card kg-embed-card"><iframe width="612" height="344" src="https://www.youtube.com/embed/kiLVAM5QFio?feature=oembed" frameborder="0" allow="accelerometer; autoplay; clipboard-write; encrypted-media; gyroscope; picture-in-picture" allowfullscreen=""></iframe></figure>

<h1 id="multiline-syntax-in-ruby">Multiline Syntax in Ruby</h1>

<p>You can use the the syntax <code>&lt;&lt;-TEXT</code> to start a multiline string in Ruby. The "TEXT" part can be any other string. The multiline string will be defined as soon as that "TEXT" is encountered on another line.</p>

<pre><code class="language-ruby">multiline = &lt;&lt;-HELLO
  hello
    world
HELLO

# Output:
#   hello
#     world

</code></pre>

<p><strong>Important</strong>: This will <em>not</em> strip out any whitespace at the beginning of each line.</p>

<h1 id="multiline-syntax-in-ruby-23">Multiline Syntax in Ruby 2.3+</h1>

<p>In Ruby 2.3+, you can use a <code>~</code> tilde instead of a <code>-</code> dash in the multiline syntax to strip out the whitespace at the beginning of each line:</p>

<pre><code class="language-ruby">multiline = &lt;&lt;~HELLO
  hello
    world
HELLO

# Output:
# hello
# world

</code></pre>

<h1 id="multiline-percent-string-in-ruby">Multiline percent string in Ruby</h1>

<p>You can also use a <a href="https://ruby-doc.org/core-2.3.0/doc/syntax/literals_rdoc.html?ref=modernlearner.org#label-Percent+Strings">percent string</a> to create a multiline string using the <code>%q()</code> syntax:</p>

<pre><code class="language-ruby">multiline = %q(
  hello
    world
)

# Output:
#   hello
#     world

</code></pre>

<p><strong>Important</strong>: This will <em>not</em> strip out any whitespace at the beginning of each line. It will preserve any tabs or spaces at the beginning of the line.</p>]]></content><author><name></name></author><summary type="html"><![CDATA[Multiline strings in Ruby are easy to use with the HEREDOC syntax or the percent string syntax. Create multiple line strings with heredoc.]]></summary><media:thumbnail xmlns:media="http://search.yahoo.com/mrss/" url="https://www.modernlearner.org/storage.ghost.io/c/5b/07/5b07656c-4414-4a45-8b13-53dbb3dcc520/content/images/size/w1200/2024/02/Modern-Learner-Website-Cover.png" /><media:content medium="image" url="https://www.modernlearner.org/storage.ghost.io/c/5b/07/5b07656c-4414-4a45-8b13-53dbb3dcc520/content/images/size/w1200/2024/02/Modern-Learner-Website-Cover.png" xmlns:media="http://search.yahoo.com/mrss/" /></entry><entry><title type="html">How to create private class methods in Ruby</title><link href="https://www.modernlearner.org/ruby-private-class-methods/" rel="alternate" type="text/html" title="How to create private class methods in Ruby" /><published>2020-10-18T15:35:56-04:00</published><updated>2020-10-18T15:35:56-04:00</updated><id>https://www.modernlearner.org/ruby-private-class-methods</id><content type="html" xml:base="https://www.modernlearner.org/ruby-private-class-methods/"><![CDATA[<p>There are a few different ways to create private class methods in the Ruby programming language.</p>

<p>First let's see how we can create a class method in Ruby:</p>

<pre><code class="language-ruby">class BlogPost
  attr_accessor :title, :description
  
  def initialize(title, description)
    @title = title
    @description = description
    class.add_post(self)
  end
  
  @@posts = []
  def self.posts
    @@posts
  end
  
  def self.add_post(post)
    @@posts &lt;&lt; post
  end
end

</code></pre>

<p>As you will see, we have two class methods here, <code>posts</code> and <code>add_post</code>. Both of them are <em>public</em> class methods. When a new instance of <code>BlogPost</code> is created, the instance is added to the <code>posts</code> list using the <code>add_post</code> method.</p>

<p>With the above code, there is nothing stopping someone from calling <code>BlogPost.add_post({ hello: 'world' })</code> or <code>BlogPost.add_post(123)</code> from any other place in the program.</p>

<h2 id="using-privateclassmethod-to-declare-a-class-method-as-private">Using <code>private_class_method</code> to declare a class method as private</h2>

<p>To prevent that from happening, we can make the <code>add_post</code> class method private by using <code>private_class_method</code>.</p>

<p>Here's how that would look:</p>

<pre><code class="language-ruby">class BlogPost
  # ...
  
  def self.add_post(post)
    @@posts &lt;&lt; post
  end
  private_class_method :add_post
end

</code></pre>

<p>An alternate way of declaring a class method as private is this:</p>

<pre><code class="language-ruby">class BlogPost
  # ...
  
  private_class_method def self.add_post(post)
    @@posts &lt;&lt; post
  end
end

</code></pre>

<p>You can see that <code>private_class_method</code> can be used with a symbol argument, <code>:add_post</code>, which is the name of the class method, or it can be passed the result of the class method definition <code>def self.add_post</code>.</p>

<h2 id="using-private-in-class-self-eigenclass-to-make-a-class-method-private">Using <code>private</code> in <code>class &lt;&lt; self</code> (eigenclass) to make a class method private</h2>

<p>The other way of declaring a class method as private is to use the eigenclass of your Ruby class.</p>

<p>Let's look at the above example with <code>add_post</code> class method in the <code>BlogPost</code> class written with the eigenclass notation:</p>

<pre><code class="language-ruby">class BlogPost
  # ...
  class &lt;&lt; self
    def add_post(post)
      @@posts &lt;&lt; post
    end
  end
end

</code></pre>

<p>You can declare that class method private by using the <code>private</code> method:</p>

<pre><code class="language-ruby">class BlogPost
  # ...
  class &lt;&lt; self
    def add_post(post)
      @@posts &lt;&lt; post
    end
    private :add_post
  end
end

</code></pre>

<p>This is similar to how you would declare instance methods as private.</p>

<hr />

<p>Hope you enjoyed this article!</p>]]></content><author><name></name></author><summary type="html"><![CDATA[There are a few different ways to create private class methods in the Ruby programming language. First let's see how we can create a class method in Ruby: class BlogPost attr_accessor :title, :description def initialize(title, description) @title = title @description = description class.add_post(self) end @@posts]]></summary><media:thumbnail xmlns:media="http://search.yahoo.com/mrss/" url="https://www.modernlearner.org/storage.ghost.io/c/5b/07/5b07656c-4414-4a45-8b13-53dbb3dcc520/content/images/size/w1200/2024/02/Modern-Learner-Website-Cover.png" /><media:content medium="image" url="https://www.modernlearner.org/storage.ghost.io/c/5b/07/5b07656c-4414-4a45-8b13-53dbb3dcc520/content/images/size/w1200/2024/02/Modern-Learner-Website-Cover.png" xmlns:media="http://search.yahoo.com/mrss/" /></entry></feed>